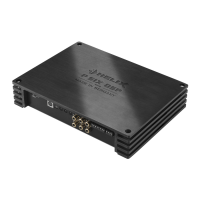
Installation with “Easy Plug Cable”
To simplify installation to an OEM or aftermar-
ket radio the HELIX P SIX DSP MK2 can also be
connected using the optional Easy Plug Cable
(EPC 5.2 - art.-no. HZ45000) which will supply the
DPSOL¿HUZLWKWKHORXGVSHDNHUVLJQDOVRIWKHUDGLR
No factory wires or plugs need to be cut by using
this connection method.
The Easy Plug Cable uses the highlevel inputs
A - D.
Note: Never use the power supply cables of the
Easy Plug Cable. Always directly connect the
PDVVLYH VFUHZ WHUPLQDOV RI WKLV DPSOL¿HU WR
your car’s battery using appropriate wires.
Connection to an OEM radio is detailed below:
1. Once the radio has been removed by using the
right tools disconnect the OEM harness from
the radio. Connect the vehicle cable jack con-
nectors of the Easy Plug Cable. You may need
a special ISO-adaptor depending on vehicle
type. In order to varify please check the adaptor
database on the Audiotec Fischer homepage
ZZZDXGLRWHF¿VFKHUFRP
2. Connect the cable plugs to the car radio.
3. Connect the highlevel plug (8-pole connector)
to the appropriate HELIX P SIX DSP MK2 input.
The power supply plug (4-pole connector) re-
mains unused.
Note - Cars equipped with MOST bus:
In cars equipped with MOST bus structure it is
PDQGDWRU\WRXQSOXJWKH¿EHURSWLFFDEOHIURPWKH
original radio connector and insert it into the ISO
adaptor which has a dedicated recess for this.
23

 Loading...