EasyManua.ls Logo

Heraeus Kulzer Translux Wave - User Manual

Heraeus Kulzer Translux Wave
347 pages
Go to English
Print Icon
To Next Page IconTo Next Page
Loading...
DE
GB
FR
ES
IT
PT
NL
SE
DK
NO
FI
GR
RU
DE
Gebrauchsanweisung
GB
Instructions for use
FR
Mode d’emploi
ES
Instrucciones de uso
IT
Istruzioni per l’uso
PT
Instruções de uso
NL
Gebruiksaanwijzing
SE
Bruksanvisning
DK
Brugervejledning
NO
Bruksanvisning
FI
Käyttöohjeet
GR
Οδηγίες χρήσης
RU
Инструкция по
применению
Dateiname: 00US_99000943_01_W11180_GBA TL Wave EU_COVER_V01_X3
SAP-Nr: Version
99000943 01
HK-Toolbox-Nr:
W11180
Format: Falzmaß:
572 x 210 mm 148 x 210 mm
Projektmanager:
Michael Helken
HKG-Version:
V01, 0.AK
Datum HKG Freigabe am
05.03.2014
HKG-Layout 99000943_01 Cover aussen 1 / 8
GBA Translux Wave EU
EURO / Pantone Sonderfarben Druckverfahren: Digitaldruck
C M Y K varnish DieCut var.Data

Table of Contents

Questions and Answers

  • C
    cwilliamsAug 16, 2025
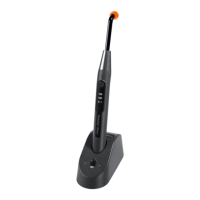
    What to do if the Heraeus Kulzer Medical Equipment charging unit does not power on?
    • M
      Maria ClarkAug 17, 2025
      If the charging unit for your Heraeus Kulzer Medical Equipment doesn't power on and the green LED is off, first ensure the input power supply is securely connected to both the electrical outlet and the charging unit. Try a different power outlet to rule out voltage issues. If those aren't the problem, the power cable or the input power supply itself might be damaged, requiring replacement. In rare cases, the charging unit might be defective, or its contacts could be short-circuited. Eliminate the cause of short circuit. If the short circuit condition persists, replace the charging unit contacts with new ones.
  • E
    Erin FoxAug 19, 2025
    Why is my Heraeus Kulzer Medical Equipment hand piece not starting?
    • B
      brianaloveAug 19, 2025
      If your Heraeus Kulzer Medical Equipment hand piece isn't starting and the green LED is off, it could be due to a few reasons. There might be an interruption of charging contacts, improper contact between the charging base and the hand piece, or the charging and hand piece contacts could be soiled. Check if the hand piece has been inserted in the correct orientation into the charging unit. Clean the hand piece and the charging unit contacts.
  • P
    Patrick DuffyAug 22, 2025
    What to do if Heraeus Kulzer Medical Equipment hand piece is overheating?
    • M
      Mary Miller MDAug 22, 2025
      If your Heraeus Kulzer Medical Equipment hand piece becomes overheated, allow it to cool down for at least 4-5 minutes. Then, press the Start/Stop button to start the next exposure. The hand piece will become operational once it reaches the correct temperature; no manual reset is needed.
  • J
    Jessica CareyAug 25, 2025
    How to check for a defective battery in Heraeus Kulzer Translux Wave?
    • C
      Catherine CurtisAug 25, 2025
      To check if the battery of your Heraeus Kulzer Medical Equipment is defective, place the hand piece in the charging unit. The device will start a prequalification sequence for up to 30 minutes to check the battery. If a beep sounds every second for 30 seconds and the battery icon blinks yellow, the battery is defective and needs replacing.
  • C
    caitlin50Aug 27, 2025
    What to do if light guide is not properly inserted in Heraeus Kulzer Medical Equipment?
    • P
      Pamela NguyenAug 27, 2025
      If the light guide is not properly inserted into the hand piece of your Heraeus Kulzer Medical Equipment, check that the light guide is completely inserted into the metal cone of the hand piece.
  • J
    Jermaine Howard Jr.Aug 30, 2025
    How to check the LED pack of Heraeus Kulzer Translux Wave Medical Equipment for defects?
    • J
      justinyoungAug 30, 2025
      If the LED pack of your Heraeus Kulzer Medical Equipment could be defective, verify its functionality by inserting the hand piece into the charger and pressing the “Start / Stop” button consecutively for 5 times. Remove the hand piece from the charger unit. The curing LED “10s” on the hand piece stops blinking GREEN, the hand piece has been reset. If the curing LED “10s” on the hand piece appears again blinking at start of the next exposure cycle and no light emission starts, the LED pack is defective.
  • H
    Hannah RangelSep 2, 2025
    How to fix low battery charge on Heraeus Kulzer Translux Wave Medical Equipment?
    • T
      thodgeSep 2, 2025
      If your Heraeus Kulzer Medical Equipment shows a low battery charge or the battery is empty, place the hand piece in the charging unit and recharge it.
  • J
    John Blankenship MDSep 5, 2025
    How to fix empty battery on Heraeus Kulzer Medical Equipment?
    • H
      henrybradshawSep 5, 2025
      How to fix empty battery on Heraeus Kulzer Medical Equipment? Place the hand piece in the charging unit and re-charge the battery.
  • C
    Christina HuntSep 7, 2025
    What to do if the light guide output is contaminated on Heraeus Kulzer Translux Wave?
    • J
      Joshua WilliamsSep 7, 2025
      If the light guide output of your Heraeus Kulzer Medical Equipment is contaminated, clean the light guide output.
  • A
    Amanda GilbertSep 10, 2025
    How to replace a damaged light guide on Heraeus Kulzer Medical Equipment?
    • G
      gespinozaSep 10, 2025
      If the light guide of your Heraeus Kulzer Medical Equipment is damaged or aged, replace it with a new one.

Summary

1 Application

1.1 In general

General information about the Translux Wave device.

1.2 EC - Declaration of Conformity

Formal declaration of compliance with European Union directives.

1.3 Manufacturers declaration

Manufacturer's confirmation of compliance with relevant standards.

2 Instructions on using the unit safely

2.1 Explanation of symbols and accompanying word(s)

Explanation of safety symbols and their corresponding meanings.

2.2 Transport damage - Unpacking and inspection

Procedures for checking the unit for damage upon delivery.

2.3 Owners obligations

Responsibilities and duties of the unit owner and operator.

2.4 Machine journal

Recommendation to maintain a logbook for unit maintenance and work.

3 Intended use

3.1 Description of the device

Details about the Translux Wave's LED light source and components.

3.2 Safety requirements

General safety guidelines and precautions for operating the unit.

3.2.1 General safety instructions on operating the device

Essential safety rules for proper device operation.

3.2.2 Safety Precautions

3.2.2 Safety Precautions

Specific safety measures to prevent hazards and risks.

3.2.3 BATTERY - Safety precautions

Critical safety rules for battery handling, charging, and disposal.

3.2.4 BATTERY - Information

3.2.4 BATTERY - Information

Details on battery charging time, operating conditions, and life expectancy.

4 Unit description

4.1 Delivery contents

List of items included in the product package.

4.2 Description of the control and operating elements

Overview of the device's buttons, LEDs, and other controls.

4.2.1 Hand piece

Description of the hand piece components and controls.

4.2.2 Alignment key

Explanation of the alignment key's function for proper charging.

4.2.3 Charging unit

Details of the charging unit's top and bottom views.

4.2.4 Acoustical signals hand piece

4.2.4 Acoustical signals hand piece

Summary of beeps and signals for different functions and error conditions.

4.2.5 LED information concerning the radiation emitted

4.2.5 LED information concerning the radiation emitted

Explanation of LED information and radiation class.

5 Installation and putting into initial operation

5.1 Safety requirements during Installation

Safety guidelines to follow during the device installation process.

5.2 Connection of the charging unit to the mains power outlet

Steps for connecting the charging unit to the mains power supply.

5.3 Inserting the battery into the hand piece

Instructions for correctly installing the battery into the hand piece.

5.4 Inserting the fibre optic into the hand piece

Steps for attaching the light guide and protective cone to the hand piece.

5.5 Battery charging

Information regarding the initial charging of a new battery.

6 Operation

6.1 Activating and deactivating the exposure cycle

How to start and stop the light curing exposure cycles.

6.2 Measurement of the Light Intensity

How to check light intensity using the integrated meter.

6.3 Sleep Mode

Explanation of the automatic sleep mode function for energy saving.

6.4 Additional information on the unit operations

Notes on device behavior during charging and operation.

7 Alarm conditions

7.1 Faulty battery

Symptoms and detection methods for a faulty battery.

7.2 Faulty LED

How to identify a malfunction in the LED indicator.

7.3 Overheat protection

What happens when the unit overheats and how to resolve.

7.4 BUILT-IN Temperature overload sensor defective

Indicates error codes for a defective temperature overload sensor.

7.5 Battery-low signal

Warning signal indicating a low battery charge.

8 Cleaning, disinfection and sterilisation

8.1 Disassembly

Steps to disassemble parts of the device for cleaning.

8.2 LIGHT GUIDE - Cleaning and disinfection

Procedures for cleaning and disinfecting the light guide.

8.2.1 LIGHT GUIDE - Inspection before the sterilisation

How to inspect the light guide before sterilization.

8.3 PROTECTIVE LIGHT CONE - Cleaning and disinfection

Procedures for cleaning and disinfecting the protective light cone.

8.3.1 PROTECTIVE LIGHT CONE - Inspection before the sterilisation

How to inspect the protective light cone before sterilization.

8.4 LIGHT GUIDE and PROTECTIVE LIGHT CONE - Packaging before the sterilisation

How to package the light guide and protective cone for sterilization.

8.4.1 LIGHT GUIDE and PROTECTIVE LIGHT CONE - Sterilisation

Method and parameters for sterilizing light guide and protective cone.

8.4.1.1 Sterilisation method

Specifies steam autoclaving as the approved sterilization method.

8.4.1.2 Sterilisation parameters

Details minimum temperature, exposure time, and dry time for sterilization.

8.5 HAND PIECE - Cleaning and disinfection

Procedures for cleaning and disinfecting the hand piece.

8.6 CHARGING UNIT - Cleaning casing

8.6.1 CHARGING UNIT - Cleaning charging contacts

How to clean the charging contacts on the unit and hand piece.

8.6.2 CHARGING UNIT - Replaceable charging contacts

How to replace damaged or soiled charging unit contacts.

9 Shelf storage

10 Disposal

Instructions for proper disposal of the device and its components.

10 Disposal

10 Disposal

Instructions for proper disposal of the device and its components.

11 Troubleshooting

Charging unit not powering on

Troubleshooting steps when the charging unit is off.

Hand piece not inserting into charging unit

Issues with hand piece placement in the charging unit.

Light emission does not start

Problems with activating the light emission.

2 beeps at end of exposure cycle

Interpreting the "2 beeps" signal for low battery.

Light emission does not start or cycle interrupted

Issues with light emission start or cycle interruption.

Consecutive cycles cause issues or 3 beeps

Overheating protection or sensor fault symptoms.

Malfunctions during charging phase

Battery charging errors and diagnosis.

Hand piece not starting charge

Troubleshooting charging issues for the hand piece.

Insufficient light intensity

Diagnosing low light intensity readings.

12 Technical specifications

Classification according to Directive 93;42;EEC

Device classification and safety standards compliance.

Classification according to IEC 60601-1

Compliance with medical device safety standards.

Charging unit specifications

Details of the charging unit's power supply and IP rating.

Hand piece specifications

Model, operation mode, light source, and light guide details.

Settable exposure cycles

Information on normal and "Soft-Start" exposure cycles.

Charging time of empty battery

Approximate time required to charge an empty battery.

Environmental conditions of unit

Operating and storage conditions for temperature, humidity, pressure.

12.1 Electromagnetic compatibility EN 60601-1-2

Guidance and manufacturers declaration - Electromagnetic emissions

Information on RF emissions and their electromagnetic environment.

Guidance and manufacturers declaration - Electromagnetic immunity

Information on device immunity to electromagnetic fields.

12.2 Charging unit identification plate

Description of the symbols on the identification plate

Explains the meaning of symbols found on the unit's identification label.

12.3 Hand piece serial number

13 Warranty

14 Service

14.1 Service agents; Contact in the countries

List of service contacts and locations worldwide for assistance.

15 Document history

Heraeus Kulzer Translux Wave Specifications

General IconGeneral
Light SourceLED
Light Output1200 mW/cm²
Light Guide Diameter8 mm
Curing Time5 - 20 seconds
Battery TypeLithium-Ion
CategoryCuring Light
Operating ModesPulse