8/14 – User Manual
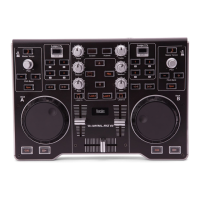
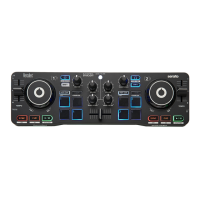
5. CONNECTING SPEAKERS
The DJ Console can be used in two different ways: in 5.1 mode and in DJ mode. 5.1 mode (the
default mode) transforms the DJ Console into a 5.1-channel sound card, perfect for games and
DVDs, while DJ mode allows you to use the DJ Console as a real mixing deck. For more on 5.1
mode and DJ mode, please refer to the online help.
Two types of connectors are available for connecting speakers: RCA and minijack. An RCA plug
corresponds to a channel, while a minijack plug corresponds to an output (composed of two
channels), which is why there are 6 RCA plugs and only 3 minijack plugs. Select the type of plug
according to the type of speakers you will be connecting (RCA and minijack plugs corresponding
to the same output cannot be used simultaneously).
5.1. Connecting speakers in 5.1 mode
- Make sure that your computer is switched off.
- Connect the front speakers to the 1 and 2 RCA plugs (plug 1 corresponds to the front left speaker, plug 2 to
the front right speaker) or to the Front 1-2 minijack plug.
- Connect the center speaker to the 3 RCA plug and the subwoofer to the 4 RCA plug, or connect the center
speaker/subwoofer pair to the Center/LFE 3-4 minijack plug.
- Connect the rear speakers to the 5 and 6 RCA plugs (plug 5 corresponds to the rear left speaker, plug 6 to
the rear right speaker) or to the Rear 5-6 minijack plug.
- Switch on your computer and your speakers.
- Click on the
icon in the taskbar.
- Click on the 5.1 / DJ / ASIO switch to enable 5.1 mode.
Your setup is now ready to reproduce surround sound.
5.2. Connecting speakers in DJ mode
- Make sure that your computer is switched off.
- Connect the speakers to the 1 and 2 RCA plugs (plug 1 corresponds to the front left speaker, plug 2 to the
front right speaker) or to the Front 1-2 minijack plug.
- Connect your headphones to the headphone plug on the front face.
- Switch on your computer and your speakers.
- Click on the
icon in the taskbar.
- Click on the 5.1 / DJ / ASIO switch to enable DJ mode.
You are now ready to mix.