The Printer Driver 3-11
Print as a Mirror Image
Mirrors the ENTIRE PAGE from left to right(horizontally). Will not mirror individual objects or
selections. Very useful for doing rubber stamps because the objects that are on screen are
readable, but when they engrave, they come out mirrored.
Shoulder
Choose from one of the preset options by clicking the down arrow in the “Shoulder Type”
dropdown list and selecting the type of shoulder you desire. These preset options are not
adjustable but you can create your own custom shoulder if you desire.
Add Custom Shoulder
This button allows you to create up to 10 of your own custom shoulders. First select a preset
shoulder option that most closely resembles the shoulder that you would like to start with, then
click on “Add Custom Shoulder”. You will see “Custom Shoulder #1” appear in the “Shoulder
Type” dropdown list and the left side of the dialog box will enable. There are three adjustments,
the number of steps, the distance between steps, and the power setting for each step.
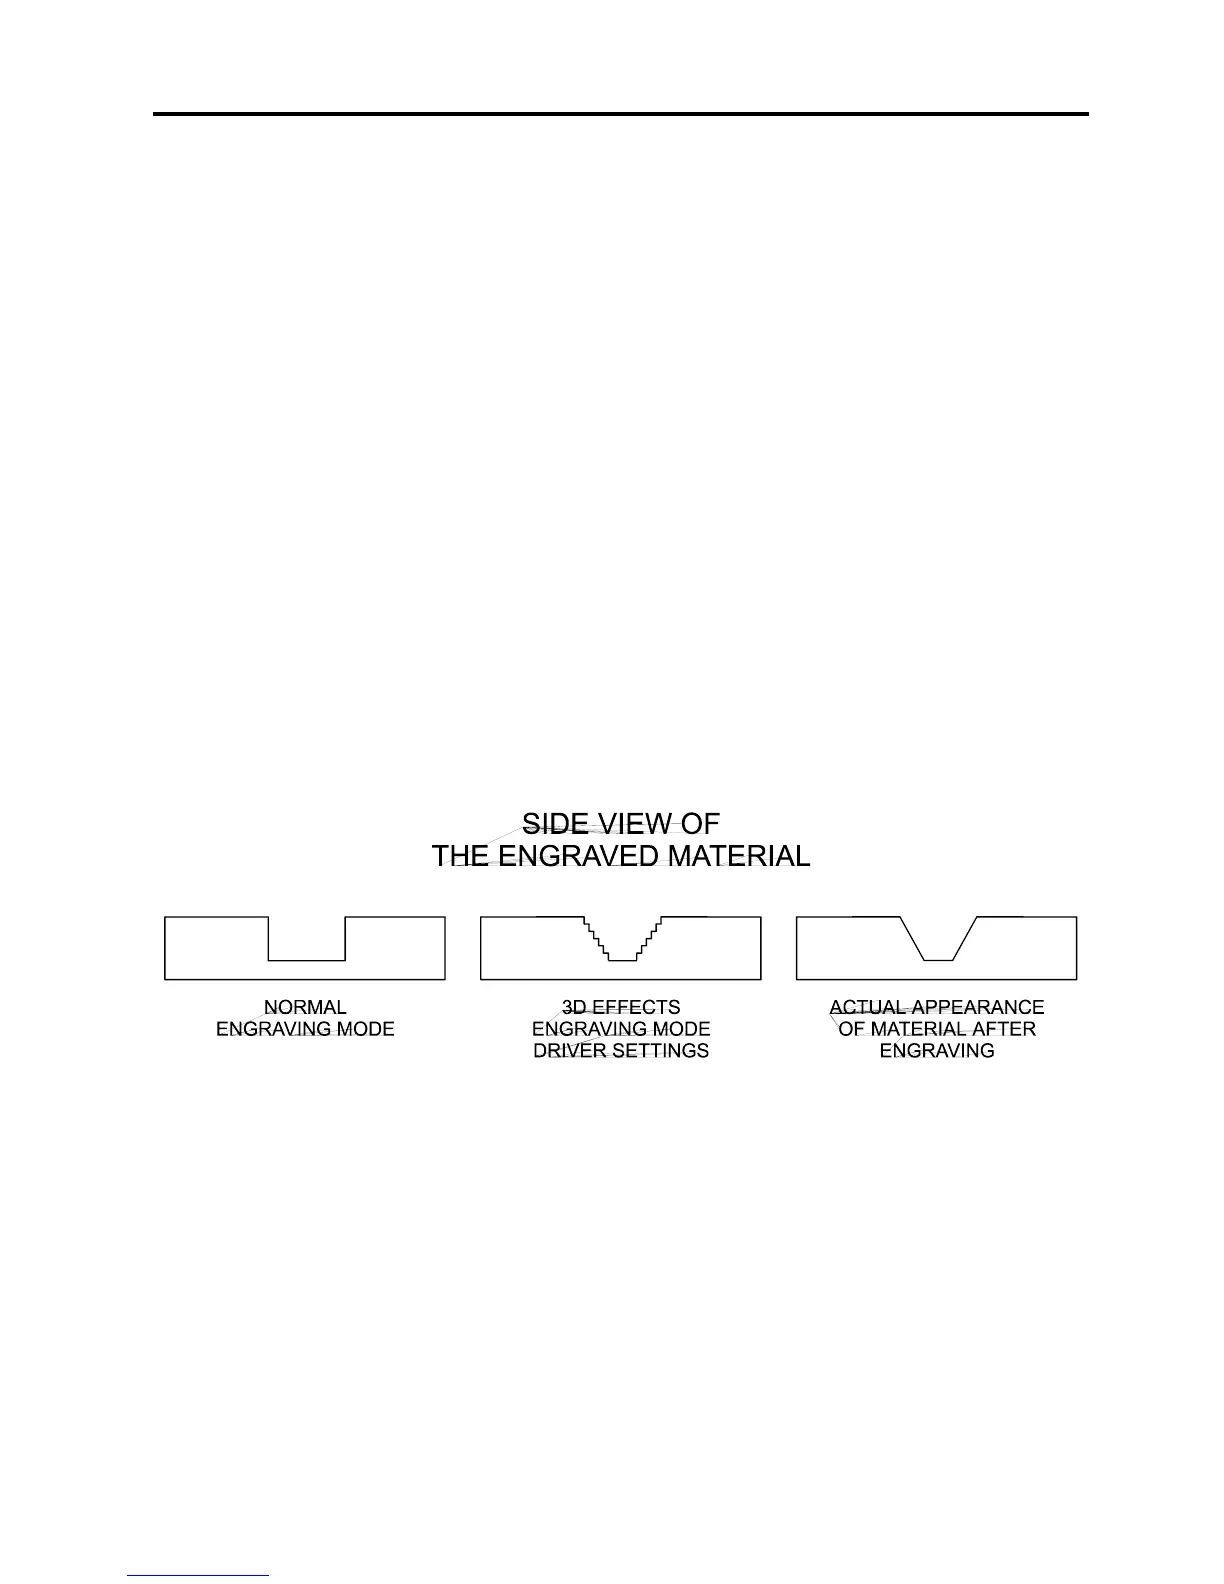
Before you set the parameters, you must first understand how each parameter works. In the
normal engraving mode, the laser beam engraves virtually straight down into the material. In
the 3D Effects mode, the laser beam is controlled in such a manner that it steps the power
settings in order to create a shouldered engraving.
From the diagram above, you can see that there were 7 steps used to create this shoulder.
The surface of the material is considered the first step and the bottom of the engraving is
considered the last step. Let’s use 7 steps as an example. You can define as many as 14
steps. The first or the last step are not definable because they are fixed at a power setting of
0% and 100% respectively. You can only define the parameters for the steps in between. By
adjusting the power setting for each step, the width in .001 inches for each step, and the
number of steps, different shoulder profiles can be created.