3-10 The Printer Driver
3D Effects
This option enables the laser system to raster engrave materials in a three dimensional fashion
where the image appears to be “chiseled” or “sunken”. The beam appears to have engraved
the material on an angle but in actuality it is a precise control of laser power that creates this
appearance. It only has an effect on raster images and no effect on vectors. This option is also
used to create rubber stamps as well as other types of marking devices. Here’s how it works:
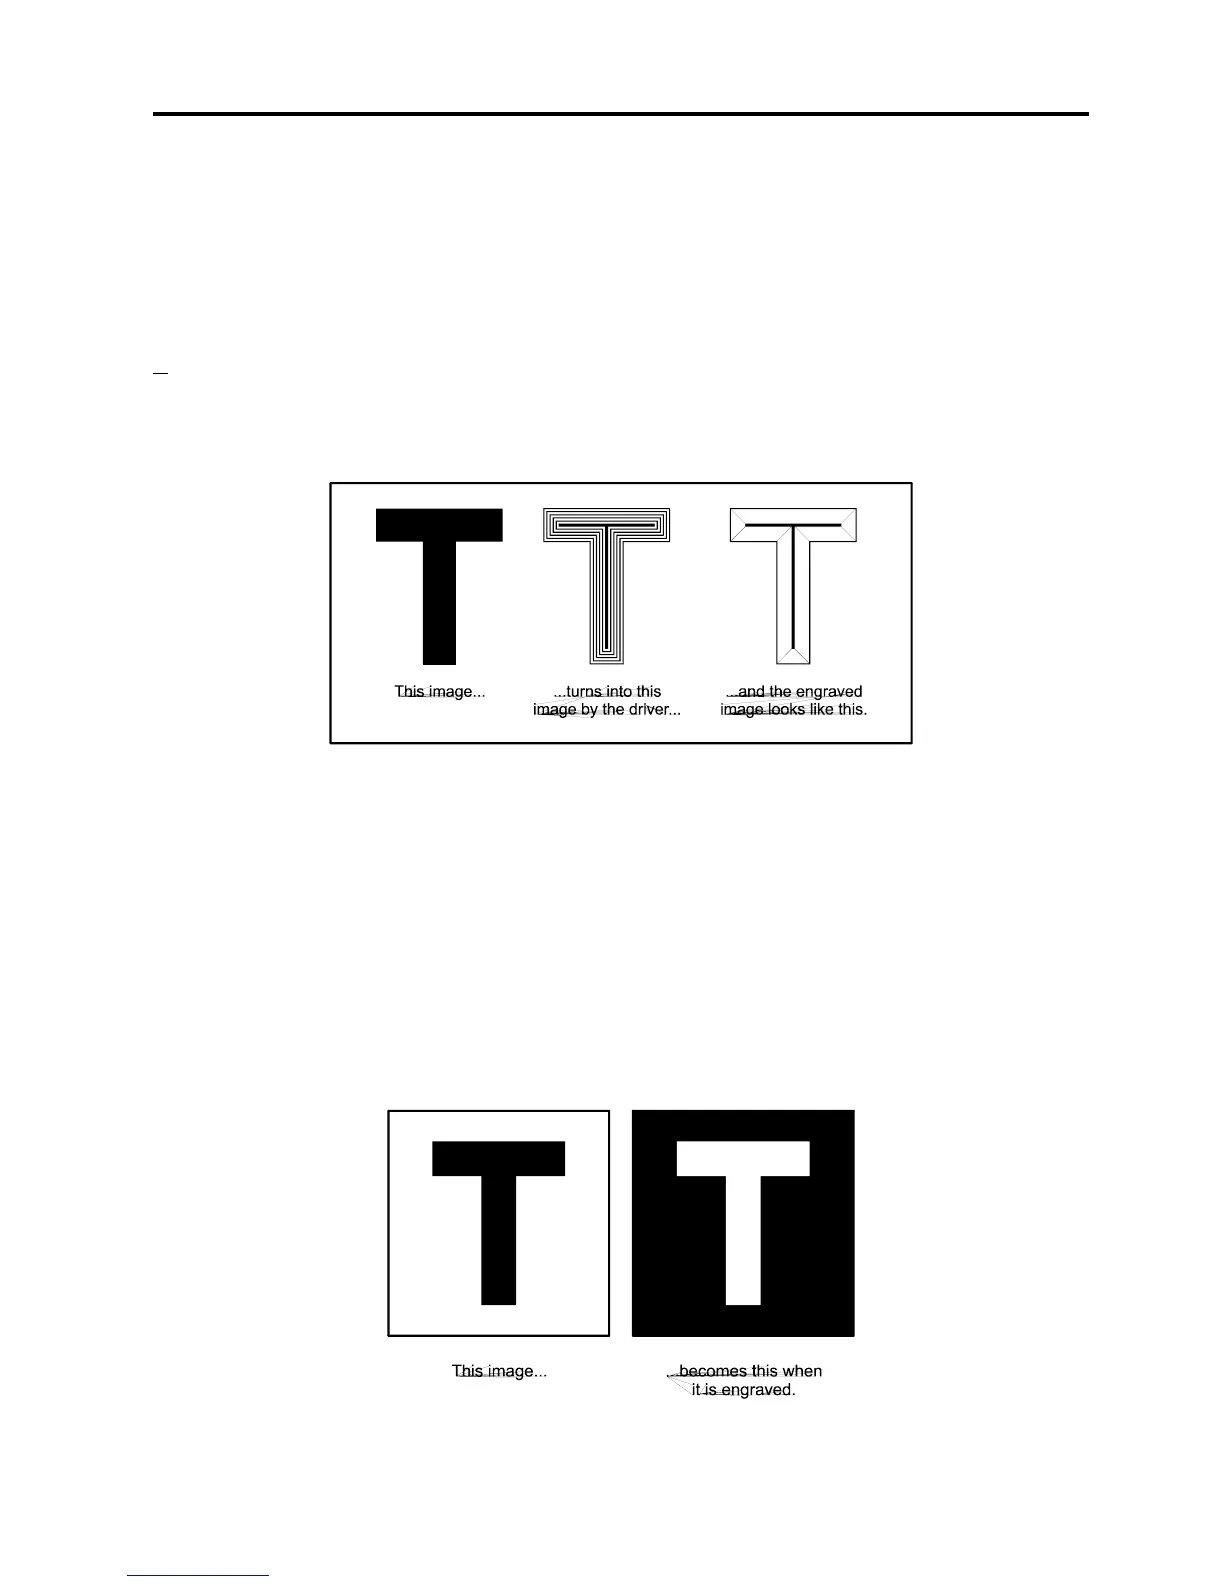
Use the letter “T” as an example. Pretend to create a “T” in your graphics program. Fill it with
black and make sure it does not have an outline. If the “3D Effects” option is activated and the
”T” is printed to the laser system, the driver turns the “T” into a three dimensional object that
has defined steps of laser power. The final image looks as if it is chiseled into the material.
Special
Choose “Add Shoulder” to activate the 3D Effects feature. This adds a shoulder to all raster
graphic objects within the engraving area but does not effect vectors
Print as a Negative Image
Inverts the entire page of graphics. Turns any white object into black and any black object into
white. Since this option creates a negative image for the ENTIRE PAGE, the raster engraved
object will be “raised” instead of “sunken” because the entire background will have been
engraved and the object will remain standing up. This is very useful for engraving a full sheet of
rubber stamps.