AB2200en_SARev.: 04 / 11.2023
Removing the rotor
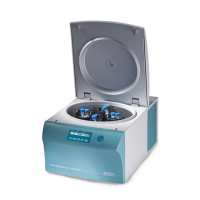
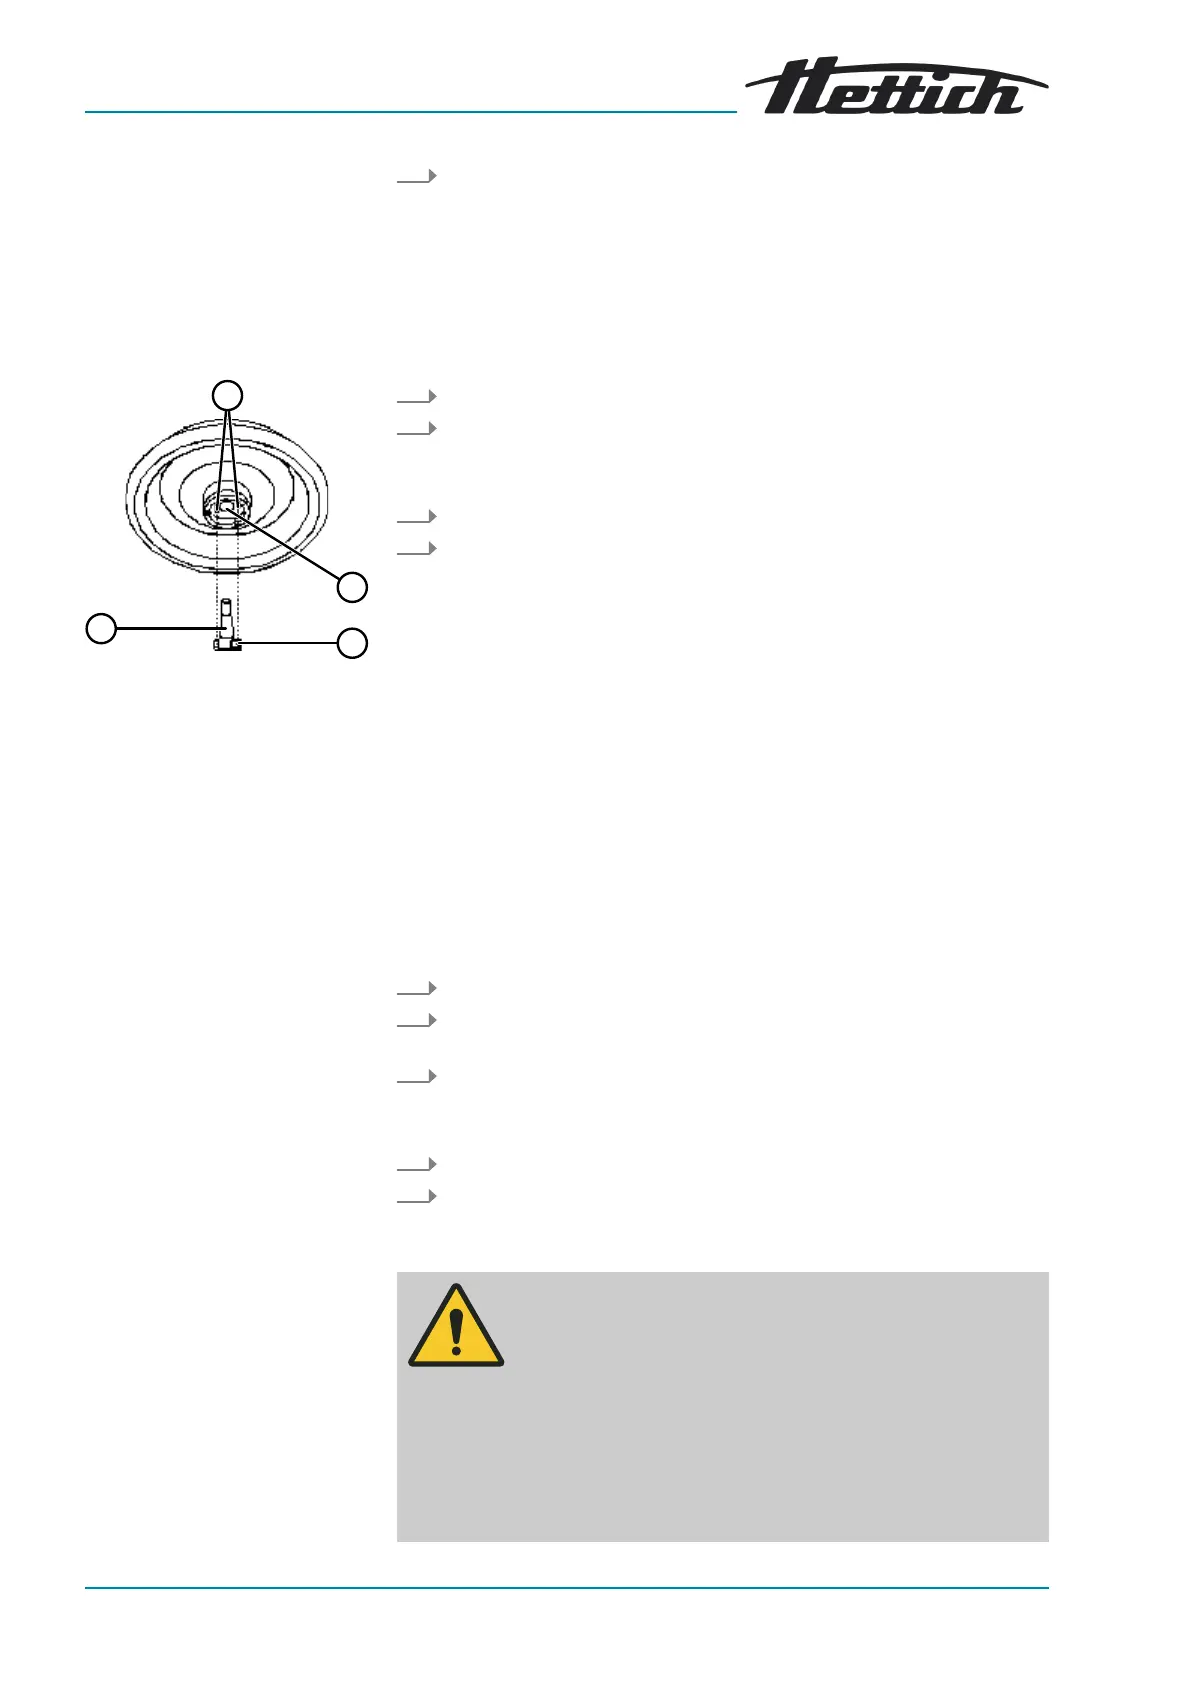
Fig. 15: Rotor installation and
removal
1 Driver pins
2 Rotor hole
3 Driver
4 Motor shaft
Installing the rotor
Filling centrifuge tubes
Close the lid and press the front edge of the lid down gently.
🡆 The lid locks using a motor.
The left side of the
[STOP/OPEN]
button lights up.
6.2 Removing and installing the rotor
Personnel:
■
Trained user
1. Open the lid.
2. Loosen the rotor clamping nut using the supplied spanner.
🡆 After passing the working point for lifting the rotor, the rotor
detaches from the cone of the motor shaft (
4
).
3. Turn the clamping nut until the rotor can be lifted off the motor shaft.
4. Remove the rotor.
Personnel:
■ Trained user
The lid is open.
1. Clean the motor shaft (
4
) and rotor hole (
2
).
2. Lightly grease the motor shaft (
4
), see ⮫
Chapter 8.2 ‘Cleaning and
disinfection instructions’ on page 32
.
3. Place the rotor vertically on the motor shaft (
4
).
The two driver pins (
1
) on the underside of the rotor must not rest on
the driver (
3
) when screwing in the rotor.
4. Hand-tighten the rotor clamping nut using the supplied spanner.
5. Check that the rotor is rmly seated.
6.3
Loading
WARNING
Risk of injury from contaminated sample material.
Contaminated sample material escapes from the sample
tube during centrifugation.
− Use centrifuge tubes with special screw caps for haz-
ardous substances.
−
For risk group 3 and 4 materials, use a biosafety system
in addition to the sealable centrifuge tubes (see WHO's
'Laboratory Biosafety Manual').
 Loading...