3.5 Alarm configuration
Alarm configuration includes five sub menus: motion, video loss, other alarm and alarm out.
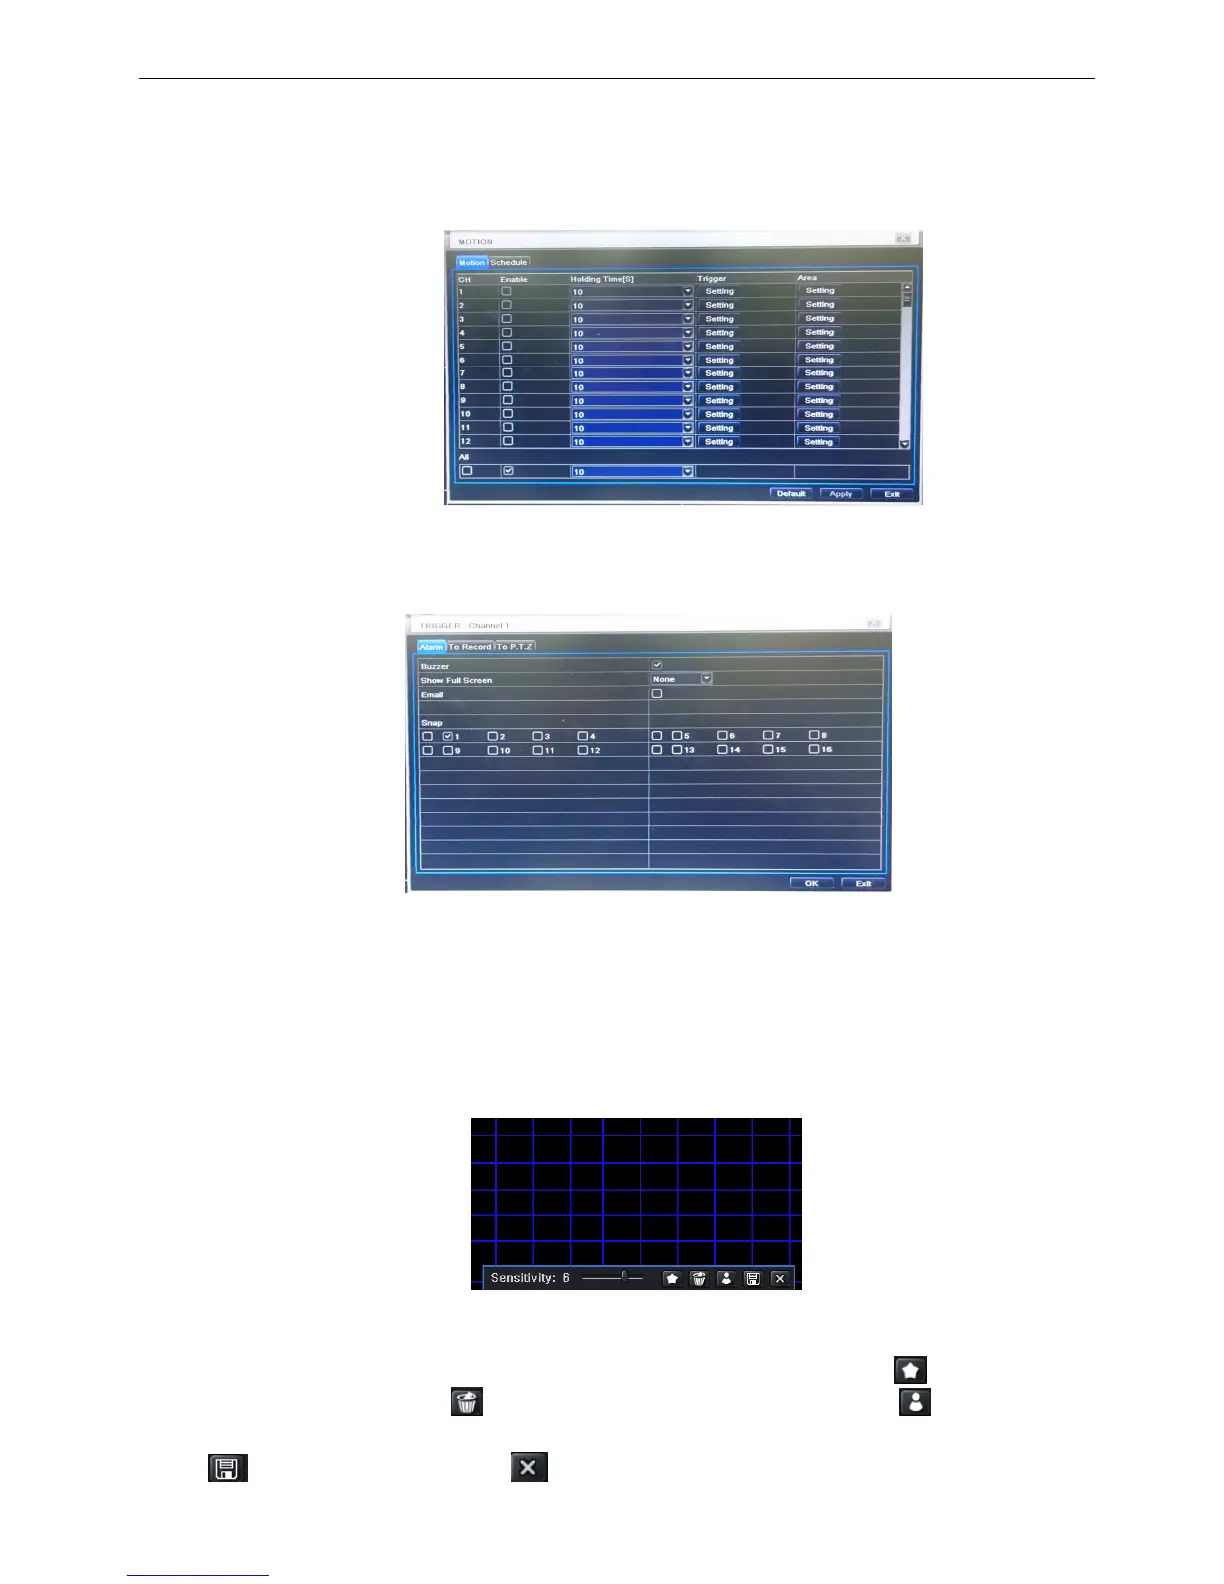
3.5.1 Motion
Motion includes two sub menus: motion and schedule.
① Motion
Step1: enter into system configurationalarm configurationmotion; refer to Fig 3-18:
Fig 3-18 alarm configuration-motion
Step2: enable motion alarm, set alarm hold time which means time interval between two adjacent detective
motions. If there is other motion detected during the interval period which is considered continuous
movement; otherwise, it will be considered that those two adjacent detective motions are two different
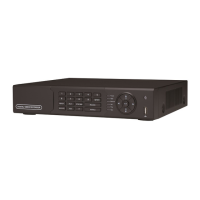
motion events. Click Trigger button, a dialog box will pop-up:
Fig 3-19 Trigger (motion alarm)
Step3: the setup steps of motion trigger.
(1)Enable the buzzer if user need this function.
(2)Choose the channel which when event happened to show full screen,
(3)Choose enable transfer e-mail function or not.
(Before enable this function, user need to set-up E-mail transit data. please reference 3.6.3)
(4)Choose the snap shot channel.
After complete the configuration, click ok to finish.
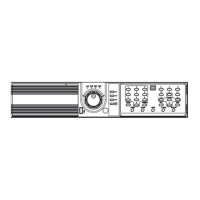
Step4: click Area button, a dialog box will pop-up as Fig 3-20:
Fig 3-20 motion-area
Step5: in the Area interface, user can drag slide bar to set the sensitivity value(1-8), the default value is 4.
The higher the value is the higher sensitivity you get. Due to the sensitivity is influenced by color and time
(day or night), user can adjust its value according to the practical conditions; click icon, set the whole
area as detection area; click
icon, the set detection area will be cleared; click icon, user can test
whether the sensitivity value and motion area are suitable accordingly(refer to following picture); Click
icon, to save the setting; click icon, exit current interface.