44 - 60
7.4.5 RS485 - Modbus Connection - [optional]
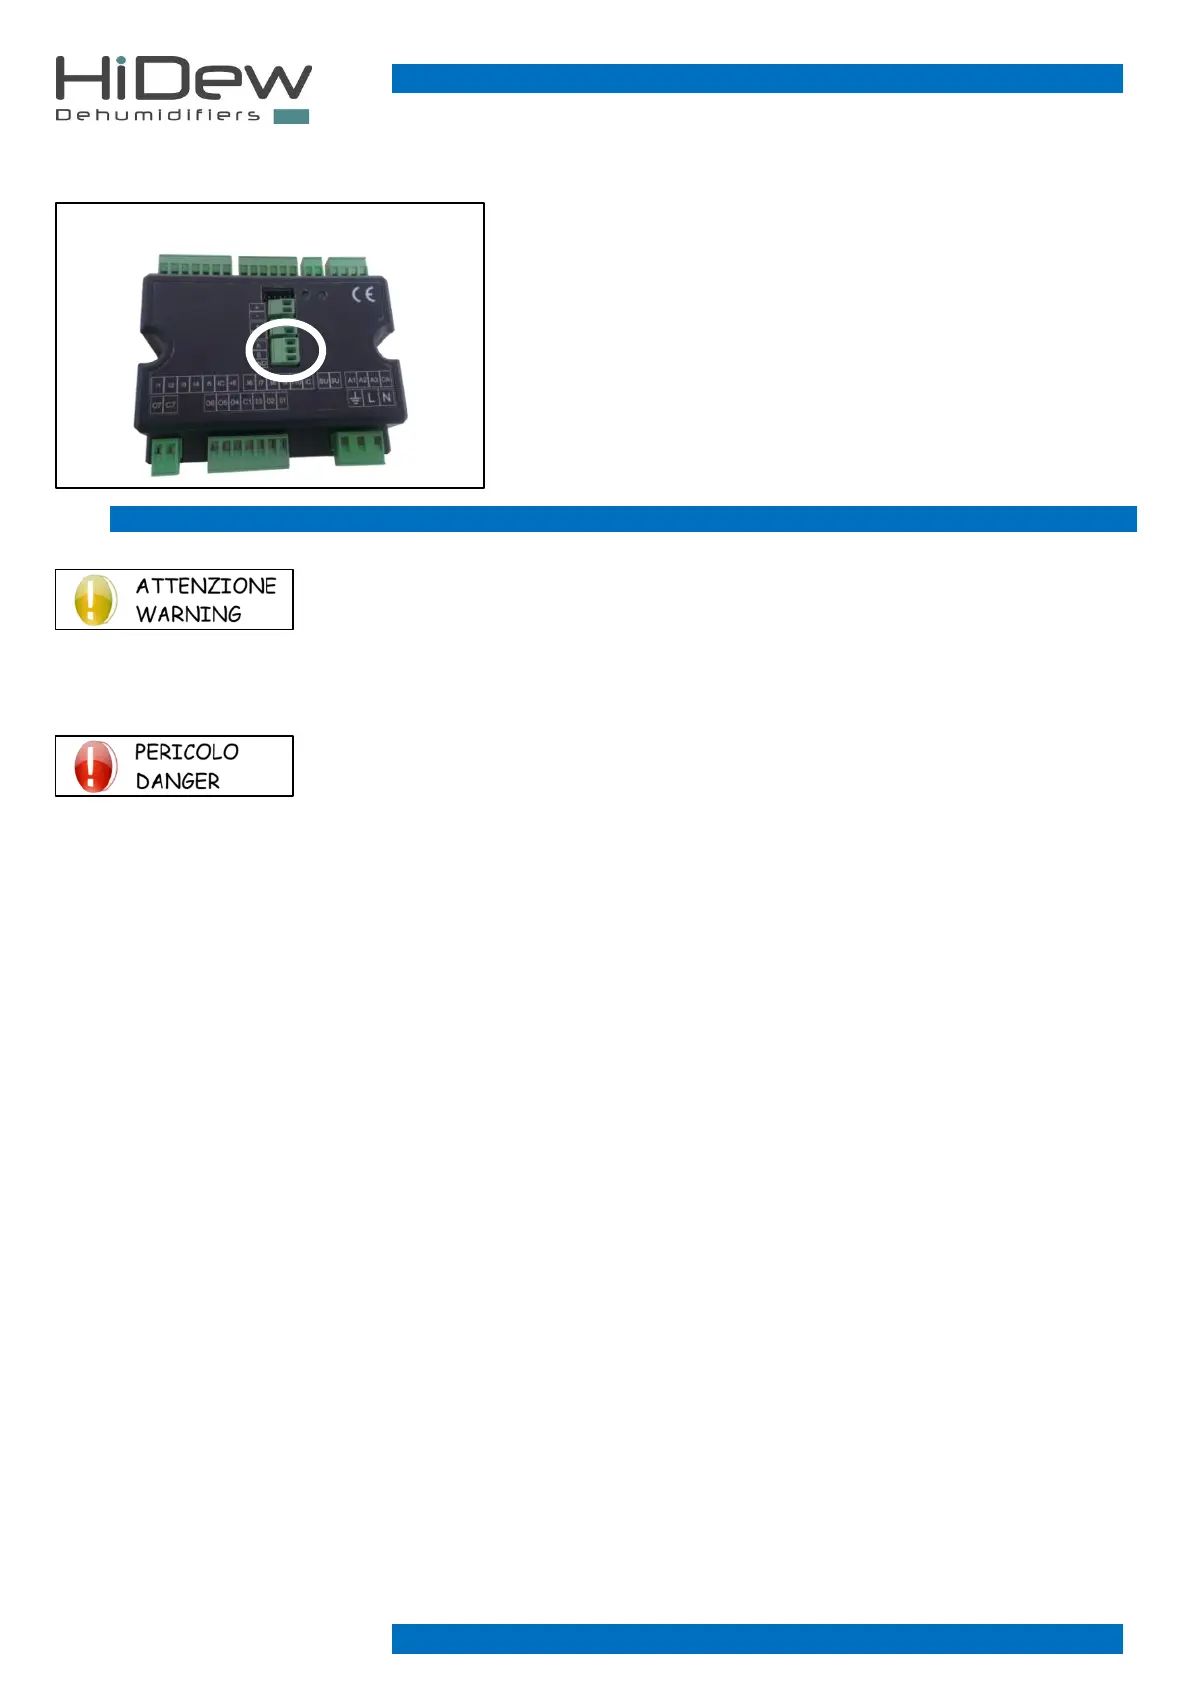
Connect the Modbus RS485 cable on the removable clamp indicated in the
image to the left.
Respect on all the connected devices, the connection A and B and connect on
the GND connection the shielded.
For the Modbus parameters’ configuration, make reference to the installer
paragraph on the following pages.
RS485 Modbus connection is optional, but the clamp should be always
present. Check that you have set this option; if not, the unit will not function.
For the connection of all the Modbus system/network use a CEAM Y08761
cable or an equivalent one.
7.5 FIRST START, CALIBRATION AND CONFIGURATIONS
First start-up and configurations must be carried out exclusively by specialist personnel.
DO NOT IMPROVISE, UNIT MALFUNCTION DANGER
Before starting, check that all the panels are in their position and tightened with their screws.
Follow these instructions carefully for commissioning:
Check that all the hydraulic, electric and aeraulic connections are correctly installed and that all
the indications given on the labels and user manual are observed.
Check that the refrigerant circuit taps, if present, are open and that the hydraulic plant is cracked, by eliminating any residual air,
charging it gradually and opening the cracking devices on the top side.
Check that there are no water leaks.
The unit leaves the factory ready for operation; follow the steps below to proceed with the first start-up:
1. Power the unit
2. Make sure the unit is OFF and if it is not, press the ON/OFF button to turn it off
3. Wait 2 hours with the unit OFF before proceeding with the first ignition
4. Once the time has passed press the ON/OFF button to switch on
For the basic settings (for example the humidity set point) refer to the previous paragraph "advanced control".
For advanced settings (optional), refer to the "modify installer parameters" paragraph.