BIOS Configuration Utility
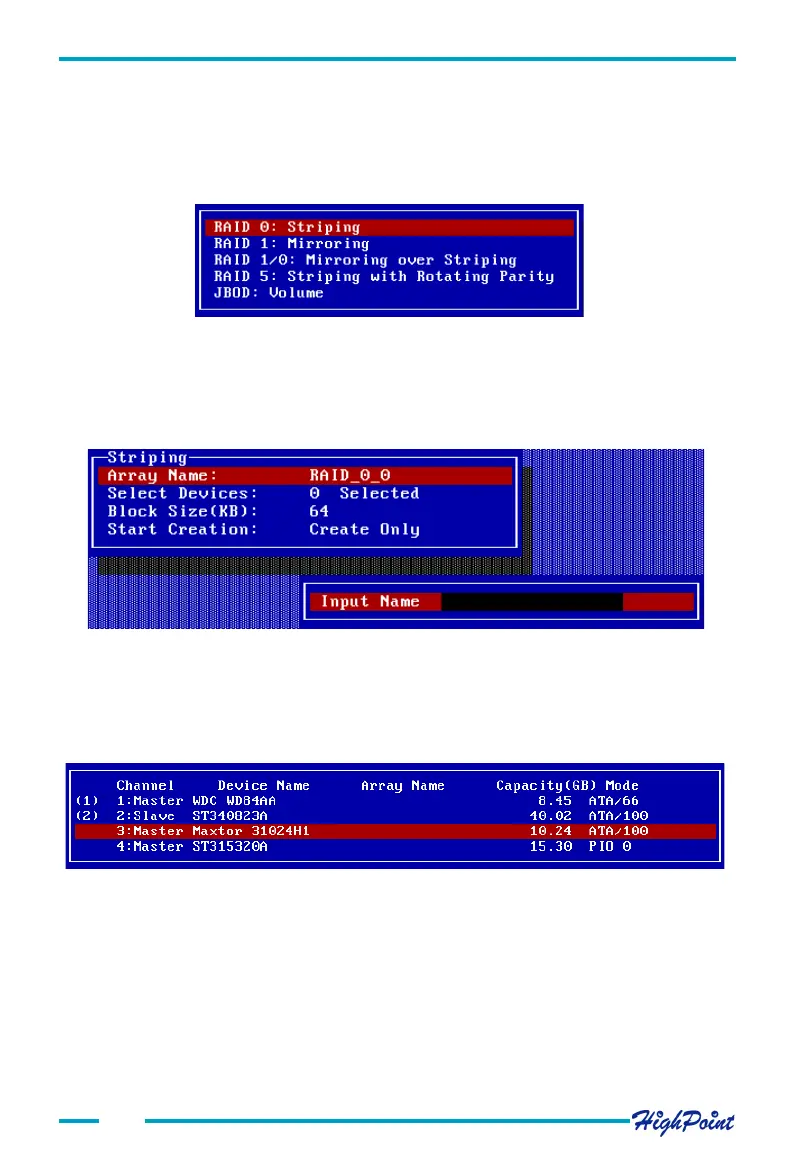
Use the arrow keys to highlight the array mode you wish to create, and press ENTER to
confirm the selection.
2. Within the Menu column of the main interface, use the arrow key to highlight
Array Name, and press ENTER. A dialogue box will appear (see the image below)
Name the array using the keyboard, and press ENTER to continue.
3. Within the Menu column of the Main interface, use the arrow key to highlight the
Select Devices option, and press ENTER. This will activate the Status column (see
the image below):
3-2
3.2 Creating a Disk Array
Follow these steps to create a disk array:
1. Within the Menu column of the main interface, use the arrow keys to highlight the
Create command and press ENTER. This will open a list of array modes (also
referred to as RAID levels). See the image below:
Highlight the disks that you wish to use, and press ENTER to select them. After all of
the disks have been selected, press the ESC key to return to the creation step menu.
4. When creating a RAID 0, 1/0, or 5 array, a block size must be selected. Within the
Menu column of the main interface, use the arrow keys to highlight the Block Size
option, and press ENTER. Select a block size from the pop-up list (see the following
page):