Digital Video Recorder User Manual
232
The cloud storage facilitates you to upload and download the recorded files at any time and any
place, which can highly enhance the efficiency.
Cloud storage is only applicable to HQHI-F/N and HUHI-F/N series DVR.
Step 1 Enter the Cloud Storage interface
Menu > HDD > General > Cloud Storage
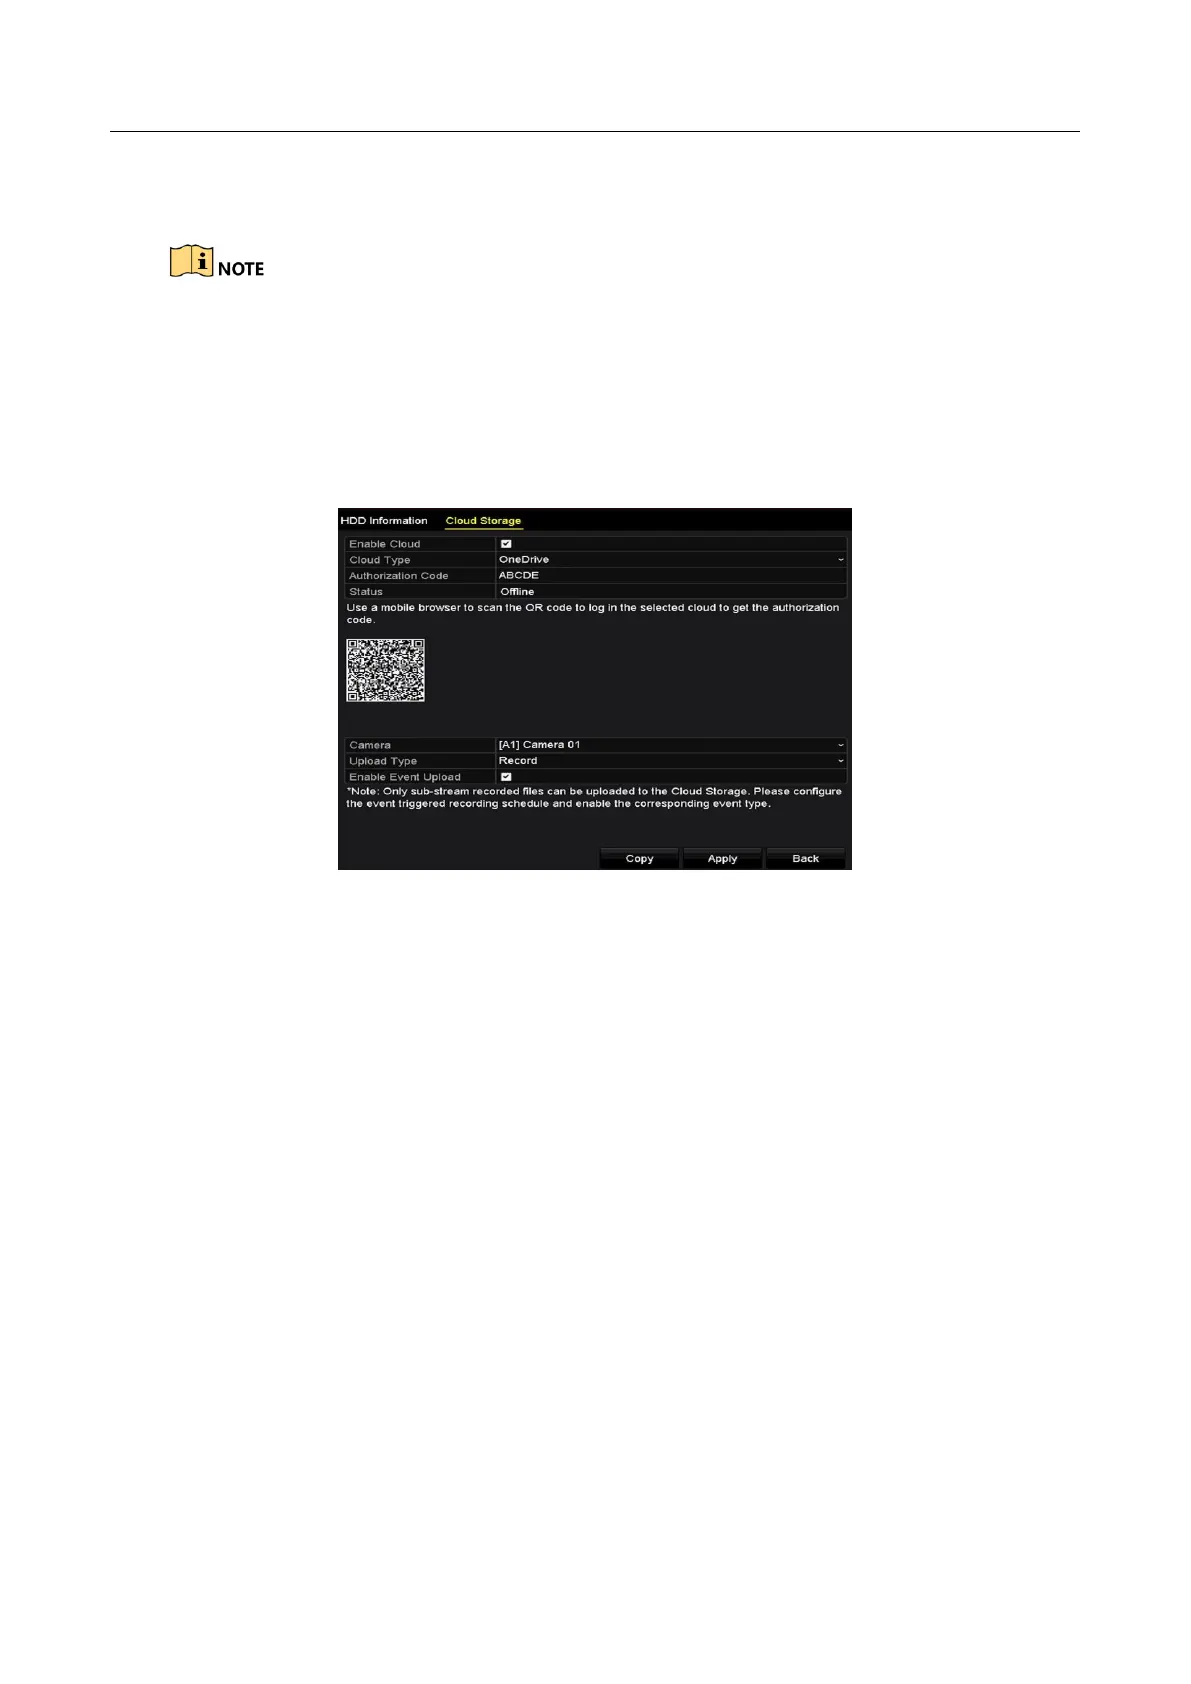
Step 2 Check the Enable Cloud checkbox to enable the feature.
Step 3 Select the Cloud Type from the dropdown list to One Drive, Google Drive or Drop Box.
Figure 14-18 Cloud Storage Interface
Step 4 According to the prompts, you are required to use a mobile browser to scan the QR code to
log in the selected cloud to get the authentication code. And then copy the authentication
code to the Authentication Code text filed.
Step 5 Click Apply and then back to the main menu.
Step 6 Enter the cloud storage interface again about 20s later. When the Status shows online, it
indicates the successful registration.
Step 7 Configure the recording schedule.
Back to enter the record interface, choose a certain camera from the Camera dropdown list
and check the Enable Schedule checkbox to enable the schedule recording. For detailed
recording schedule, refer to 5.2 Configuring Recording and Capture Schedule.
 Loading...