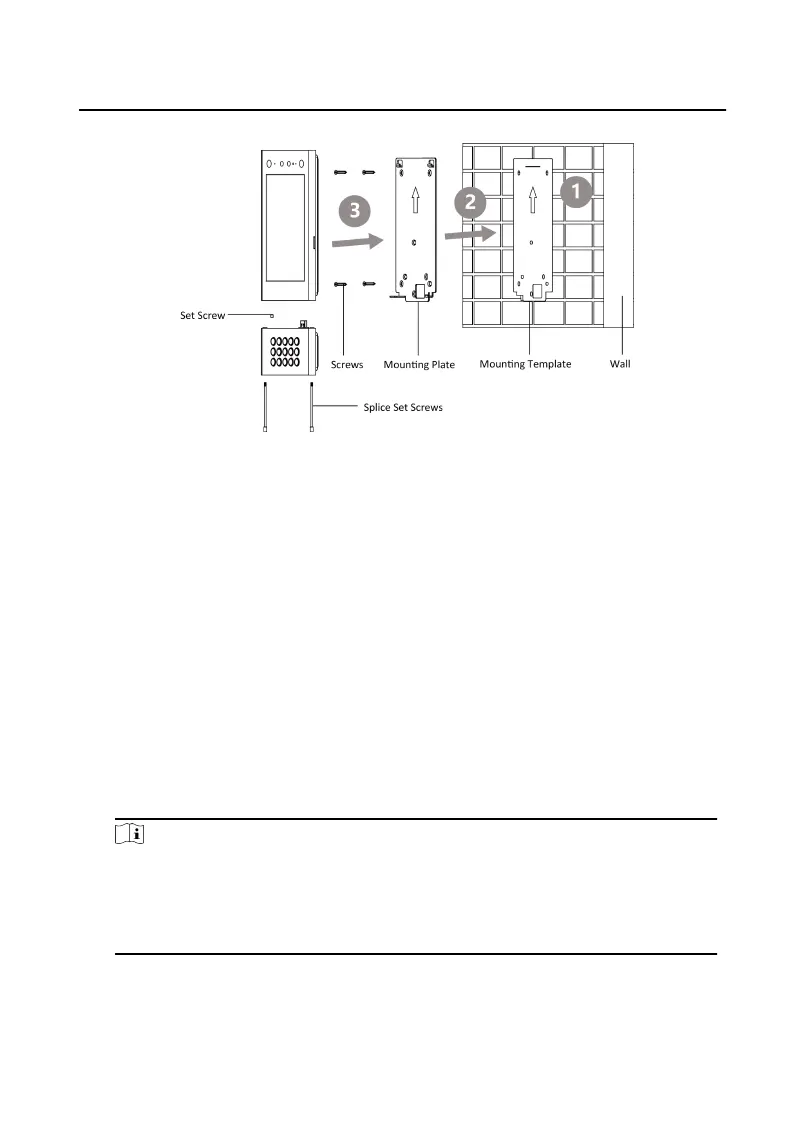
Figure 4-7 Surface Mounng
4.2.3 Flush Mounng
Steps
1. Cave an
installaon hole in the wall. The suggested dimension of the installaon
hole is 313.5 mm (W) × 128.9 mm (H) × 41.3 mm (D). Pull the cables out from the
wall, insert the gang box into the installaon hole, and mark the gang box screw
holes' posion with a marker.
2. Take out the gang box. Drill 4 holes according to the marks on the wall, and insert
the expansion sleeves into the screw holes. Fix the gang box with 4 expansion
bolts. Remove the mounng ears of the gang box.
3. Fix the sub module to the door staon with 2 set screws. Wire the device and
cover the rear panel with 2 screws. Insert the door staon into the gang box, and
x it with set screws.
Note
●
Do not touch the TF card slot and other devices during the process of plugging
in and unplugging the power interface.
●
Apply Silicone sealant among the joints between the device and the wall
(except the lower side) to keep the raindrop from entering.
Video Intercom Face Recognion Door Staon User Manual
15
 Loading...