E Series IR Speed Dome Installation Manual
© Hikvision Digital Technology Co., Ltd. All Rights Reserved.
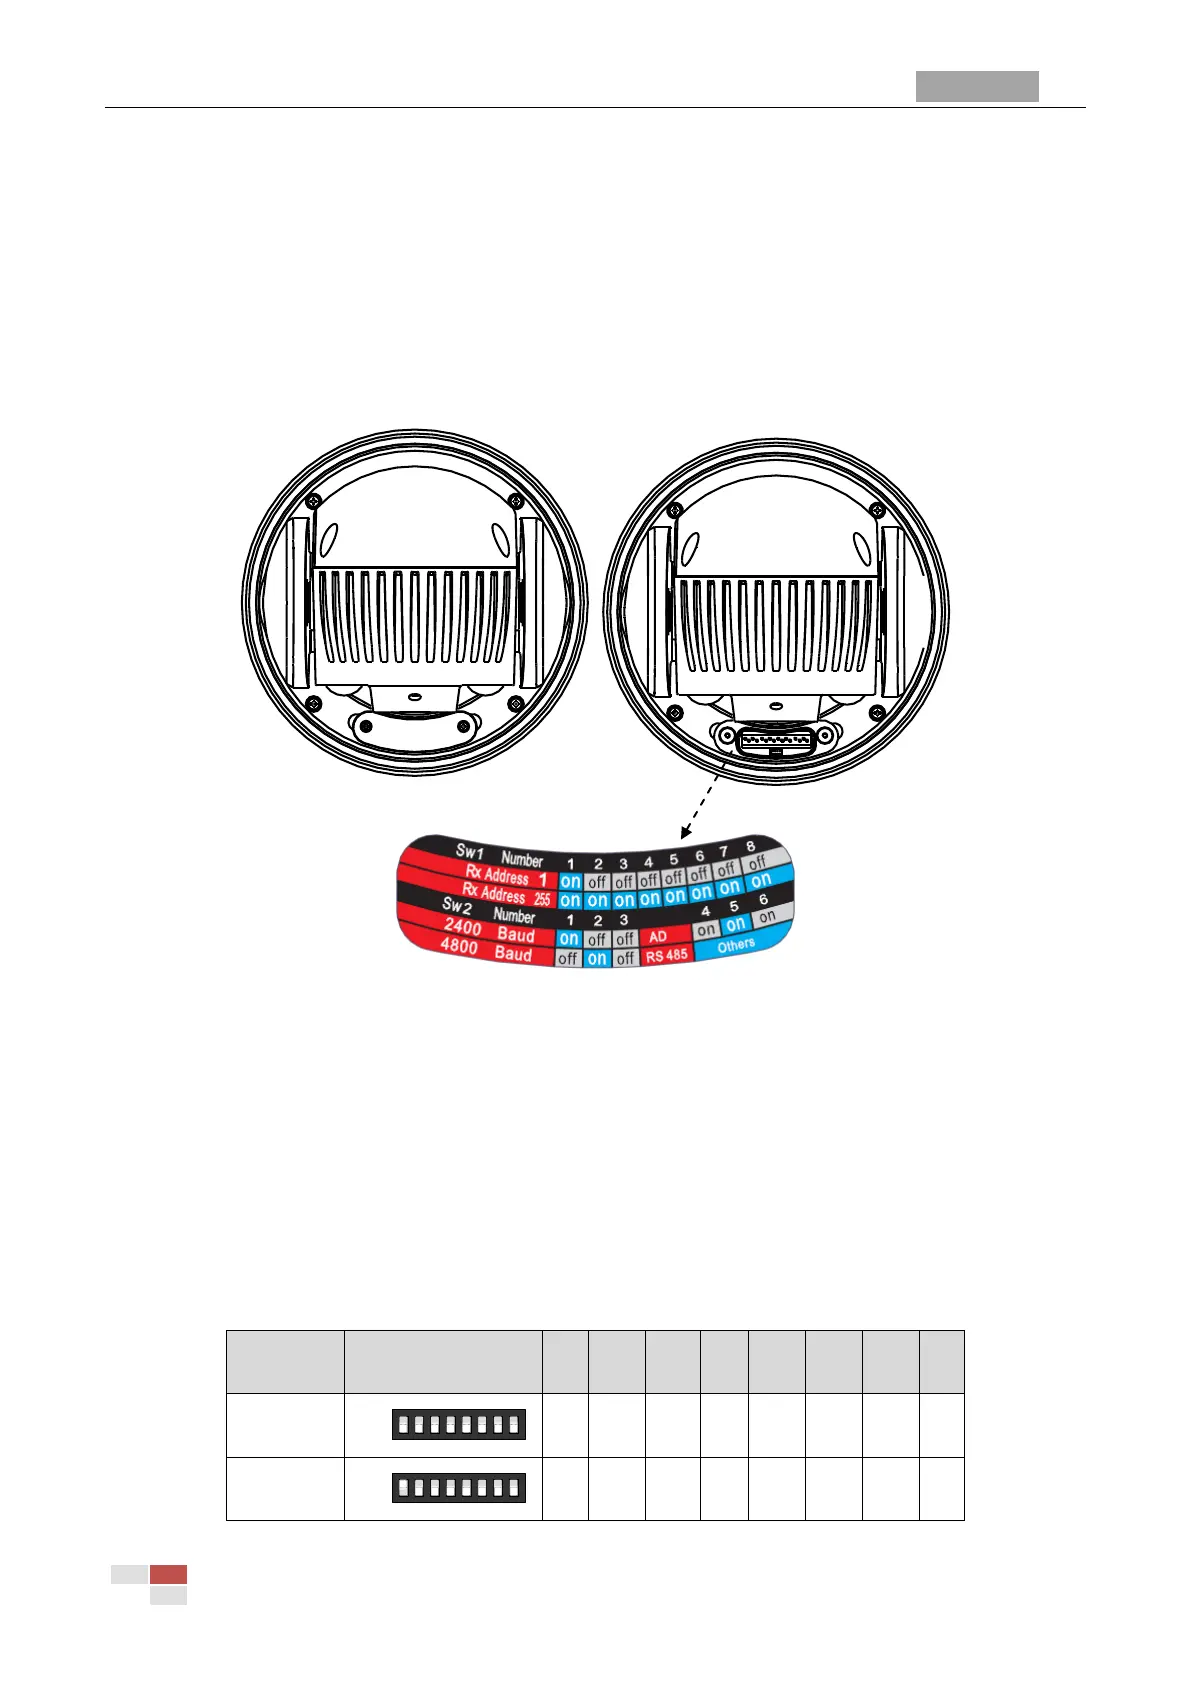
1.3 DIP Switch Settings
Note: This section is only for analog speed domes.
Two DIP switches SW1 and SW2 are for setting the speed dome address, baudrate, protocol, etc.,
with value ON=1 and OFF=0. The switch label is on the back of the SWITCH cover as shown in Figure
1-7.
Each number of the switch represents a DIP value, ranging from 1 to 8 for the lowest to highest.
Please refer to Section 1.3.1 to 1.3.5 for detailed settings.
Figure 1-7 Label of DIP Switch
Note: The default dome address is 0; the default baudrate is 2400; and the default value of the
120Ω terminator is OFF.
1.3.1 Address Settings
The SW1 switch is used for setting the address of speed dome. You can refer to Table 1-1 and Table
1-2 for details of setting the speed dome address to a specific number.
Table 1-1 Set the Dome Address
 Loading...