42
Measurement Precautions and Tips
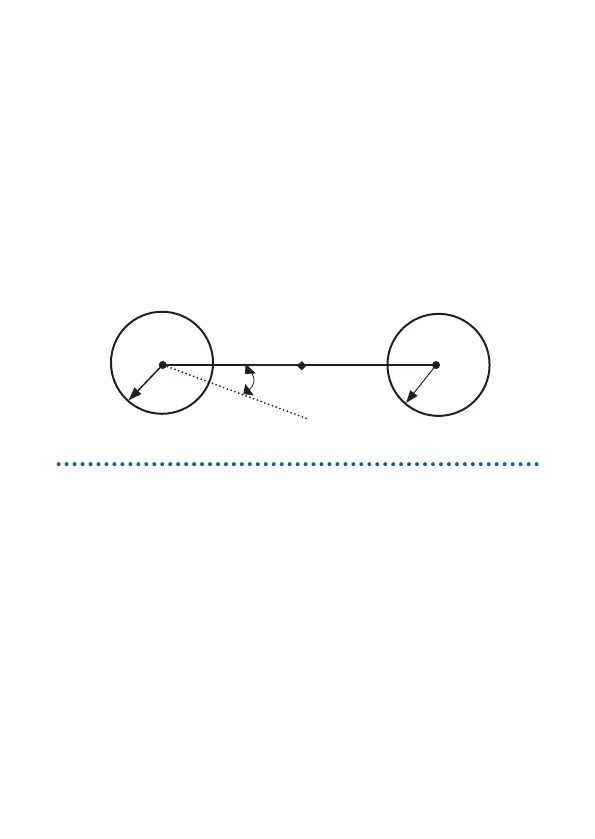
Position relationship of auxiliary earthing rods
The auxiliary earthing rod S(P) should normally be positioned
halfway on a straight line between the earthing body E and the
auxiliary earthing rod H(C).
If this is not possible due to obstacles or the like, the auxiliary
earthing rod S(P) should be positioned on the area between the two
lines: one drawn connecting the earthing body E and the auxiliary
earthing rod H(C), and the other drawn from the earthing body E
at 29° or less to the rst line, with the exception of the areas within
a 5-m radius of the earthing body E and the auxiliary earthing rod
H(C). This will help to reduce measurement errors.
5 m
5 m
29°
S(P) H(C)
E
How to insert / pull out the auxiliary earthing rods
How to insert the auxiliary earthing rods
The accessory auxiliary earthing rods are suitable for providing
auxiliary earthing electrodes and are designed for thickness and
hardness that allow insertion into a general ground by hand.
Because they are thinner than conventional models, they can be
inserted into a small gap.
Insert the rods perpendicular to the ground surface by the gloved
hands.
If the ground is too hard to insert the rods by hand, hammer them
perpendicularly into the ground. Hammering them excessively
hard may result in bending them. If the ground surface is too hard
to hemmer the rods with weak force, use the optional Model 9050
Earth Nets for measurement.