15
15
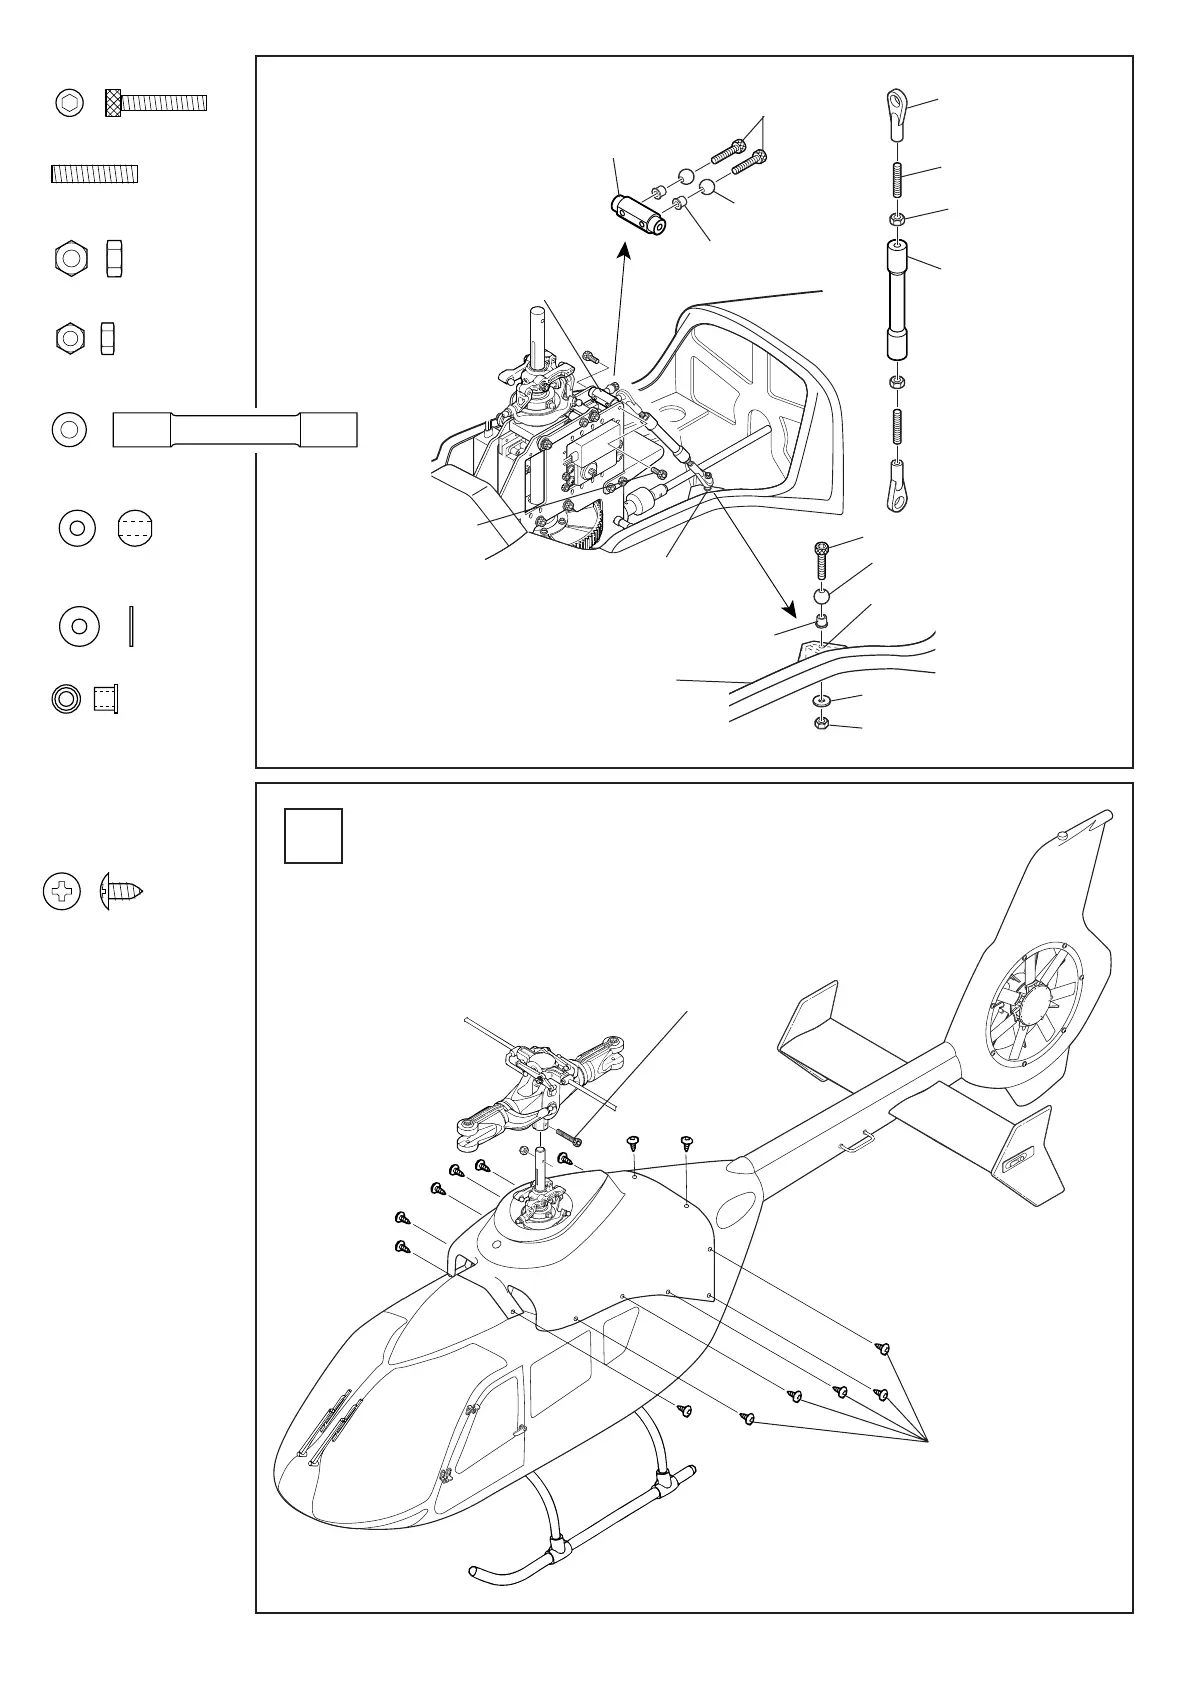
ローターヘッド・トップカバーの取付
Attachingtherotorheadandthetopcover
はずしておいたネジ
で取り付けます。
Usethepre-removed
screwforattachment.
M2.6 × 6 トラス TS
M2.6 × 6trussTS
M2.6×6トラスTS…………14
M2.6×6 truss TS
M2.6 × 15CS
M6 ロッドエンド
M6rodend
M3 × 15 全ネジ
M3 × 15threadscrew
M3 ナット
M3nut
クロスメンバー L=43
CrossmemberL=43
φ 6 ボール
φ 6ball
カラーφ 2.6 ×4 × 4F
Collarφ 2.6 × 4 × 4F
クロスメンバー M3 × 26M2.6 穴付
CrossmemberM3 × 26withM2.6holes
M2.6 ナット
M2.6nut
φ 2.6 × 7 × 0.5FW
カラーφ 2.6 ×4 × 4F
Collarφ 2.6 × 4 × 4F
φ 6 ボール
φ 6ball
M2.6 × 15CS
クロスメンバーL=26を外し、クロスメン
バー M3 × 26M2.6 穴付に交換します。
RemovethecrossmemberL=26,and
replacewiththecrossmemberM3 × 26
withM2.6holes.
位置決め後φ 2.6 穴を
あけます。
Openaφ 2.6holeafter
decidingtheposition.
φ 2.6 穴をあけます。
Openφ 6hole.
ボディ
Body
φ6ボール …………………4
φ6 ball
カラーφ2.6×4×4F ………4
Collar φ2.6×4×4F
φ2.6×7×0.5FW …………2
M2.6×15CS …………… 4
M3×15全ネジ …………… 4
M3×15 thread screw
M3ナット ………………… 4
M3nut
M2.6ナット ……………… 2
M2.6nut
クロスメンバーL=43 ……… 2
Cross member L=43
組み終わったら、リンケージやスワッシュプ
レート、テールピッチプレートなどがボディ
と当たったり、こすれたりしていないか入念
にチェックします。もし、干渉しているとこ
ろがある場合はヤスリ等で削ります。
Whentheassemblyiscomplete,doathoroughcheckfor
anycontactorrubbingbetweenthebodyandlinkage,
swashplate,ortailpitchplate.Ifyoudiscoverany
interference,trimtheoffendingportionsusingafileor
suitabletool.
M6ロッドエンドは、ぐらつ
かない様に最後まできっち
り締め込み、組み立てます。
Assemblebyfullytightening
theM6rodendsothatit
doesnotwobble.
M3×8CSを外し、受信機台
取付用の M3 × 6CS をここ
に使用します。
RemovetheM3 × 8CSand
use the receiver mount
installationM3 × 6CShere.