2
1
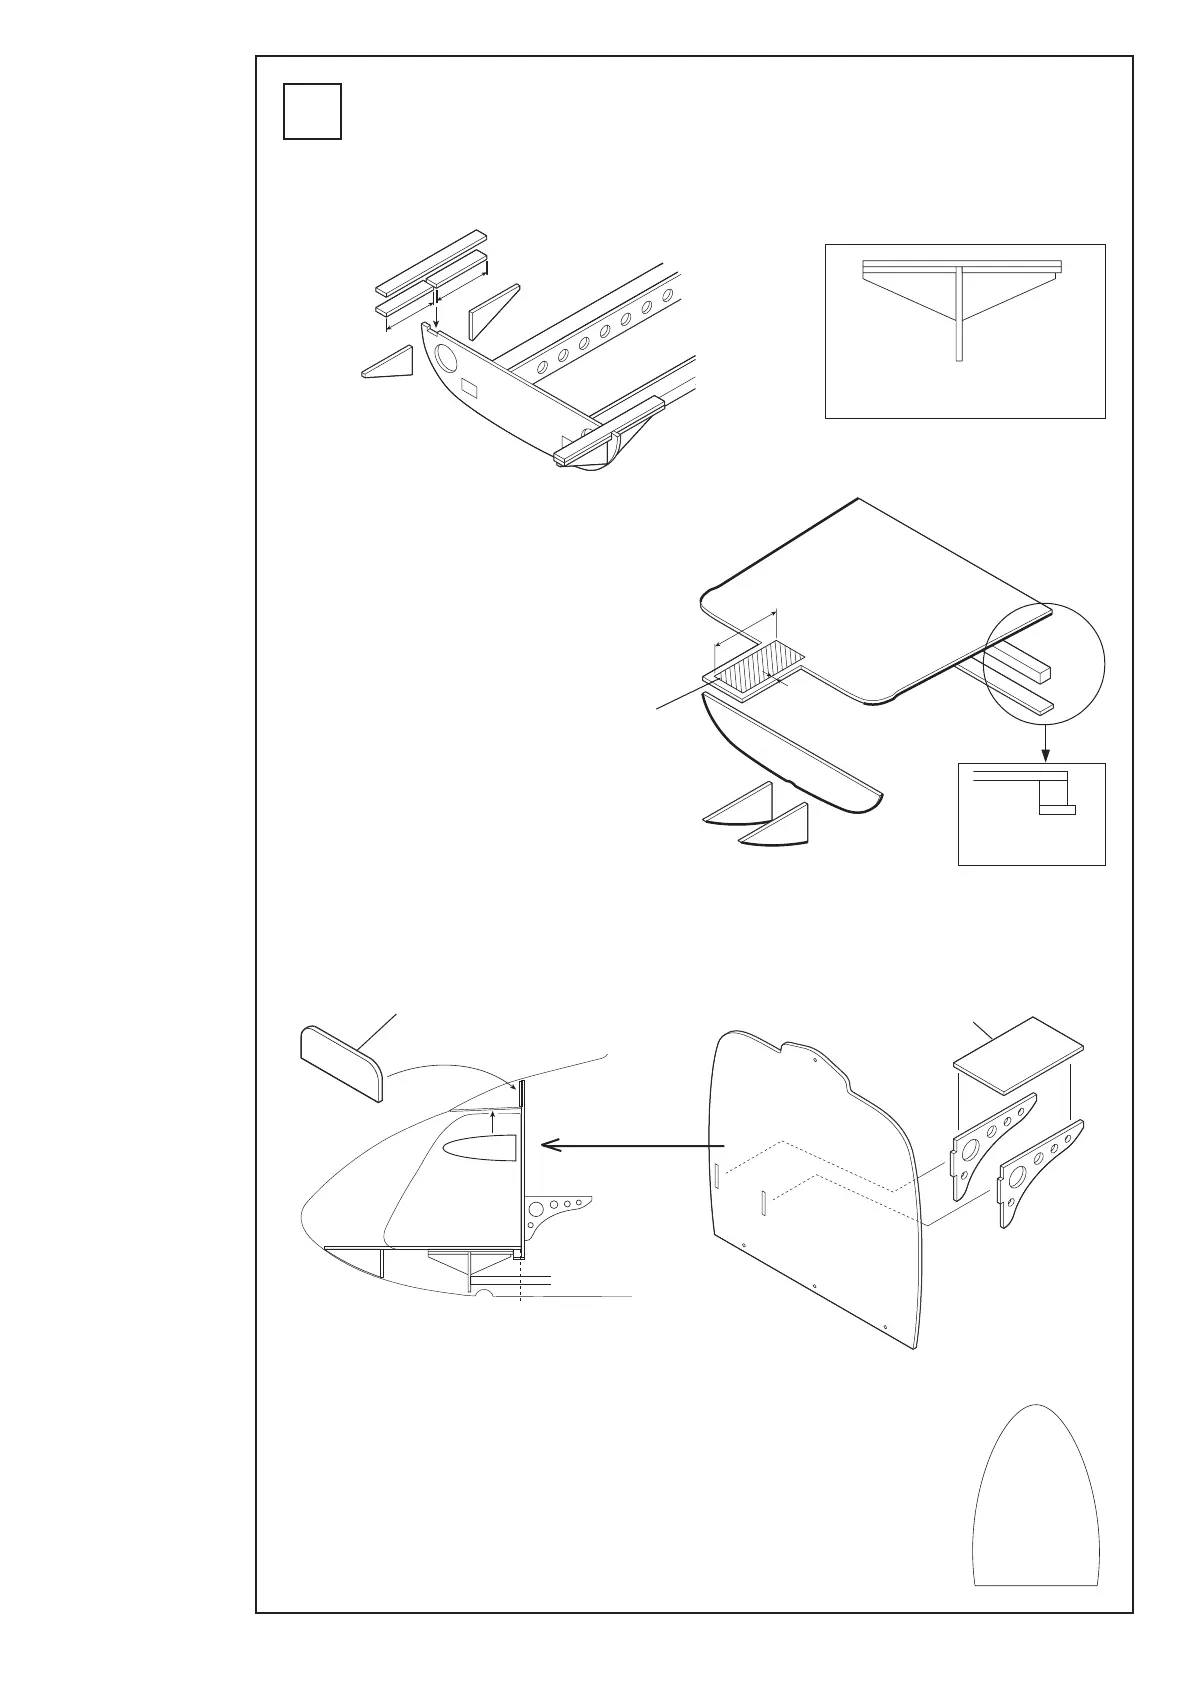
コクピットの組立
Cockpitassembly
① 胴枠にフロア部分を固定するためのベニヤ板をエポ
キシ接着剤で貼り付けます。
② フロア部分になる胴枠を組み立てます。
太線の部分は、ボディと合わせながらぴったり
合う様にヤスリ等で修正します。
③ 隔壁となる胴枠はこの位置でぴったり合う様に
外型を修正します。
修正後、受信機台となる胴枠をエポキシ接着剤
で接着します。
④ フロアと隔壁の位置が決まったら、隔壁をネジ止めする為の胴枠を図の位置に
接着します。
接着にはエポキシ接着剤(30 分以上硬化型)もしくは FRP 樹脂を使用します。
⑤ 余ったプラスチック板を右図のようにカットし、図の位置に貼り付けます。P.6のイラスト
をコピーして型紙にして下さい。
⑤ Cutanyexcessplasticplateasshowninthefigureontheright,andattachintheposition
showninthefigure.Makeacopyoftheillustrationonpage6anduseitasapapertemplate.
横から見た図
Sideview
隔壁固定用胴枠
Partitionwallfixing
fuselageframe
ドアのこの線に合わせます
Alignwiththisline.
47
50
60
5
横から見た図
Sideview
受信機台
Receivermount
カットします
Cutoff
① Useepoxyadhesivetoattachtheplywoodwhichwill
fixthefloorsectiontothefuselageframe.
② Assemblethefuselageframewhichwillbethe
floorsection.
Alignthepartmarkedwiththethicklinetothe
bodyandtrimwithafilesothatitfitsperfectly.
③ Trimtheoutsidesothatthefuselageframewhichwill
bethepartitionwallfitsperfectlyatthisposition.
Aftertrimming,useepoxyadhesivetoattachthe
fuselageframewhichwillbethereceivermount.
④ Whenthepositionsofthefloorandpartitionwallaredecided,attachthefuselageframewhich
isusedtoscrewdownthepartitionwallasashowninthefigure.
Useepoxyadhesive(30minutehardeningtype)orFRPresintoattachthefuselageframe.