3-10 Preparation
Hitachi Compute Rack 220H CRU Replacement Guide
Installing the front top cover
NOTICE
Make sure all of the internal cables and components are correctly kept
inside the system before installing the cover. Otherwise, the
cables may become damaged or disconnected.
1. Installing the rear top cover.
See Installing the rear top cover on page 3-9.
Installing the rear top cover before installing the front top cover.
Otherwise the front edge of the rear top cover is caught on the front
top cover and may be deformed.
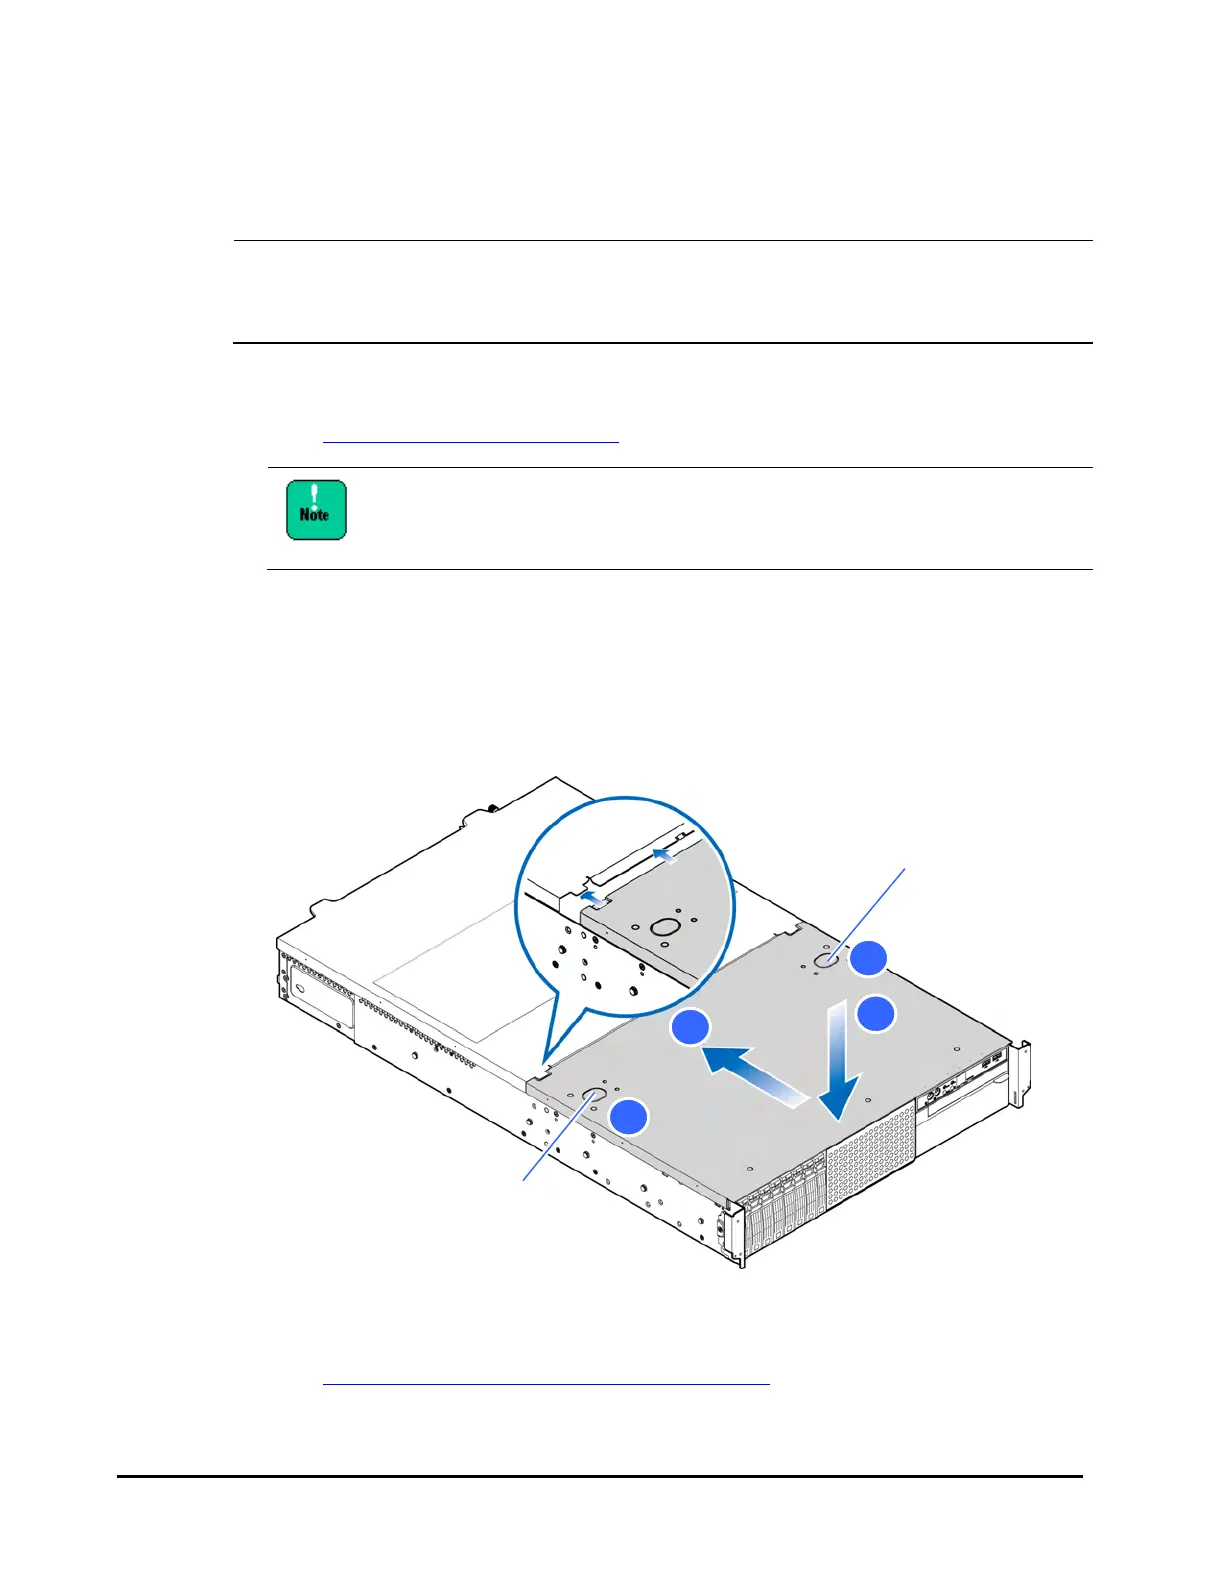
2. Align the hooks inside the front top cover side tabs with the guide slots on
both sides of the chassis.
3. Close and slide the front top cover toward the center of the system.
Make sure the rear edge of the front top cover is fully inserted in the rear top
cover correctly.
4. Make sure that the front top cover is locked by the two release latches.
Figure 3-8: Install the front top cover
5. Reinstall the system to the rack cabinet.
See Sliding the system unit into a rack cabinet on page 3-6.
3
2
4
Release latch
Release latch
4

 Loading...


