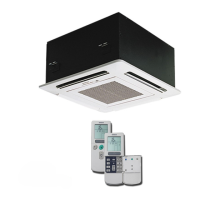
¿ Cleaning the built-in 4-way indoor unit RCI(M)
Preliminary procedure.
Place a vinyl sheet on the floor to protect the furniture and other items from the cleaning water before starting this job.
Remove the optional air panel as indicated in sections Removal of the optional air panel, see on page 270 and Removal of
the optional air panel, see on page 278.
Remove the electrical box after opening the corresponding panel and then disconnect the connectors located between the
indoor and outdoor units and other connectors, as indicated in sections Removal of the electrical box cover, see on page
277 and Removal of the electrical box, see on page 279.
Remove the bellmouth and fan as indicated in section Removal of the fan duct and the fan, see on page 280.
Remove the drain pan as indicated in sections Removal of the drain pan, see on page 273 and Removal of the drain pan,
see on page 281. Also carry out the following tasks:
1 Remove the drain pan after emptying it of water.
2 Empty the drain pan of water by removing the rubber plug. Make sure the water flows easily through the hole by inserting
a pencil into it.
3 Once the drain pan has been removed, check that there is no water in the drainage at the bottom of the pan.
4 Clean and dry the pan before removing it. Handle the pan carefully.
Remove the float switch as indicated in sections Removal of the float switch, see on page 274 and Removal of the float
switch, see on page 283.
Cleaning the indoor unit
N O T E
Wear gloves to avoid injuries caused by the heat exchanger fins.
Place a vinyl sheet around the heat exchanger to prevent the
cleaning water from splashing the insulation surface and drain
pump.
12 Maintenance notes
386
SMGB0063 rev. 1 - 10/2010