ID50 Series Panel - Installation, Commissioning & Configuration Manual
Configuration Mode
59
997-263-000-11, Issue 11
January 2010
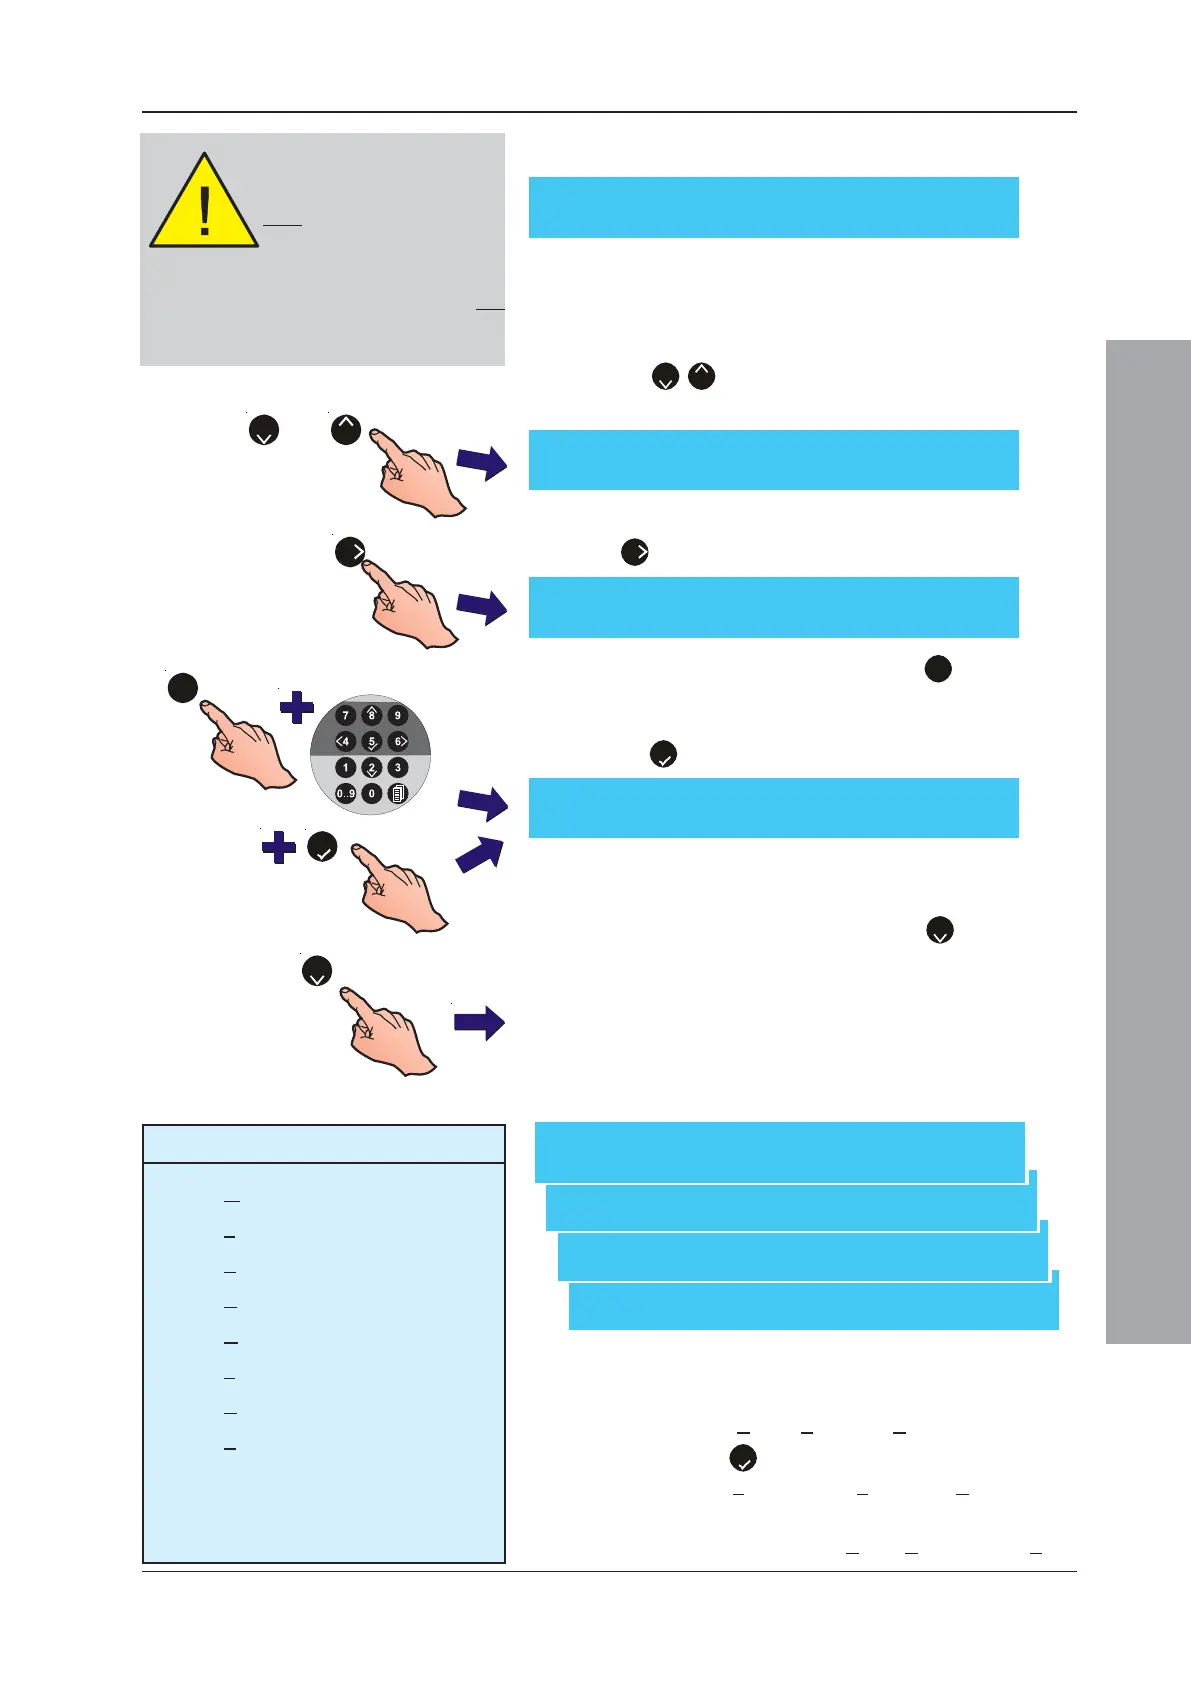
However, if the change was not successful the
following message is displayed:
The PIN change failure may be due to an incorrect
PIN number having been entered.
5 To enter the GSM network telephone numbers, press
the ‘
2
/
8
’ pushbutton repeatedly until the GSM Item
1 screen is displayed:
6 To enter the GSM network contact number, press the
‘
6
’ pushbutton to display the following options:
7 Using the numeric keypad press ‘
1
’ to select the
number entry option. Again, using the numeric keypad
enter the required number, without spaces and press
the
5
’ pushbutton when finshed.
Note: The number entry is limited to 20 digits although
the first character may be a ‘+’.
8 Using the numeric keypad press the ‘
2
’ pushbutton to
select the ‘Notifications’ option. Selection of Alarm, pre-
alarm, fault and various disable classes can be
made.The following event notification options are
selectable (see table below left for a description of
the Notifications code letters used and, for A, F and P
events, the first one, first five or all events that can be
configured to be sent.
9 Use the numeric keypad to select/deselect any of the
event notification options. The characters displayed in
the square brackets indicate which options have been
selected. For Alarm, Fault and Pre-alarm repeatedly
pressing the
5
’ pushbutton toggles the selection of:
not selected, 1st event, first 5 events or All events.
Note: For each GSM number entered the following options
are assigned by default: Alarm, Pre-alarm and Fault.
[Setup] PIN Change failed
<: Exit
[Setup] GSM Item 1:
1: Number 2: Notifications [A1F1P1.....]
[GSM number entry field ] ¦ : Char : Done
> : Next < : Previous u1:Delete u3:Insert
[Setup] GSM Item 1:
>: Change ¦: More <: Exit
or
82
6
1
5
[Setup] Options [A1F1P1.....] :
8 : System Disable ¦: More
[Setup] Options [A1F1P1.....] :
7 : Device Disable ¦: More
[Setup] Options [A1F1P1.....] :
5 : General Disable 6 : Zone Disable ¦: More
[Setup] Options [A1F1P1.....] : 1 : Alarm
2 : Fault 3 : Pre-Alarm 4 : Controls ¦: More
2
Notifications: Code Letters
A* - Alarm condition (A1, A5, or AA)
F* - Fault condition (F1, F5, or FA)
P* - Pre-alarm condition (P1, P5, or PA)
C-Controls (user action at panel)
G- General Disablement
Z-Zone Disablement
D-Device Disablement
S-System Disablement, e.g. sounder
output disabled, transmission output
disabled.
* Can be configured to send the first event
(default), first five events or all events.
Use care when entering the PIN
number to avoid a failed PIN
change. You are only allowed
three attempts at entering a PIN
code before it is locked out.
Likewise, if you have entered an incorrect PIN
and restart the panel you are only allowed
one
more attempt before the PIN is locked out.
Don’t restart the panel if the PIN is incorrect.

 Loading...