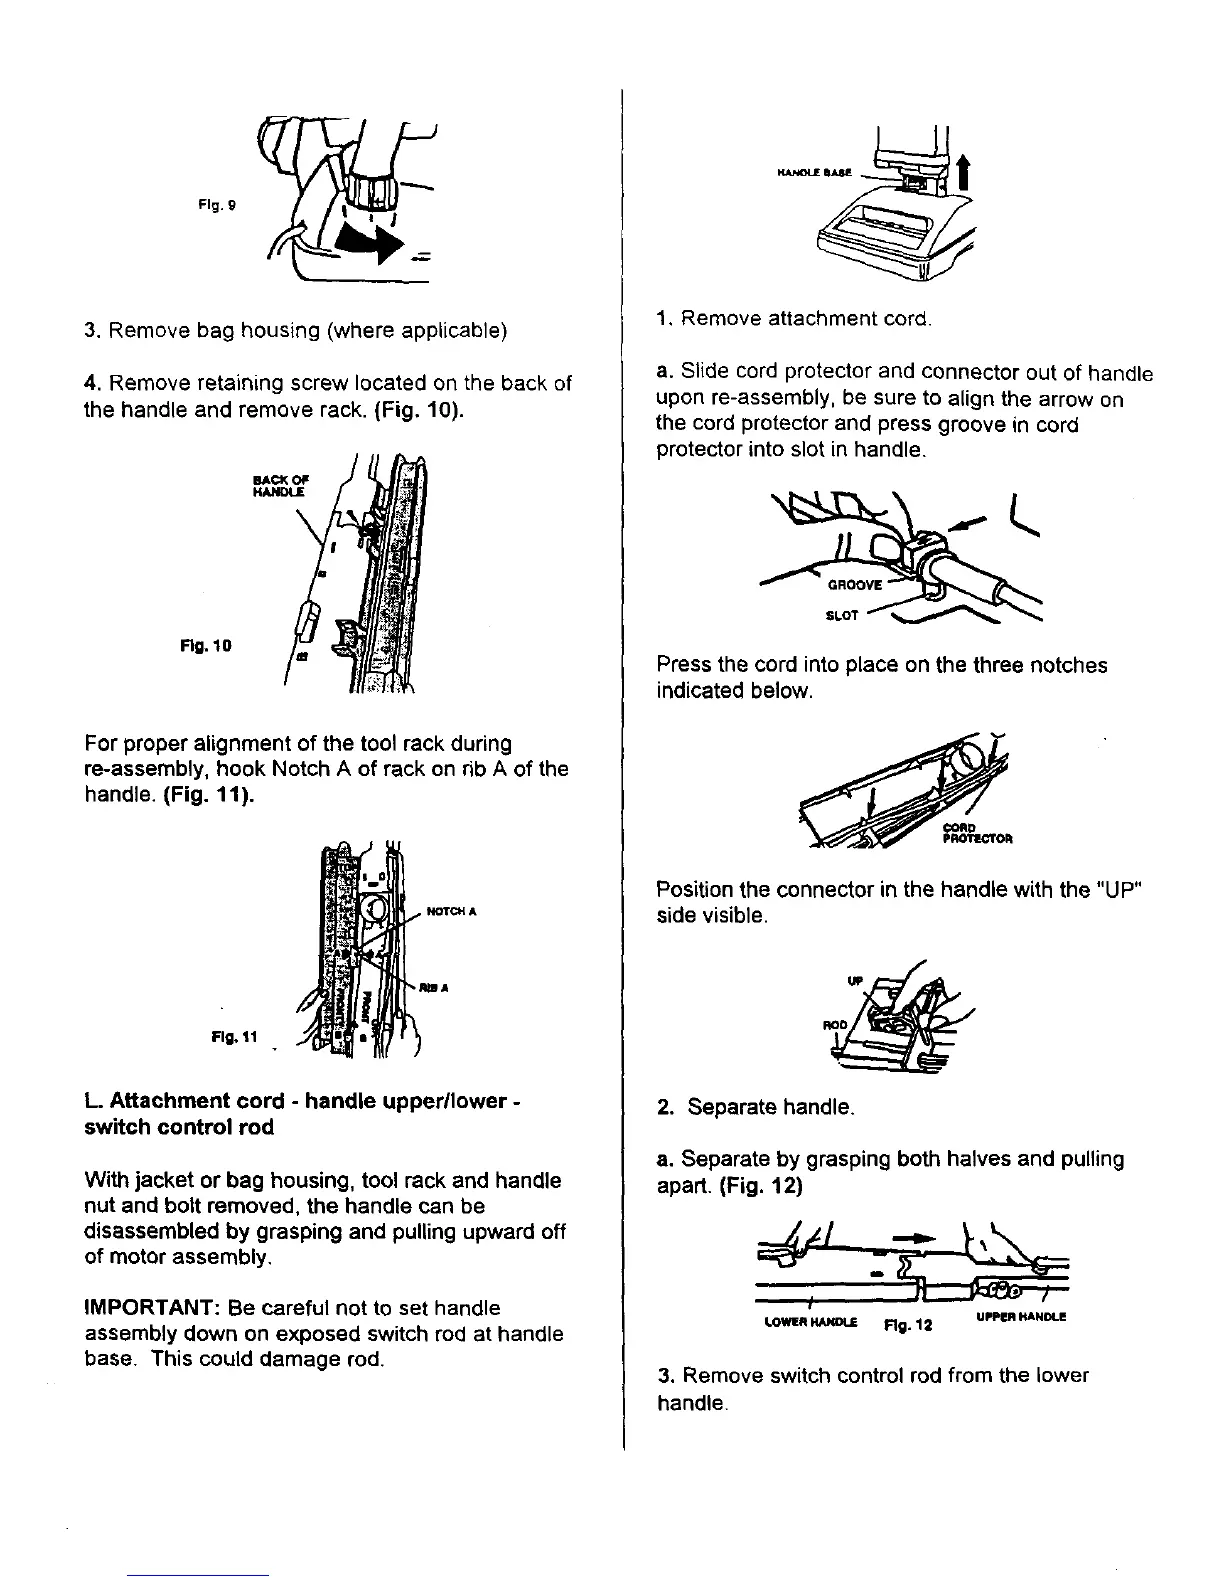
Flg. 9
!
3. Remove bag housing (where applicable)
4. Remove retaining screw located on the back of
the handle and remove rack. (Fig. 10).
BACK OF
HANDLE
\
Fig. 10
For proper alignment of the tool rack during
re-assembly, hook Notch A of rack on rib A of the
handle. (Fig. 11).
NOTCH A
_A
Fig, 11
L. Attachment cord - handle upperllower -
switch control rod
With jacket or bag housing, tool rack and handle
nut and bolt removed, the handle can be
disassembled by grasping and pulling upward off
of motor assembly.
IMPORTANT: Be careful not to set handle
assembly down on exposed switch rod at handle
base. This could damage rod.
1, Remove attachment cord.
a. Slide cord protector and connector out of handle
upon re-assembly, be sure to align the arrow on
the cord protector and press groove in cord
protector into slot in handle.
Press the cord into place on the three notches
indicated below.
Position the connector in the handle with the "UP"
side visible.
2. Separate handle.
a. Separate by grasping both halves and pulling
apart. (Fig. 12)
3. Remove switch control rod from the lower
handle.