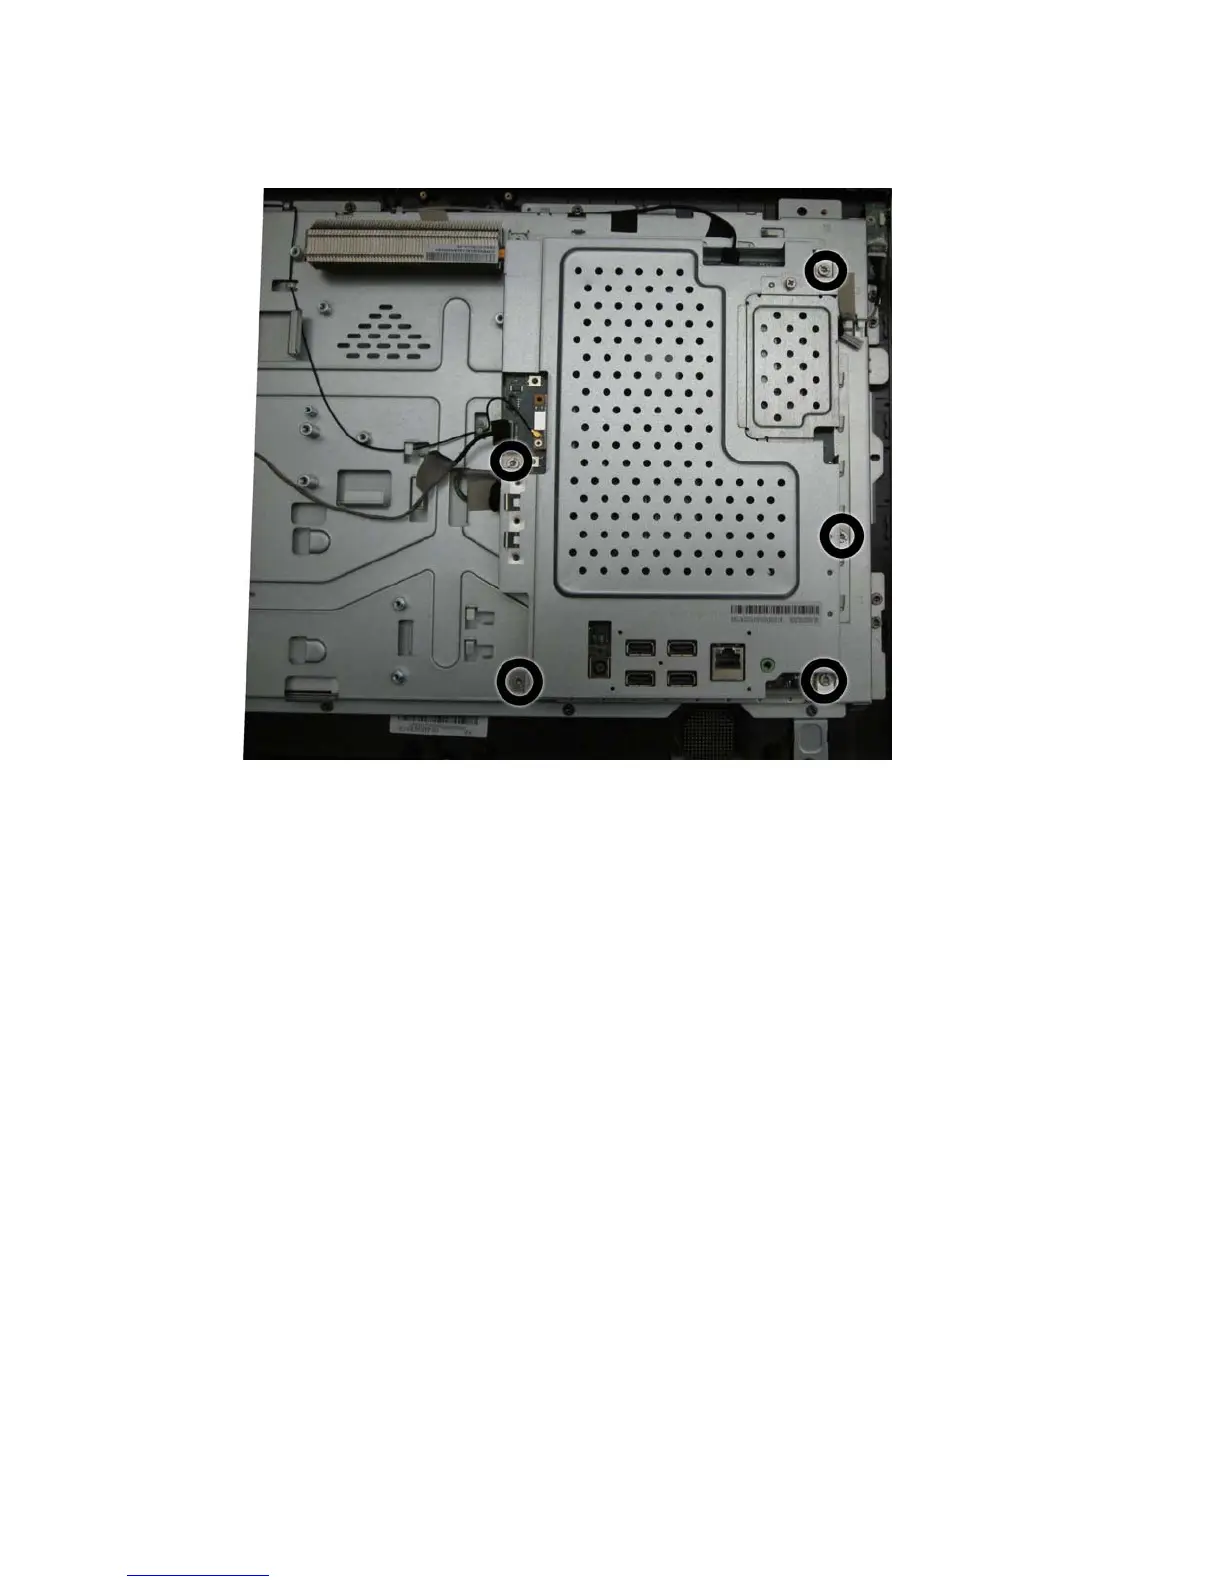
4. Remove the five Torx T15M3.0x6.0 screws that secure the shield to the computer.
Figure 6-48 Removing the system board shield
5. Lift the shield from the computer.
To install the system board shield, reverse the removal procedures.
64 Chapter 6 Removal and Replacement Procedures All-in One (AIO) Chassis