8
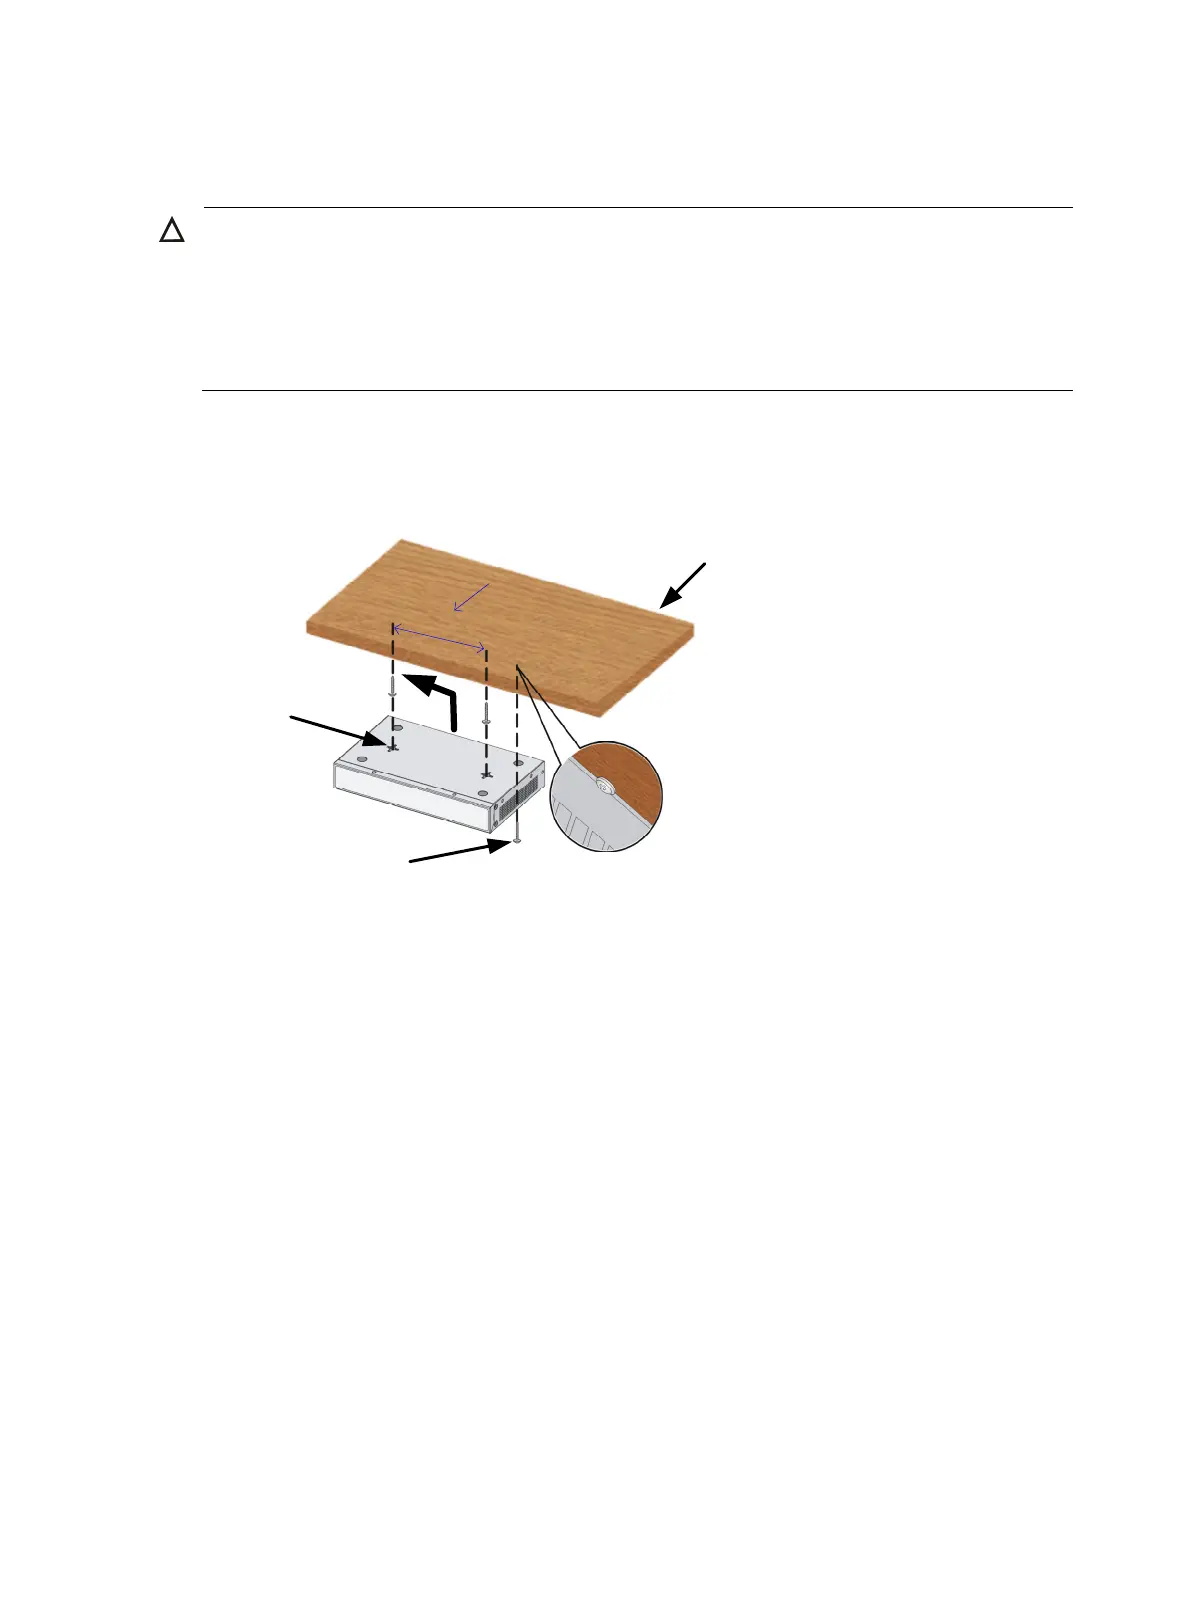
Under-table mounting
CAUTION:
• A network-attached switch with cables mounted upside down can be heavy. Verify that the table is
sufficiently stron
and of a material that can support the screws that hold the wei
ht of the switch and the
attached cables. Make sure the cables are protected and out of the way.
• Regularly inspect the installation of the switch to ensure that the switch remains securely anchored and
unobstructed.
Only the HP 1420-16G switch supports under-table mounting. The wall mounting screws (provided) can
be used when you mount the switch under a table.
Figure 10 Under-table mounting
To mount the switch under a table:
1. Follow the instructions on wall mounting to determine the location of screw holes to be used for
under-table mounting.
2. Align the two mounting holes in the switch chassis bottom with the two screws on the bottom of the
table and hang the switch.
3. Use a third screw to prevent switch movement.
Connecting cables
Connecting network cable
Use crossover cable or straight through cable to connect a PC or other network devices to the Ethernet
port of the switch.
Wood table
Mounting slots
Third securing screw
1
6
0
m
m
(
6
.
3
0
i
n
)
 Loading...