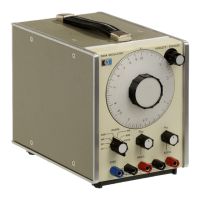
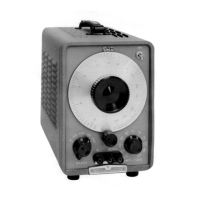
Section V
5-17.
COVER
REMOVAL.
5-18. To perform the Adjustment and Calibration
Procedure, it
is
necessary to remove the two side
covers, each
of
which
is
held in place by four screws.
~
USE
ONLY
THE
SCREWS
REMOVED OR
ONES
OF EQUAL
LENGTH
WHEN
REINSTALLING
SIDE PANELS. LONGER
SCREWS
MAY
DAMAGE
THE POWER
SUPPLY BOARD IF FORCED IN.
5-19. To perform internal troubleshooting or repair
procedures, the side covers and top and
bottom
covers must be removed. Remove the two front and
two rear screws in each side casting and remove the
side castings.
-----NOTE-----
Do
not remove any screws on the
rear panel.
Remove the rear panel, pulling
out
the
bottom
edge
first. Remove one screw from the
top
and each side
of
the chassis shield and slide the chassis off.
5-20. To operate the
209;1
with the chassis shield
removed, connect the power supply in the rear panel
to the pc board.
-----NOTE-----
To operate the instrument with
shield removed, the jumper must be
connected
as
explained below.
Connect a
short clip lead between the chassis section
on which the tuning capacitor
is
mounted and the
sheet metal tab immediately below it containing the
tapped screw hole.
5-21. The chassis shield should be in place when
doing the Performance Checks.
5-22. ADJUSTMENT
AND
CALIBRATION
PROCEDURE.
5-23.
INTRODUCTION.
5-24. The following Adjustment and Calibration
Procedures should be used only
if
it has been
determined through the Performance Checks that the
Model
209A
is
not performing within its
specifications.
5-25.
If
proper performance cannot be achieved with
the Adjustment and Calibration Procedure, refer to
the Troubleshooting Procedures.
5~
Model209A
5-26.
POWER
SUPPL
Y.
5-27. Before making any adjustments, check the
power supply voltages
at
test points 2 and 3. These
test points may be reached through the shield cut-out
labeled
B+
and
B-.
They should indicate
+21
V and
-21
V respectively, with reference to the shield.
If
the
voltages are
off
greater than
+/-1
V, troubleshoot the
power supply.
5-28.
BIAS
ADJUSTMENT.
a.
Set the Model209A Range Switch to X1K.
b. Connect the
DC
Voltmeter to TP4 (BIAS).
c.
Adjust R20 (BIAS) for 0 V indication on the
meter.
5-29.
AGC
ADJUSTMENT.
a.
Set the Model 209A RANGE switch to X1K
and the Dial to 2.
b. Connect the
DC
Voltmeter
to
TP1
(AGC).
c.
Adjust R24 (AGe) for -2.0
Vat
TP1.
5-30.
AGC
AND
FREQUENCY
ADJUSTMENT.
a.
Leave the
DC
Voltmeter connected
as
in
Paragraph 5-29, and connect the Model
209A sine
wave
output to the Frequency
Counter.
b. Set the Model 209A RANGE to X1K and
the Dial to 20.
c.
Adjust
C3
and
C8
(AGC and FREQ CAL)
for 20 kHz and -2.0 V, respectively.
-----NOTE-----
C3
and
C8
are interacting controls.
Make one half the apparent needed
correction in each adjustment.
Several
adjustments
will be
necessary.
d. Repeat Paragraphs 5-29 and 5-30 a through c
if
the voltage at 2 kHz has changed from -2.0
.
V.
e.
With the RANGE switch set on X1K, adjust
the Dial for 20 kHz +/-20 Hz on the counter.
f.
Without moving the Dial, check the
frequency on ranges
X2
through Xl
OK
and
record the error in percent.
www.HPARCHIVE.com