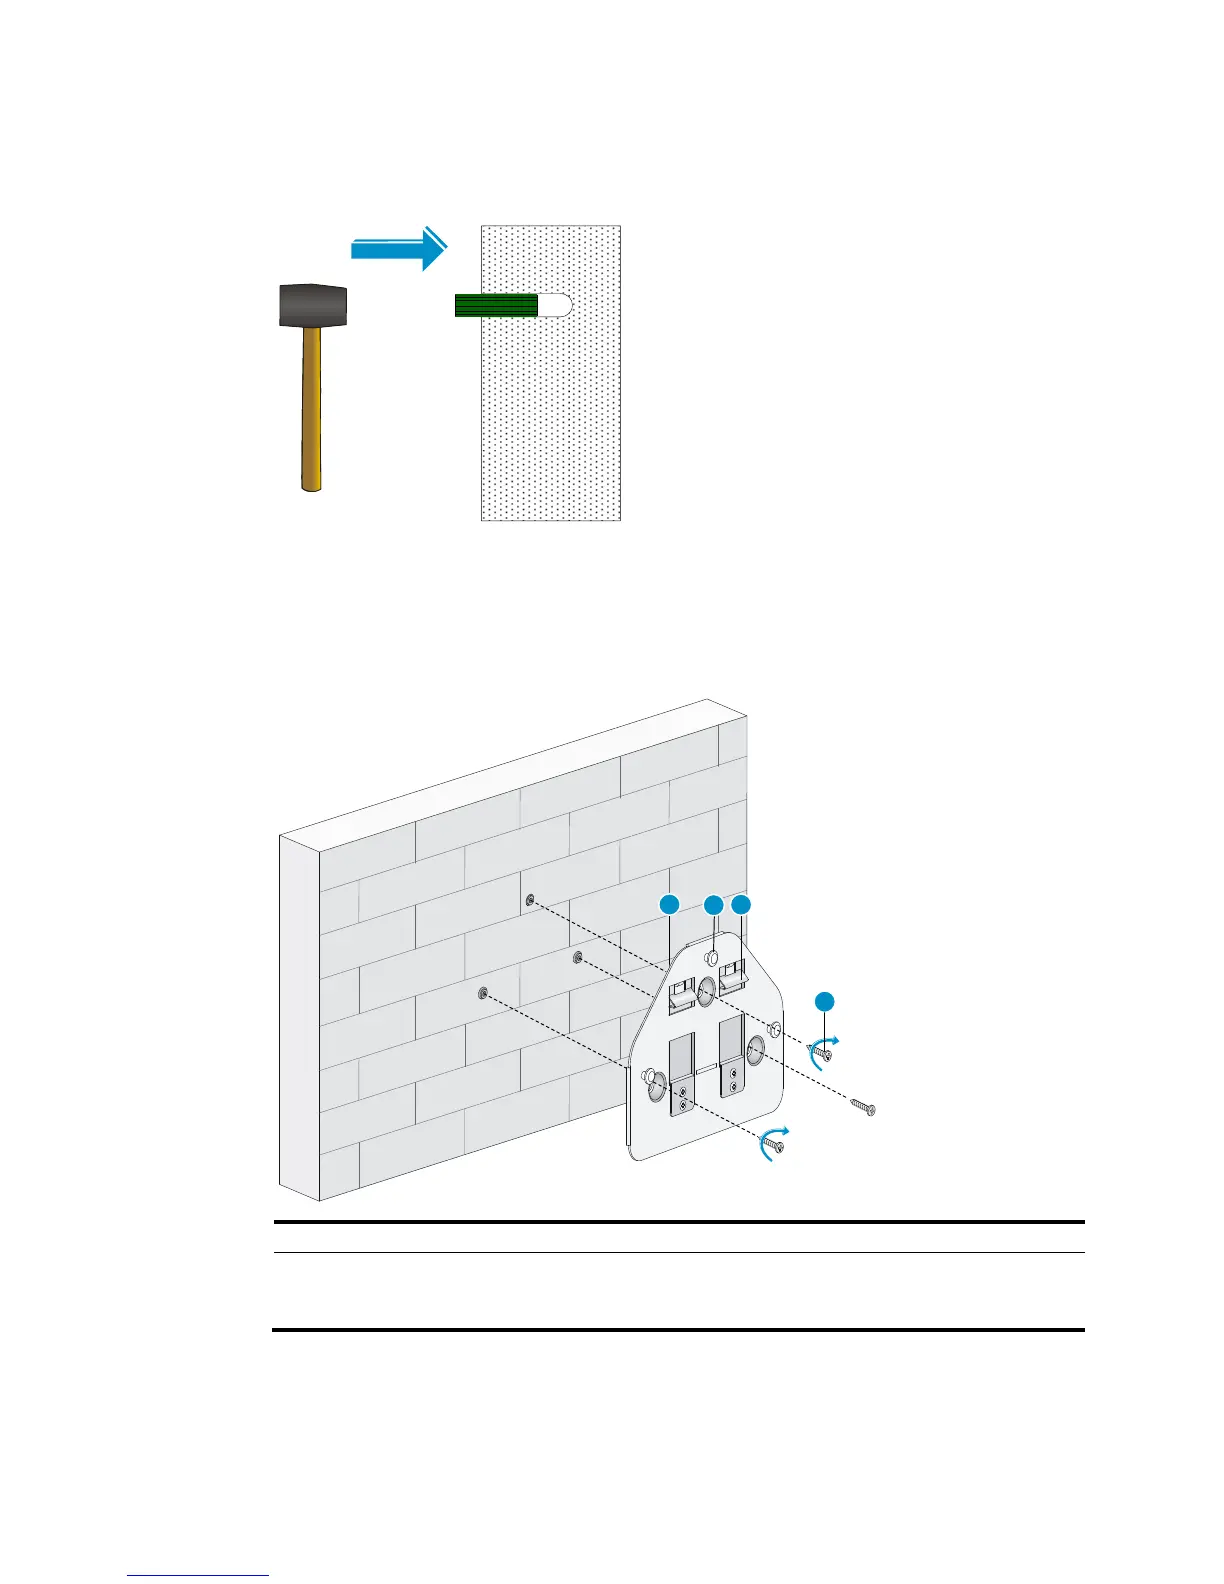
5
2. Insert a wall anchor into each mounting hole, and tap the wall anchor with a rubber hammer until
it is flush with the wall surface as shown in Figure 4.
Figure 4 Inserting a wall anchor
3. Align the holes in the wall-mounting bracket with the anchors and insert screws through the
installation holes into the wall anchors as shown in Figure 5.
4. Adjust the position of the wall-mount
ing bracket and tighten the screws.
Figure 5 Installing the wall-mounting bracket
(1) Wall-mountin
(3) Clip (4) Screw, Length ( 17.4mm / 0.69in ), Wrench
size ( 6.5mm / 0.26in ), Thread size ( 3.5mm
5. Connect the AP to the network by using an Ethernet cable.
6. Align the mounting keyhole on the rear of the AP over the hook on the wall-mounting bracket.
See Figure 6.
1
2
3
4

 Loading...