Chapter 1 17
Installing Your Analyzer
STEP 4. Configure the Analyzer
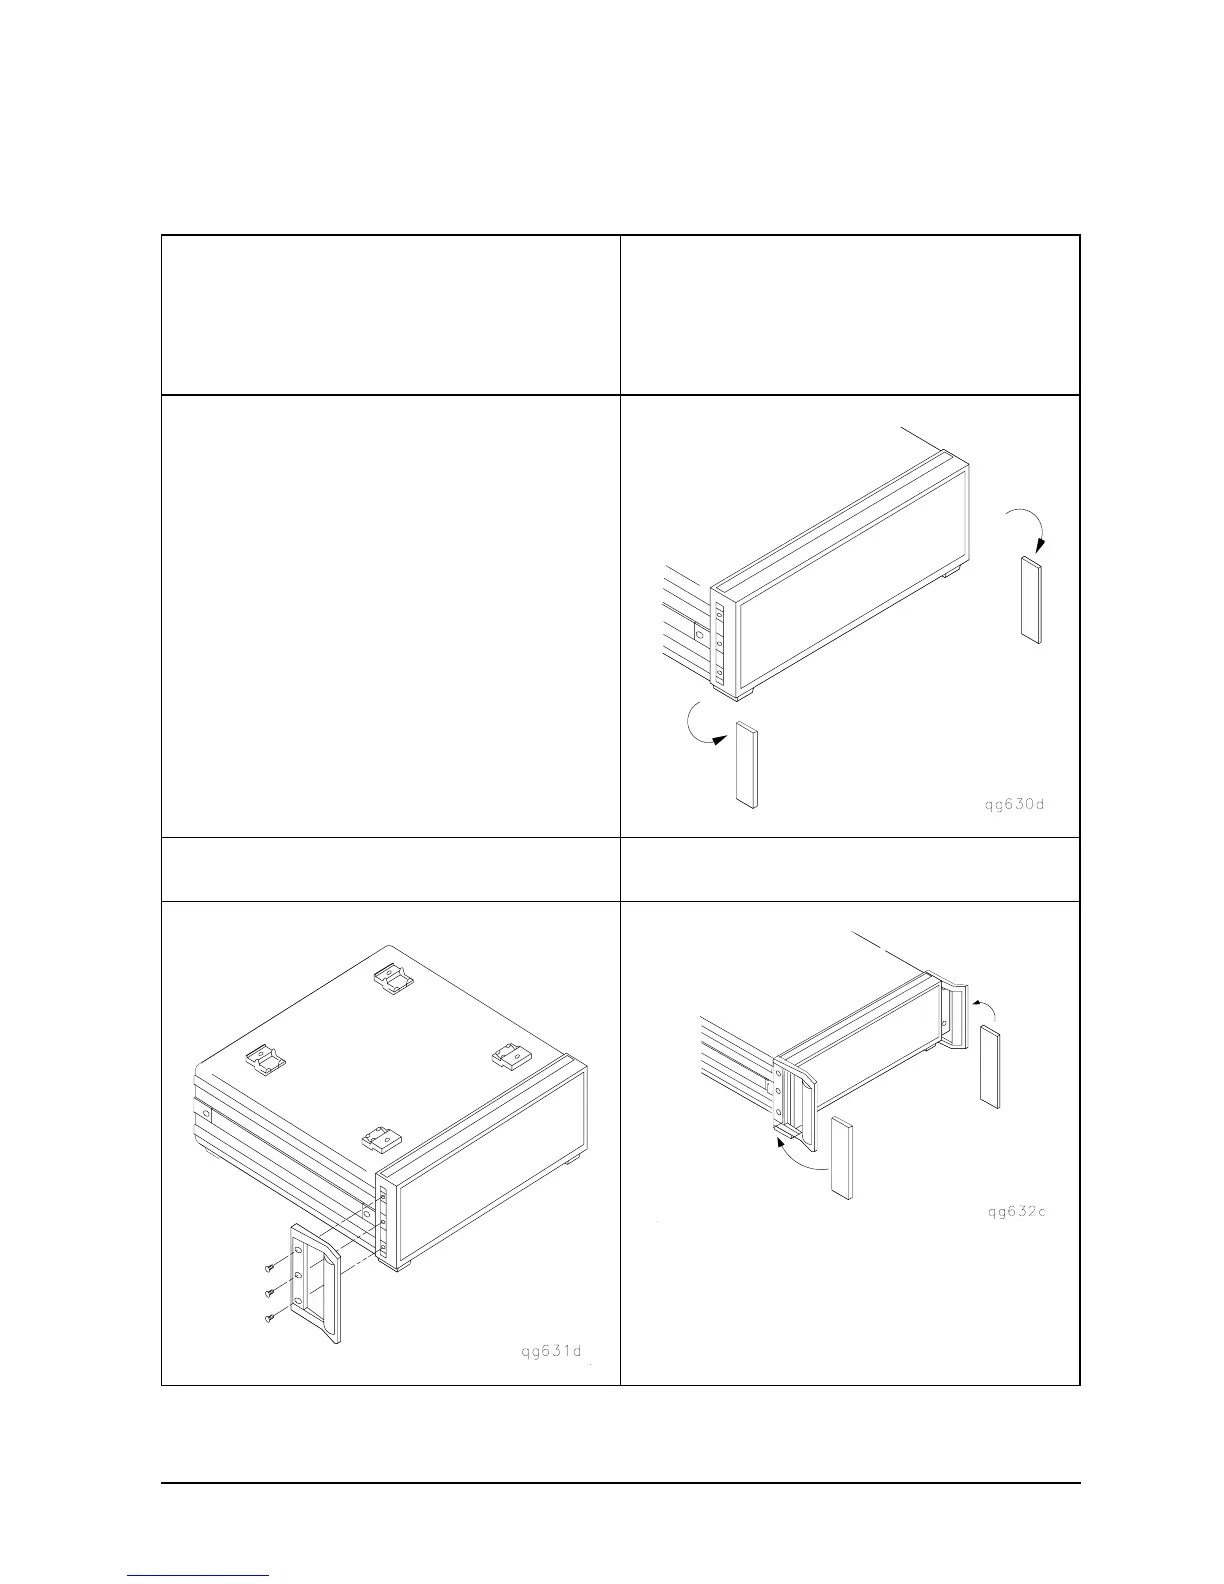
To Attach Front Handles to the Analyzer (Standard)
1. Ensure that the front handles kit is
complete. NOTE: If any items are damaged or
missing from the kit, contact the nearest HP
sales and service office to order a replacement
kit. Items within the kit (handles, flanges,
screws, etc.) are not individually available.
2. Remove the side trim strips.
■ (2) front handles
■ (6) screws
■ (2) trim strips
3. Attach the handles to the sides of the front
panel, using three screws for each handle.
4. Place the new trim strip over the screws on
the handles.
WARNING: If an instrument handle is
damaged, you should replace it immediately.
Damaged handles can break while you are
moving or lifting the instrument and cause
personal injury or damage to the instrument.

 Loading...


