• If you are replacing a disk drive, refer to “Removing a drive” (page 16)
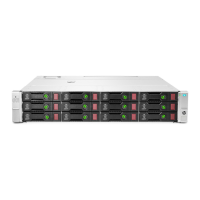
2. Unlatch and swing out the latch handle on the drive. Then, slide the drive into the bay (1),
pressing firmly on the drive to seat it. Close the latch handle (2), pressing firmly until it locks
in place.
IMPORTANT: When a drive is inserted in an operational enclosure, the drive LEDs flash
to indicate that the drive is seated properly and receiving power.
3. If you are replacing a drive, confirm that the replacement drive matches the drive that is
being replaced.
4. Determine the status of the hard drive.
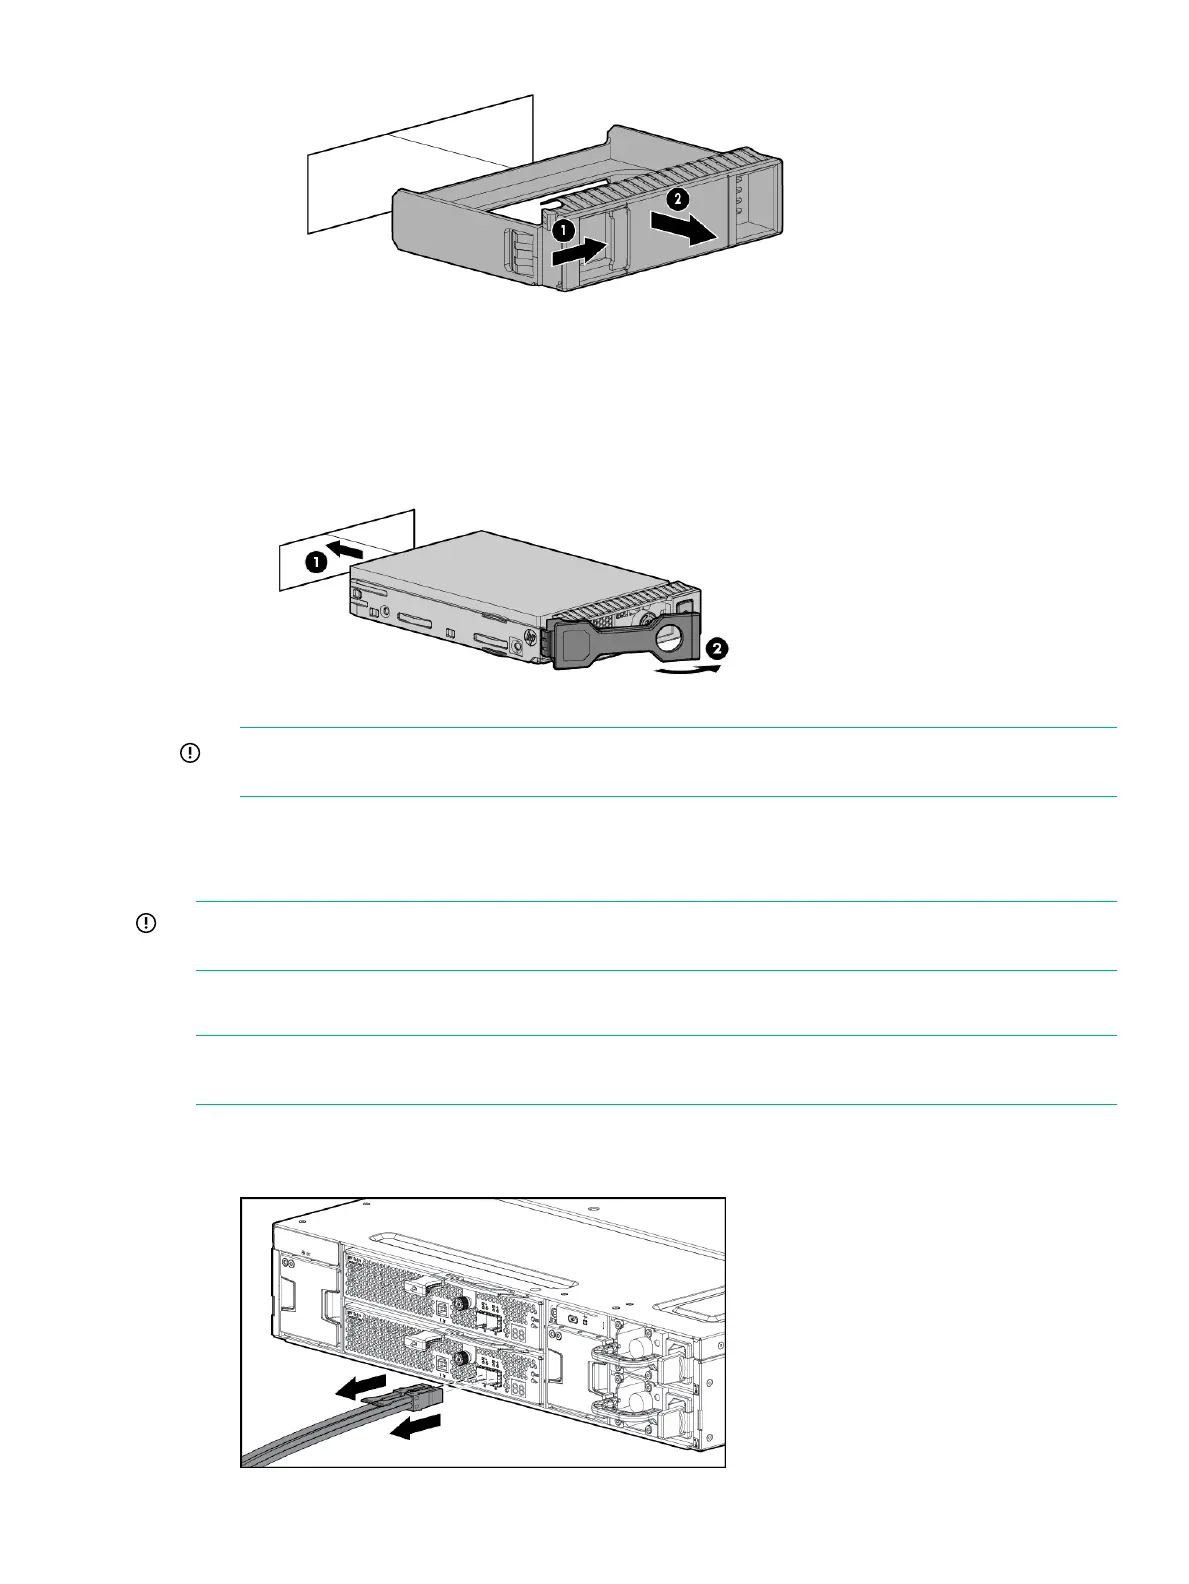
IMPORTANT: For proper airflow and cooling, a drive blank must remain installed in all unused
drive bays.
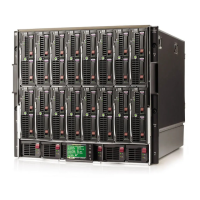
Removing and replacing I/O Cables
NOTE: If the cable is malfunctioning, check the LED displays on the I/O module back panel.
See “I/O module LEDs” (page 14)
1. Confirm the correct port(s) for the cable to be replaced.
2. Disconnect the I/O cable(s) to be replaced.
Removing and replacing I/O Cables 17