14. Tighten the retaining screws. See “Removing and replacing the enclosure” (page 22)
15. Replace the fan modules. See “Removing and replacing the fan module” (page 19).
16. Replace the I/O module cables. See “Removing and replacing the I/O module” (page 18)
17. Replace power cables and connect the cables to a live power source.
18. Confirm system is powered on and that it is operating normally. See “Verifying the operating
status of the disk enclosures” (page 13)
Removing and replacing the enclosure backplane
This operation is performed after Support determines that the backplane is the source of the
issue and requests the backplane be replaced
WARNING! Check to make sure data on the drives is backed up. Back up data if required.
1. Unplug the power cables.
2. Remove I/O cables. See “Removing and replacing I/O Cables” (page 17)
3. Label drives for removal.
4. Remove the drives. See “Removing a drive” (page 16)
5. Remove power supplies See “Removing and replacing a power supply” (page 18)
6. Remove I/O modules. See “Removing and replacing the I/O module” (page 18)
7. Remove fan modules. See “Removing and replacing the fan module” (page 19)
8. Remove enclosure. See “Removing and replacing the enclosure” (page 22)
9. Pull up hood latch and remove enclosure cover.
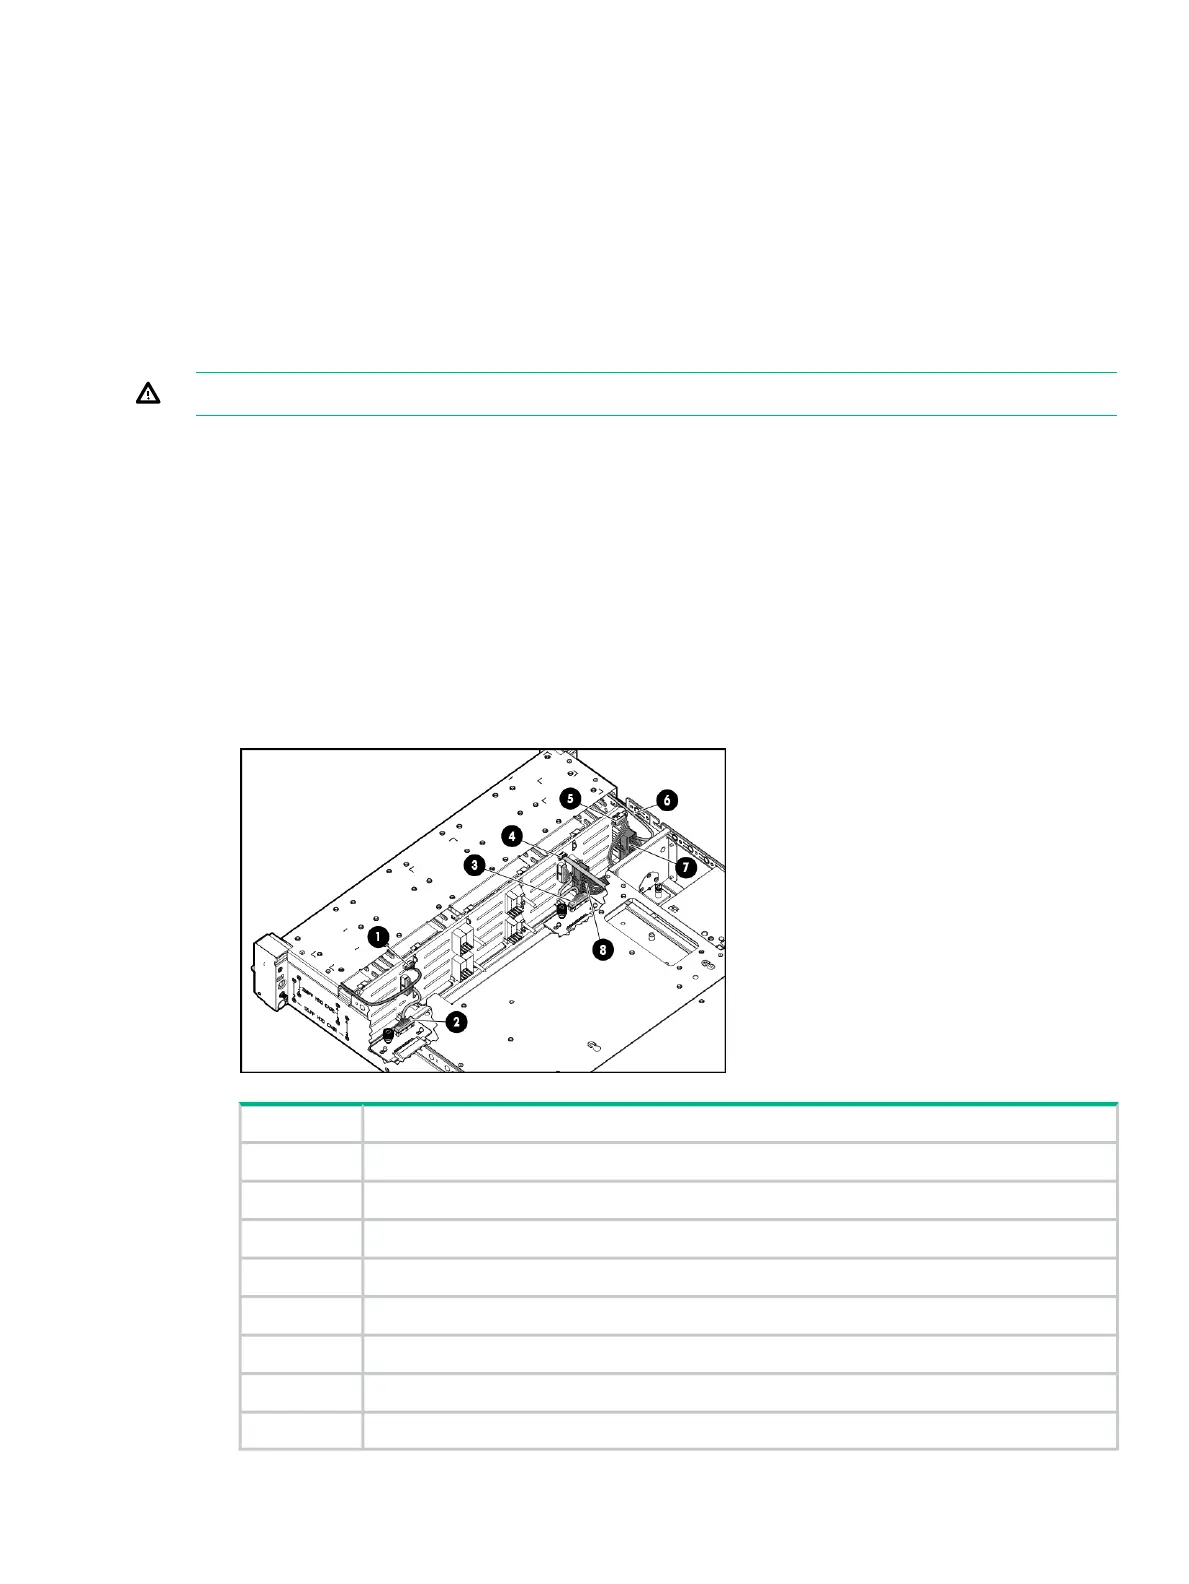
10. Disconnect the following cables from the backplane:
CableNumber
Front UID health module1
Fan control card2
Fan control card3
Rear UID health module4
Power distribution unit5
Rear UID health module6
Power supply7
Power supply8
11. Remove the eight T-10 drive cage retaining screws. There are four to a side.
Removing and replacing the enclosure backplane 25