Fan/heat sink assembly
Description Spare part number
Fan/heat sink assembly (includes fan cables and replacement thermal material) L41018-001
Before removing the fan/heat sink assembly, follow these steps:
1. Turn o the computer. If you are unsure whether the computer is o or in Hibernation, turn the computer
on, and then shut it down through the operating system.
2. Disconnect the power from the computer by rst unplugging the power cord from the AC outlet, and then
unplugging the AC adapter from the computer.
3. Disconnect all external devices from the computer.
4. Remove the bottom cover (see Bottom cover on page 27).
5. Remove the battery (see Battery on page 28).
6. Remove the system board (see System board on page 41).
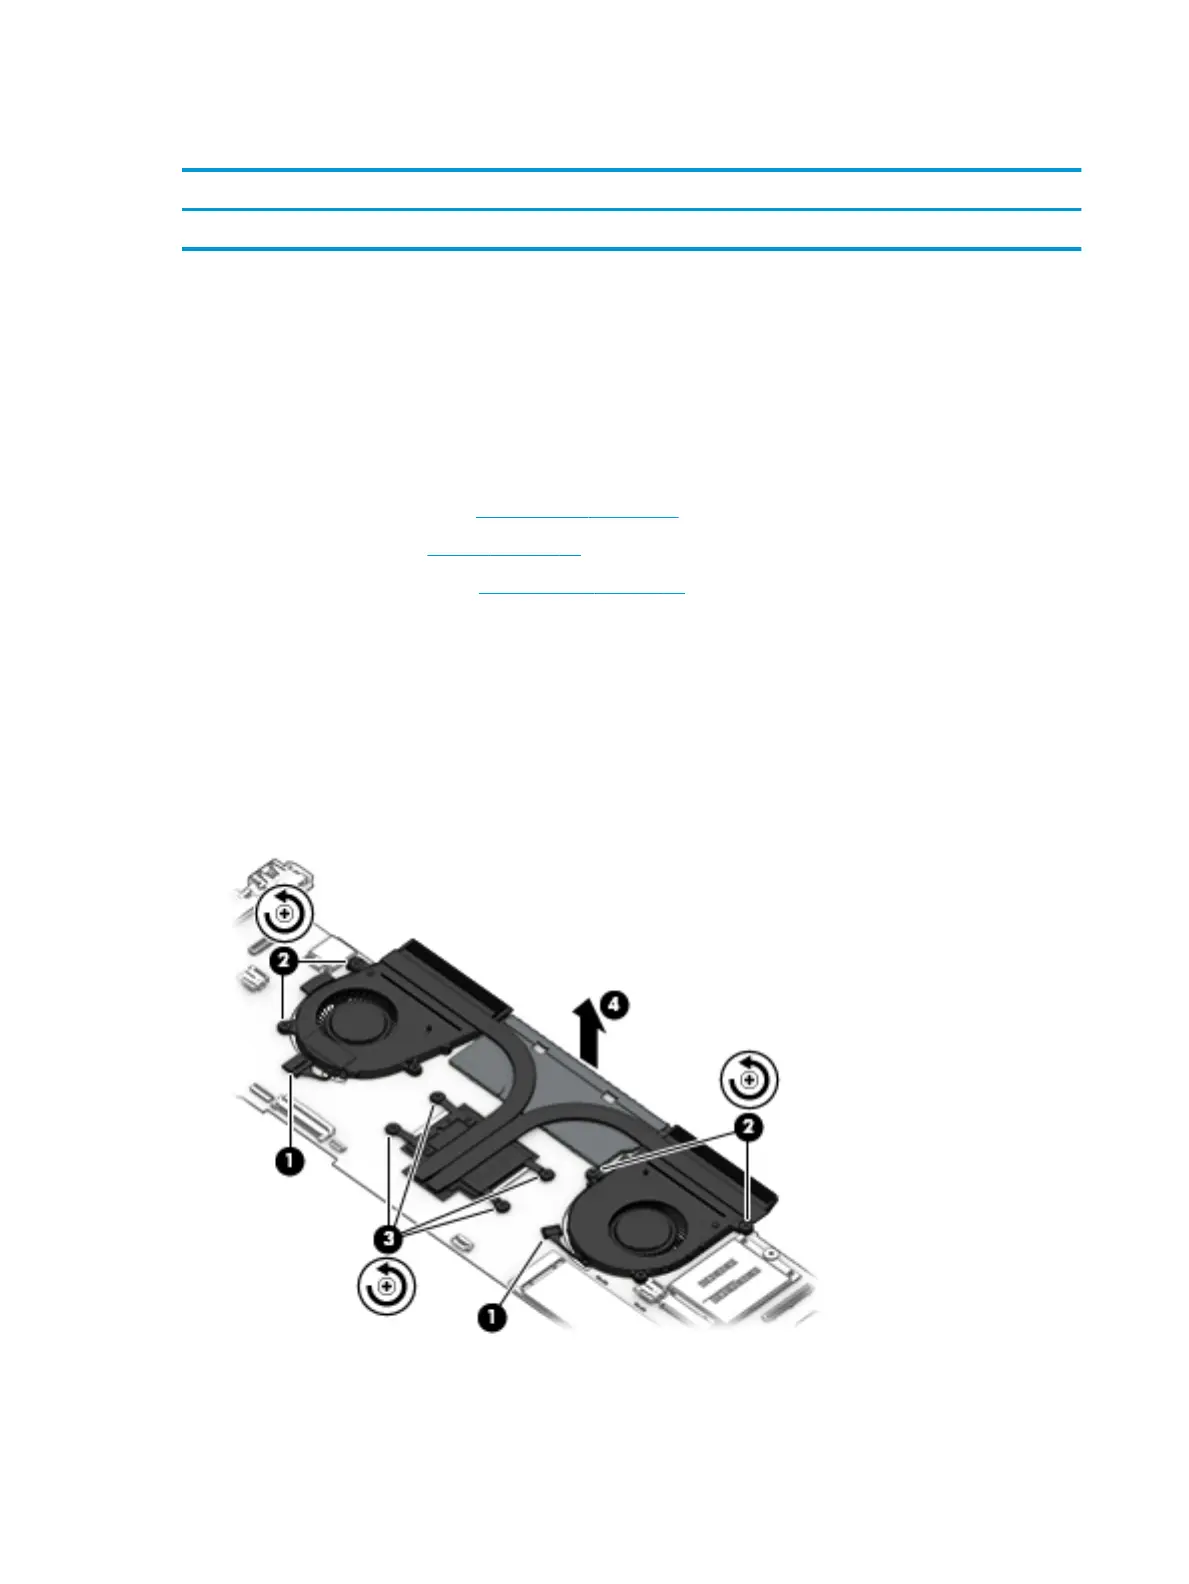
Remove the fan/heat sink assembly:
1. Disconnect the fan cables (1) from the system board.
2. Loosen the four Phillips M2.0×5.8 captive screws (2) that secure the fan/heat sink assembly to
the system board.
3. Loosen the four Phillips M2.0×3.4 captive screws (3) that secure the fan/heat sink assembly to
the system board.
4. Remove the fan/heat sink assembly (4).
44 Chapter 5 Removal and replacement procedures
 Loading...