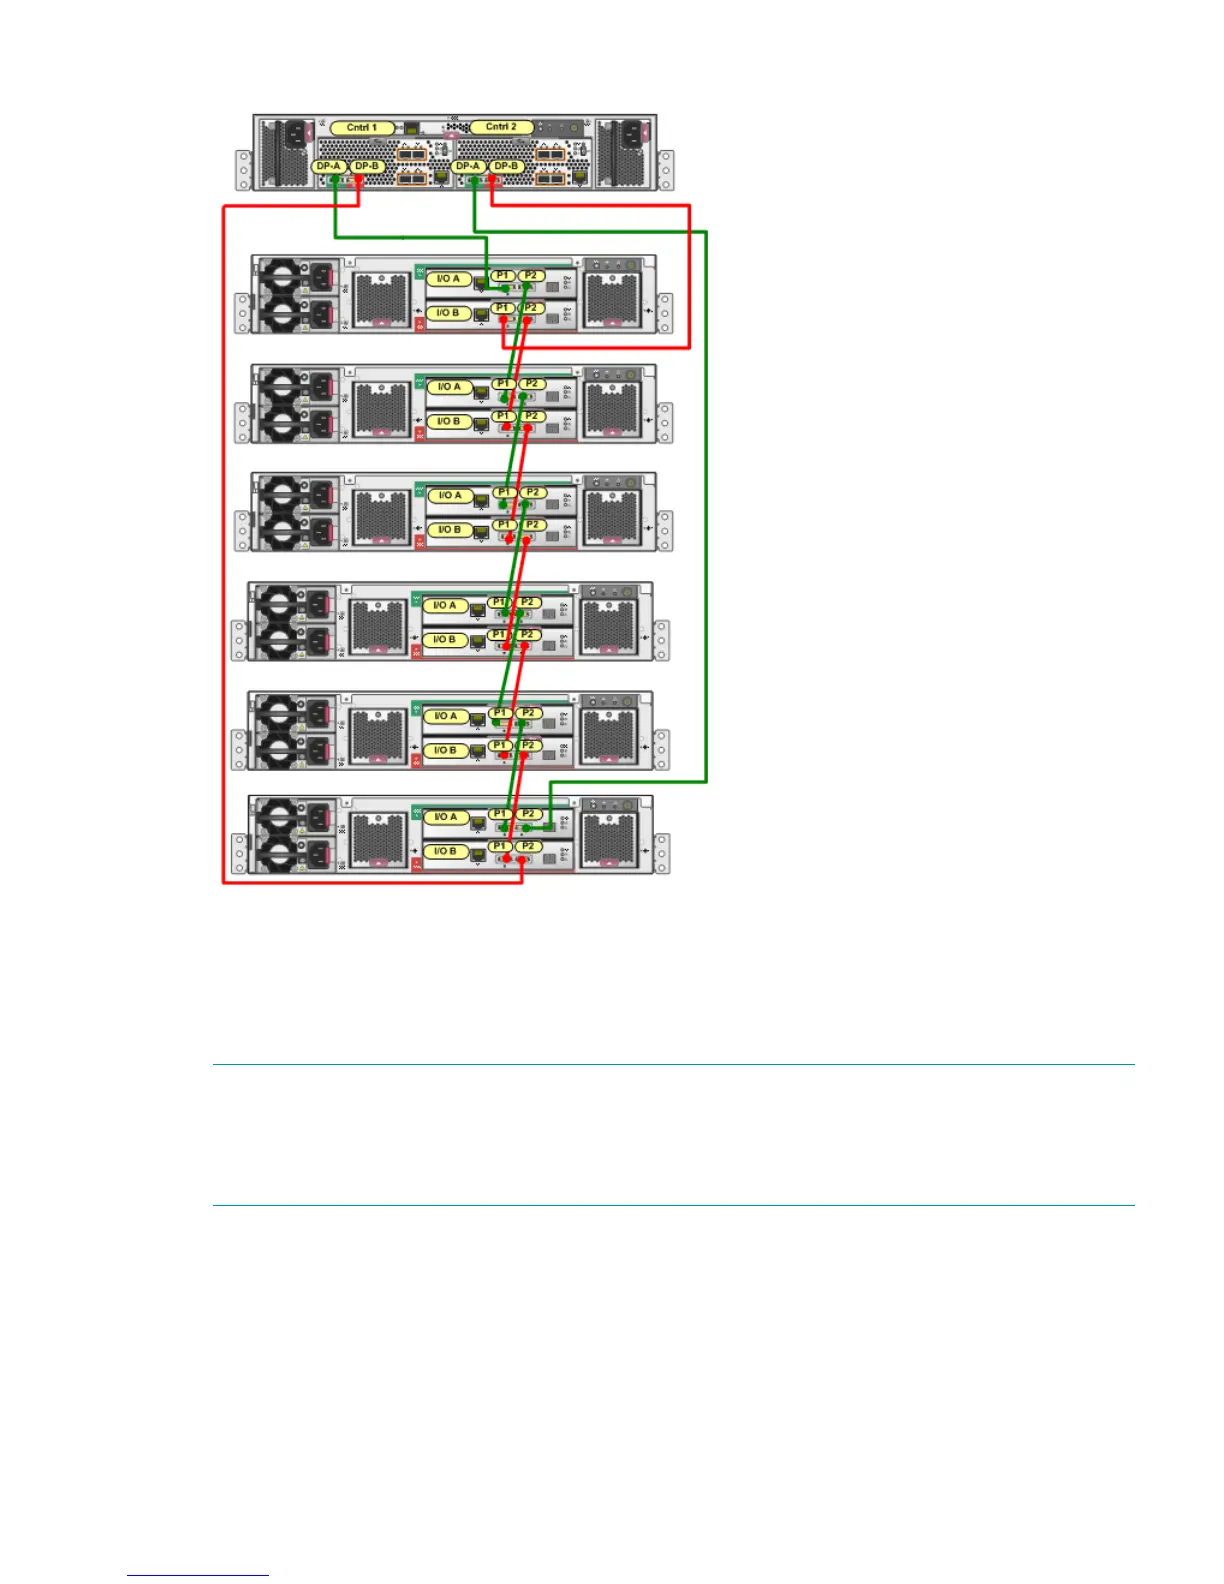
Figure 10 P6300 EVA 2C6D configuration
For the P6300 EVA expansion, you are essentially dividing the six disk enclosures in the main rack
into two groups. The first three disk enclosures below the controller enclosure are in the top group;
the last three disk enclosures are in the bottom group.
To connect one disk enclosure in the expansion rack to a P6300 EVA multi-product main rack
while online:
NOTE:
• Disk enclosures in the expansion rack must be uncabled.
• After connecting one cable pair, verify every aspect of the connection before proceeding to
the next cable pair.
1. Using a power cord provided in your kit, plug one end into the power supply of the expansion
rack disk enclosure you are connecting to and the other end into a rack power distribution
module. You will briefly hear a rush of air as power is applied, and the LEDs on the power
UID flash. The power UID standby switch LED remains amber.
2. With the remaining power cord, connect the other power supply to a rack power distribution
module. The power UID power switch LED turns green. The I/O module index number will
likely display 00, but if not, ignore the index number at this time.
3. Figure 11 (page 14) shows the complete cabling (both I/O modules) to one disk enclosure
in the expansion rack. In the main rack, remove the cable between P2 (I/O-A) in the last disk
enclosure in the top group and P1 (I/O-A) on the first disk enclosure in the bottom group.
Online expansion 13
 Loading...