Do you have a question about the HP M24FD and is the answer not in the manual?
Carefully read cautions and notes to minimize risk of personal injury and ensure safe operation. Follow ESD procedures.
Repair by professional technicians. Observe high voltage areas, use lead-free solder, and match capacitor specs.
Professional repairers need technical competence, compliance with regulations, and liability insurance for repairs.
Products sold in EU must meet RoHS directive. Replacement parts must comply if original parts are RoHS compliant.
Provides general information. Two levels of service: cosmetic/appearance/alignment and circuit board/standard parts replacement.
Firmware updates are available at support.hp.com. Update if posted; otherwise, not needed.
Perform AC leakage current check on exposed metallic parts to ensure safety. Repair if measurements are outside limits.
Details monitor features like screen size, display technology, connectivity options, and software.
Identifies and describes components located on the front of the monitor, including buttons and ports.
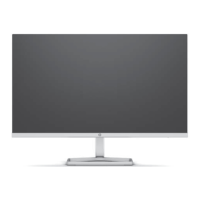
Identifies and describes components located on the rear of the monitor, including ports and slots.
Explains where to find the serial and product numbers on the monitor's labels for identification and support.
Use this information to properly prepare to disassemble and reassemble the monitor. Ensure correct equipment and materials.
Provides steps to remove the Rear Cover of the monitor, following preparation and safety guidelines.
Procedure for repairing HDMI, DisplayPort, and audio connectors on the main board.
Confirms that all functions are working correctly after repair, including image and sound tests.
This document serves as a Maintenance and Service Guide for HP M24fd (M75605) and M27fd (M31383) monitor models, providing comprehensive information on their function, usage, and maintenance. It is intended for trained service personnel familiar with these HP products, emphasizing safety precautions and proper service methods to ensure reliable operation and prevent equipment damage.
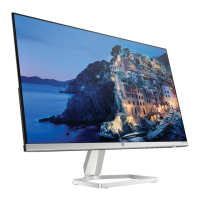
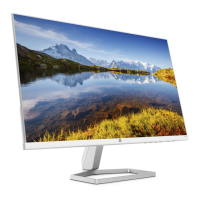
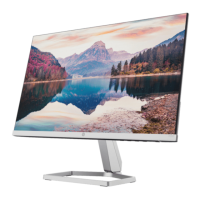
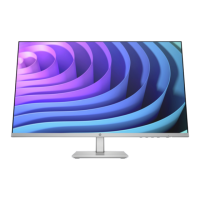
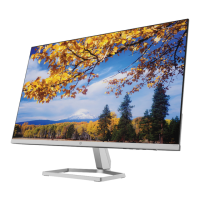
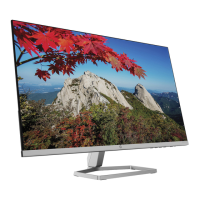
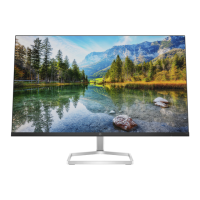
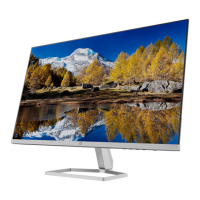
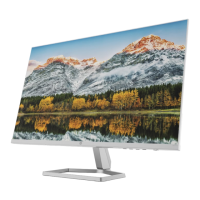
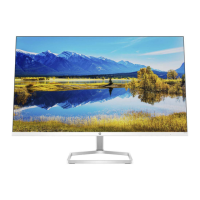
The HP M24fd and M27fd monitors are designed as liquid crystal displays (LCDs) with active matrix and in-plane switching (IPS) technology, offering a high-quality visual experience. They feature a nonglare panel with an LED backlight, contributing to comfortable viewing in various lighting conditions. Depending on the specific model, the monitors offer diagonal viewable screen areas of 60.5 cm (23.8 inches) or 68.6 cm (27.0 inches), both supporting a 1920 × 1080 FHD resolution. They also include full-screen support for lower resolutions, with custom scaling to maximize image size while preserving the original aspect ratio. A key visual feature is the wide color gamut, which provides extensive coverage of sRGB color spaces, enhancing color accuracy and vibrancy.
For user convenience, the monitors are equipped with a wide viewing angle, allowing for clear visibility from various positions, whether sitting, standing, or moving from side to side. Tilt adjustment capability further enhances ergonomic flexibility, enabling users to position the screen for optimal comfort. Connectivity options are robust, including High-Definition Multimedia Interface (HDMI), USB, and USB Type-C ports, as well as a VGA video input, ensuring compatibility with a wide range of source devices such as computers and game consoles. The USB Type-C port is particularly versatile, functioning as a DisplayPort audio/video input, a USB 3.0 connection, and capable of delivering up to 65 W of power to a connected device, with power outputs configurable at 9 V, 10 V, 12 V, 15 V, or 20 V. This port also enables the functionality of the USB Type-A ports.
The user interface includes four on-screen display (OSD) buttons, three of which can be reconfigured to quickly access commonly used operations, streamlining adjustments. The monitors support Plug and Play functionality, simplifying setup with compatible operating systems. For security, a cable slot is located on the rear, allowing for an optional security cable to deter theft. The OSD adjustments are available in multiple languages, facilitating easy setup and screen optimization for users globally. Additionally, HP Display Assistant software is provided for fine-tuning monitor settings and activating theft deterrence features. An energy saver feature is integrated to meet requirements for reduced power consumption, aligning with environmental considerations.
Maintenance features are detailed to guide service personnel through various procedures. The guide emphasizes the importance of adhering to safety information and precautions, such as ensuring a dry and clean working environment, using proper safety devices, and always disconnecting power before opening the product. It highlights that modules with electrical components are sensitive to electrostatic discharge (ESD), requiring adherence to ESD safety procedures. The document also addresses battery handling, warning against disassembly or exposure to high temperatures to prevent explosions, and advises on government requirements for battery recycling or disposal.
For repair, the guide specifies that only professional service technicians in a repair center should perform procedures, not end users. It notes that the primary side of the monitor is a high voltage area, requiring caution. The monitors meet RoHS requirements, and technicians are instructed to use lead-free solder wire when soldering. When replacing capacitors, it is crucial to match polarity, specification, part number, and location. Care must be taken to insert new parts to avoid short circuits. Technicians are advised not to get the board wet, to work quickly when soldering to prevent overheating, and to keep the soldering iron tip clean and tinned. After repairs, a thorough inspection of the circuit board and a function test are required to confirm proper operation and safety.
The guide outlines two levels of service: cosmetic/appearance/alignment service and circuit board or standard parts replacement. Firmware updates, if available, can be found on support.hp.com. Before returning a repaired product to the customer, an AC leakage current check on exposed metallic parts is mandatory to ensure electrical safety.
Disassembly preparation involves reading safety information, cleaning the work area, identifying the disassembly area, planning material flow, and gathering necessary equipment such as a press fixture, working table, screwdriver, knife, gloves, cleaning cloth, ESD protection, and a scraper bar of specified dimensions. The process for removing the rear cover is detailed, including quick release of the base stand, stripping screws, removing DECO components, detaching acetate tapes from LVDS/LED cables, and pulling out the LVDS/LED cable to the panel.
Connector repair procedures are provided for HDMI, VGA, Type C, and USB Type A connectors. These steps involve using a soldering iron and desoldering pump to remove solder, a hot air gun to melt solder, lifting the old connector, placing the new component matching the PCB footprint, and soldering it in place. After any repair, a function test is required to confirm that all functions are working, including HDMI, VGA, Type C, and Hub tests to verify image display, sound, and data readability.
A troubleshooting section addresses common problems such as a blank or flashing screen, an improperly connected video cable, the system in Sleep mode, an incompatible video card, blurred or indistinct images, and messages like "Input Signal Out of Range" or "On-Screen Menus are Locked." Solutions include connecting power cords, properly connecting video cables, exiting Sleep mode, adjusting input settings, increasing brightness, changing video resolution/refresh rate, enabling auto-sleep, and disabling OSD or power button lock functions.
The guide also includes an illustrated parts catalog for both M24fd and M27fd models, listing major components with their descriptions and quantities. Information on how to order parts is provided, directing users to the HP part store and mentioning EU distributors for internal and external power supplies. It emphasizes that HP continually improves and changes product parts, advising users to refer to partsurfer.hp.com for the most current information.
| Color gamut | 99 % |
|---|---|
| Pixel pitch | 0.275 x 0.275 mm |
| Screen shape | Flat |
| Pixel density | 93 ppi |
| Backlight type | Edge LED |
| Display diagonal | 23.8 \ |
| Surface hardness | 3H |
| Anti-glare screen | Yes |
| Display technology | LED |
| Native aspect ratio | 16:9 |
| Vertical scan range | 48 - 75 Hz |
| Maximum refresh rate | 75 Hz |
| Contrast ratio (typical) | 1000:1 |
| Display number of colors | - |
| Display brightness (typical) | 300 cd/m² |
| Supported graphics resolutions | 640 x 480 (VGA), 720 x 400, 800 x 600 (SVGA), 1024 x 768 (XGA), 1280 x 1024 (SXGA), 1280 x 720 (HD 720), 1280 x 800 (WXGA), 1440 x 900 (WXGA+), 1600 x 900, 1680 x 1050 (WSXGA+), 1920 x 1080 (HD 1080) |
| AC input voltage | 100 - 240 V |
| AC input frequency | 50 - 60 Hz |
| Power consumption (max) | 117 W |
| Power consumption (standby) | 0.5 W |
| Power consumption (typical) | 27 W |
| Operating temperature (T-T) | 5 - 35 °C |
| Storage relative humidity (H-H) | 5 - 95 % |
| Operating relative humidity (H-H) | 20 - 80 % |
| Cables included | AC, HDMI, USB Type-C |
| HDMI version | 1.4 |
| USB Type-A downstream ports quantity | 2 |
| Package depth | 121 mm |
| Package width | 610 mm |
| Package height | 399 mm |
| Package weight | 5100 g |
| Tilt angle range | -5 - 25 ° |
| Product color | Silver |
| Market positioning | Home |
| Depth | 34 mm |
| Height | 315.6 mm |
| Depth (with stand) | 39.68 mm |
|---|---|
| Width (with stand) | 53.58 mm |
| Height (with stand) | 17.72 mm |
| Weight (with stand) | 2600 g |
| Depth (without stand) | 3.4 mm |
| Width (without stand) | 535.8 mm |
| Height (without stand) | 31.56 mm |