Do you have a question about the HP P22v G5 and is the answer not in the manual?
Carefully read the cautions and notes within this document to minimize the risk of personal injury to service personnel.
Repair must be performed by professional service technicians in a repair center. End users should not perform these procedures.
The RoHS (Restriction of Hazardous Substance in Electrical and Electronic Equipment Directive) is a legal requirement by the EU.
This manual contains general information. There are two levels of service: cosmetic/appearance/alignment and circuit board/standard parts replacement.
Firmware updates for the monitor are available at support.hp.com. If no firmware is posted, the monitor does not need a firmware update.
Perform an AC leakage current check on exposed metallic parts to be sure the product is safe to operate without the potential of electrical shock.
Details the monitor's specifications, including screen size, resolution, panel type, and viewing angles.
Identifies and describes the components located on the front of the monitor, such as the power button and LED.
Identifies and describes the components located on the rear of the monitor, including ports and connectors.
Provides instructions on how to find the serial number and product number on the monitor's labels.
Details how to order replacement parts, including HP spare part numbers and distributor information.
Steps to prepare for monitor disassembly, including safety information and required tools and materials.
Procedure for removing the rear cover, including steps for unscrewing and disconnecting components.
Procedure for removing and replacing the power board, including important safety precautions and repair conditions.
Instructions for repairing connectors on the main board, identifying the HDMI connector (J3).
Detailed steps for repairing the HDMI connector J3, including desoldering, component replacement, and soldering.
Procedure for cutting and applying a gasket to the shielding for the HDMI connector to prevent short circuits.
Confirms that all functions are working correctly after repair, focusing on HDMI display and sound output.
Provides solutions for common problems, listing potential causes and recommended actions for screen and input issues.
This document serves as a Maintenance and Service Guide for the HP P22v G5 monitor, providing comprehensive information for trained service personnel. It outlines the device's functions, usage features, and detailed maintenance procedures, including spare parts, removal and replacement instructions, diagnostic tests, and troubleshooting.
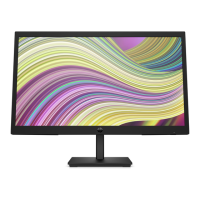
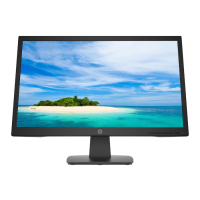
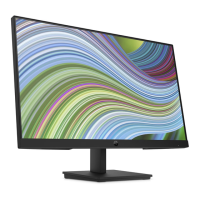
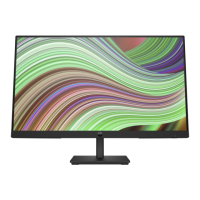
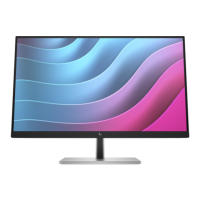
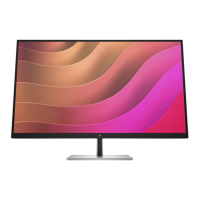
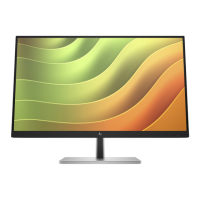
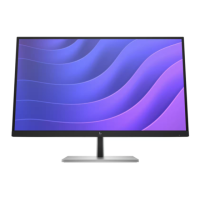
The HP P22v G5 monitor is designed for general display purposes, offering a clear visual experience. It features a user-friendly interface with a power button and a power LED located on the front for easy access and status indication. The rear of the monitor includes essential connectivity options such as a security cable slot for optional security cables, a power connector for an AC adapter, an HDMI port for connecting to source devices like computers or game consoles, and a VGA port for similar connections. The monitor's design incorporates a removable stand, allowing for flexible mounting solutions, including compatibility with VESA® mounting brackets for wall-mount devices or swing arms. A notable feature is the HP Quick Release 2 device, which facilitates quick attachment and removal of the monitor head from the stand with a simple click and a sliding tab release.
For optimal user experience, the monitor includes a 4-way on-screen display (OSD) controller that can be reconfigured for quick selection of three commonly used operations. It also supports Plug and Play capability, simplifying setup with compatible operating systems. Cable management features are integrated to help organize cables and cords, contributing to a tidy workspace. On-screen adjustments are available in multiple languages for easy setup and screen optimization, and an energy saver feature helps meet requirements for reduced power consumption.
Maintenance and service of the HP P22v G5 monitor are strictly intended for trained service personnel. The guide emphasizes important safety information and precautions, such as ensuring a dry and clean working environment, using proper safety devices, and always disconnecting power before opening the product's cabinet. Modules containing electrical components are sensitive to electrostatic discharge (ESD), necessitating adherence to ESD safety procedures during handling. The document also warns about products containing multiple batteries, advising against disassembly or exposure to high temperatures to prevent explosion, and recommends referring to government requirements for battery recycling or disposal.
The service information highlights that repairs must be performed by professional service technicians in a repair center, not by end-users. It specifies that the primary side of the monitor is a high voltage area, requiring extreme caution during servicing. The monitor complies with RoHS requirements, mandating the use of lead-free solder wire for soldering. When replacing capacitors, it is crucial to match polarity, specification, and part number according to the Bill of Materials (BOM) and location, and to insert new parts carefully to avoid short circuits. The guide also advises against getting the circuit board wet, working quickly during soldering to prevent overheating, and keeping the soldering iron tip clean and well-tinned. After any repair, a close inspection of the circuit board and a function test are required to confirm proper operation.
The guide details procedures for disassembling and reassembling the monitor, including steps for removing the rear cover, power board, and addressing connector repairs. For power board repair, specifically capacitor replacement, the process involves disconnecting the power cord, discharging EL capacitors using a multimeter, lifting damaged capacitors, and carefully placing and soldering new components while ensuring correct polarity and footprint match. The document also provides instructions for repairing the HDMI connector, which involves removing old solder, melting remaining solder with a hot air gun, lifting the old connector, and soldering a new one. A unique maintenance step involves sticking a gasket on the shielding for the HDMI connector, with precise instructions on cutting, aligning, and pressing the gasket to prevent short circuits.
Before returning a repaired product to the customer, an AC leakage current check on exposed metallic parts is mandatory to ensure electrical safety. The guide also includes a troubleshooting section that lists common problems, their possible causes, and recommended solutions, such as connecting the power cord, powering on the monitor, properly connecting video cables, exiting Sleep mode, adjusting brightness, and disabling OSD or power button lock functions. Firmware updates, if available, can be found on support.hp.com. The document also provides information on how to order spare parts, including power boards, capacitors, connectors, and cables, from HP authorized repair centers and specified EU distributors.
| Color depth | 8 bit |
|---|---|
| Color gamut | 72 % |
| Pixel pitch | 0.25 x 0.24 mm |
| Screen shape | Flat |
| Pixel density | 103 ppi |
| Display diagonal | 21.45 \ |
| Surface hardness | 3H |
| Native aspect ratio | 16:9 |
| Vertical scan range | 48 - 75 Hz |
| Maximum refresh rate | 75 Hz |
| Horizontal scan range | 54 - 88.1 kHz |
| Contrast ratio (dynamic) | 8000000:1 |
| Contrast ratio (typical) | 3000:1 |
| Display number of colors | 16.7 million colors |
| Display diagonal (metric) | 54.5 cm |
| Display brightness (typical) | 200 cd/m² |
| Supported graphics resolutions | 640 x 480 (VGA), 720 x 400, 800 x 600 (SVGA), 1024 x 768 (XGA), 1280 x 720 (HD 720), 1280 x 800 (WXGA), 1440 x 900 (WXGA+), 1600 x 900, 1680 x 1050 (WSXGA+), 1920 x 1080 (HD 1080) |
| HDCP | Yes |
| HDMI version | 1.4 |
| AC input voltage | 100 - 240 V |
| AC input frequency | 50 - 60 Hz |
| Power consumption (max) | 21 W |
| Power consumption (standby) | 0.5 W |
| Power consumption (typical) | 11 W |
| Operating temperature (T-T) | 5 - 35 °C |
| Operating relative humidity (H-H) | 20 - 80 % |
| Tilt angle range | -5 - 23 ° |
| Panel mounting interface | 100 x 100 mm |
| Feet color | Black |
| Market positioning | Business |
| Package weight | 4300 g |
| Depth (with stand) | 180.5 mm |
|---|---|
| Width (with stand) | 504.2 mm |
| Height (with stand) | 386.9 mm |
| Weight (with stand) | 2800 g |
| Depth (without stand) | 50.8 mm |
| Height (without stand) | 303 mm |