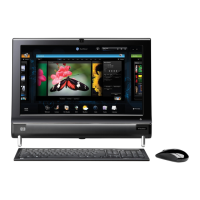
Display Panel
Description Spare part number
Display panel, 18.5-inch, non-ZBD, 200 nits 671542-001
The display panel is secured to the display bracket with four screws (two on each side). This
procedure continues the previous section that shows how to remove the bezel while removing a
minimum number of components.
To remove the display panel:
1. Prepare the computer for disassembly (see
Preparing to Disassemble the Computer
on page 34).
2. Remove the rear cover (see
Rear Cover on page 35).
3. Remove the system board cover (see
System Board Cover on page 60).
4. Disconnect the speaker cables from the system board (see
Speakers on page 42).
5. Remove the front bezel (see
Front Bezel on page 69).
6. Remove the two screws that secure the display panel to the bracket.
Figure 7-38 Removing the display panel screws
7. Remove the two screws that secure the display panel to the bracket.
Figure 7-39 Removing the display panel screws
8. Disconnect the two LCD backlight cables from the inverter board.
9. Lift the bracket assembly from the bottom side of the display.
70 Chapter 7 Removal and Replacement Procedures All-in One (AIO) Chassis