7. Remove the existing processor heatsink assembly:
a. Allow the heatsink to cool.
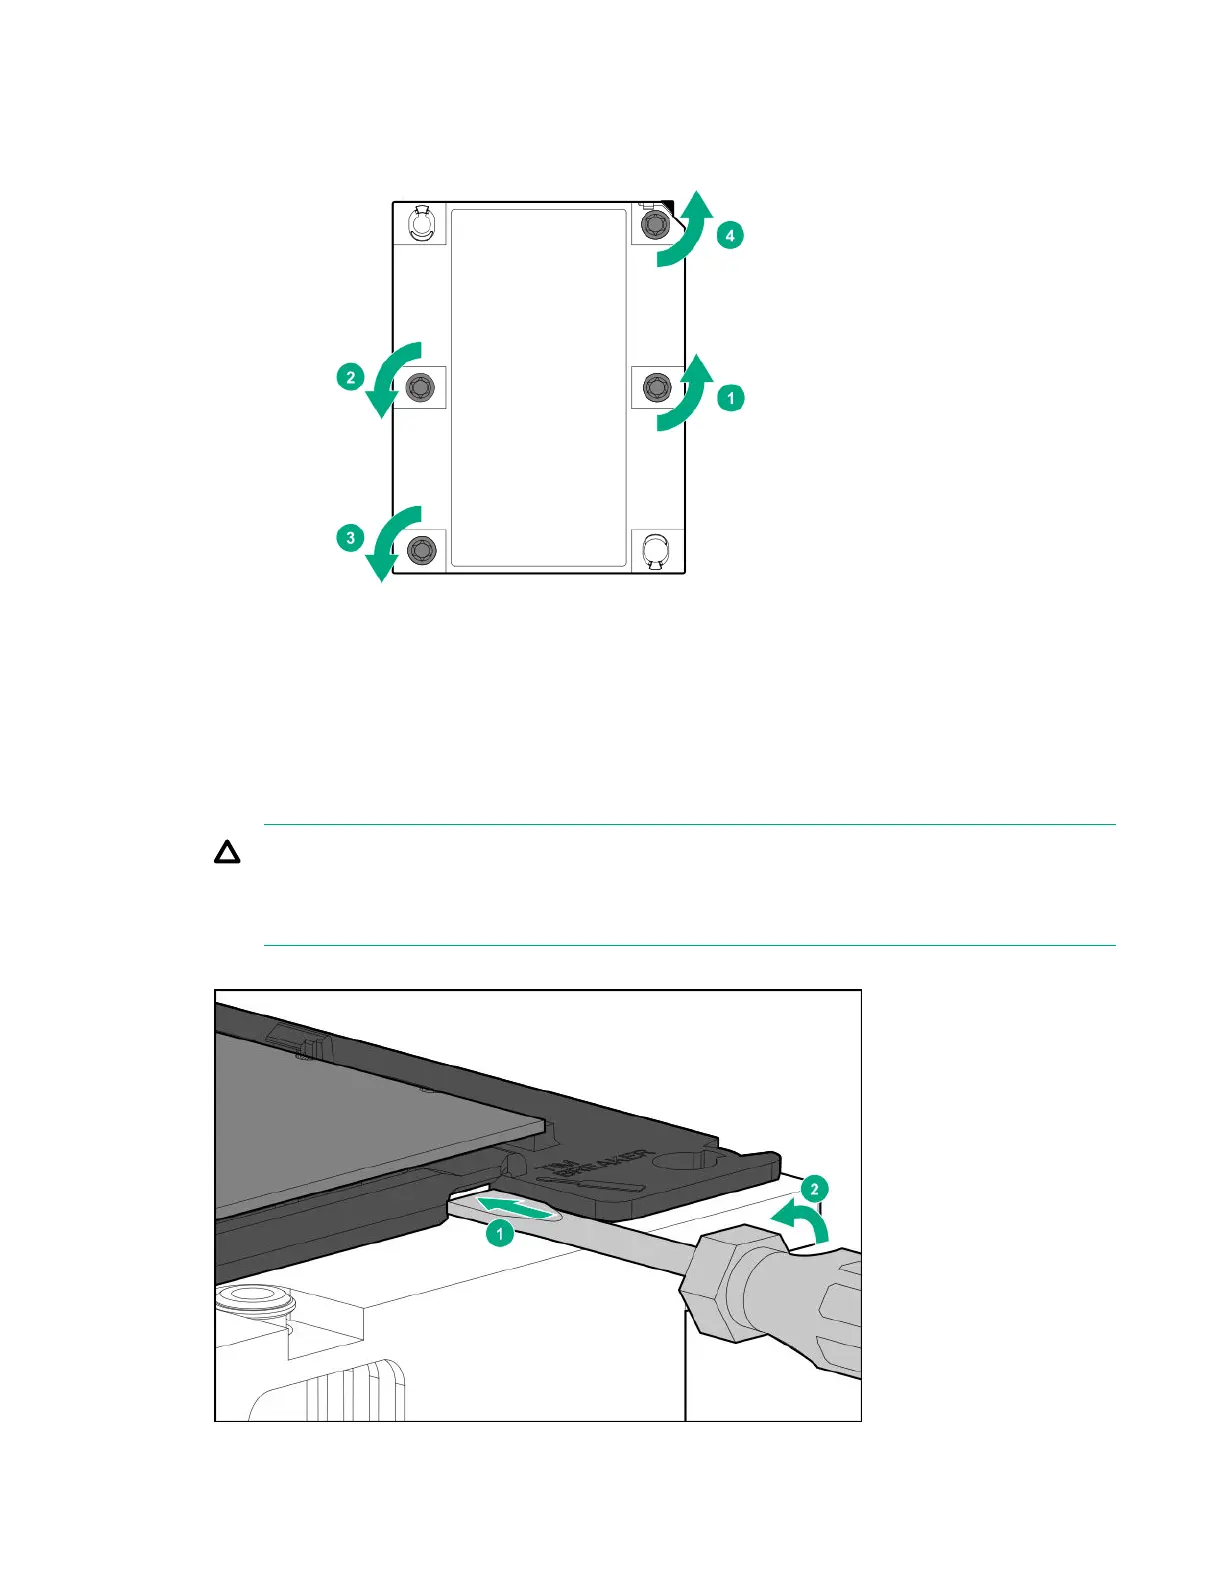
b. Using a T-30 Torx screwdriver, loosen the heatsink nuts.
c. Lift the processor heatsink assembly up and away from the system board.
d. Turn the processor heatsink assembly over and place it on a work surface with the processor
assembly facing up.
8. Release the thermal grease adhesion between the processor assembly and heatsink:
a. Locate the TIM (thermal interface media) breaker slot between the processor assembly and heatsink.
The slot is across from the Pin 1 indicator, near the corner.
b. Insert a 1/4" flat blade screwdriver or nonconductive tool into the slot.
CAUTION:
To avoid damage to the processor, insert the tool between the processor and the heatsink base.
The opening in the carrier provides access to a gap between the processor heatsink spreader
and the heatsink base.
c. To release the adhesion of the thermal grease, gently rotate the tool.
92 Hardware options installation
 Loading...