Removal and replacement procedures 59
11.
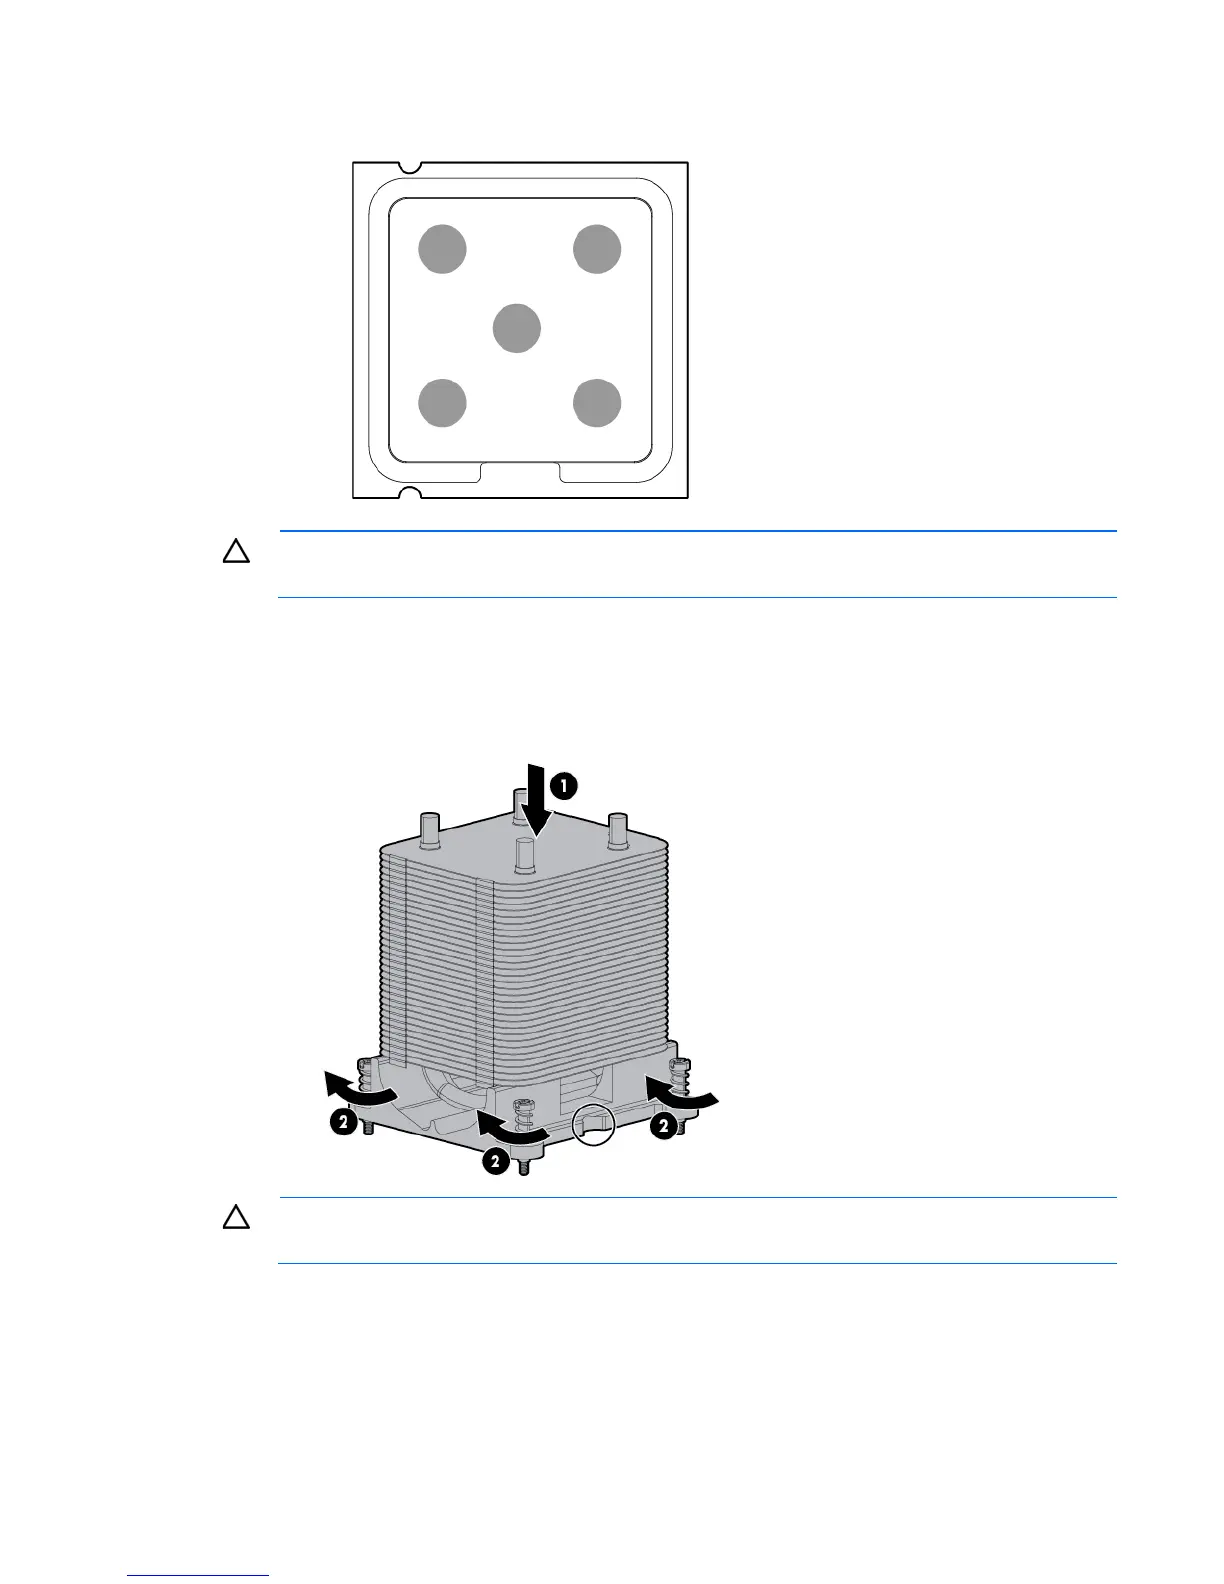
Apply all the grease to the top of the processor in the following pattern to ensure even distribution.
CAUTION: Do not overtighten the screws as this might damage the board, connectors, or screws
and voids the warranty of the board.
12. Install the heatsink:
a. Position the heatsink using the guide pin on the processor backplate.
b. Tighten one pair of diagonally opposite screws halfway, and then tighten the other pair of screws.
c. Finish the installation by completely tightening the screws in the same sequence.
CAUTION: When returning a damaged system board to HP, always install all processor socket
covers to prevent damage to the processor sockets and system board.
 Loading...