User and Group Management
76 NAS 1000s Administration Guide
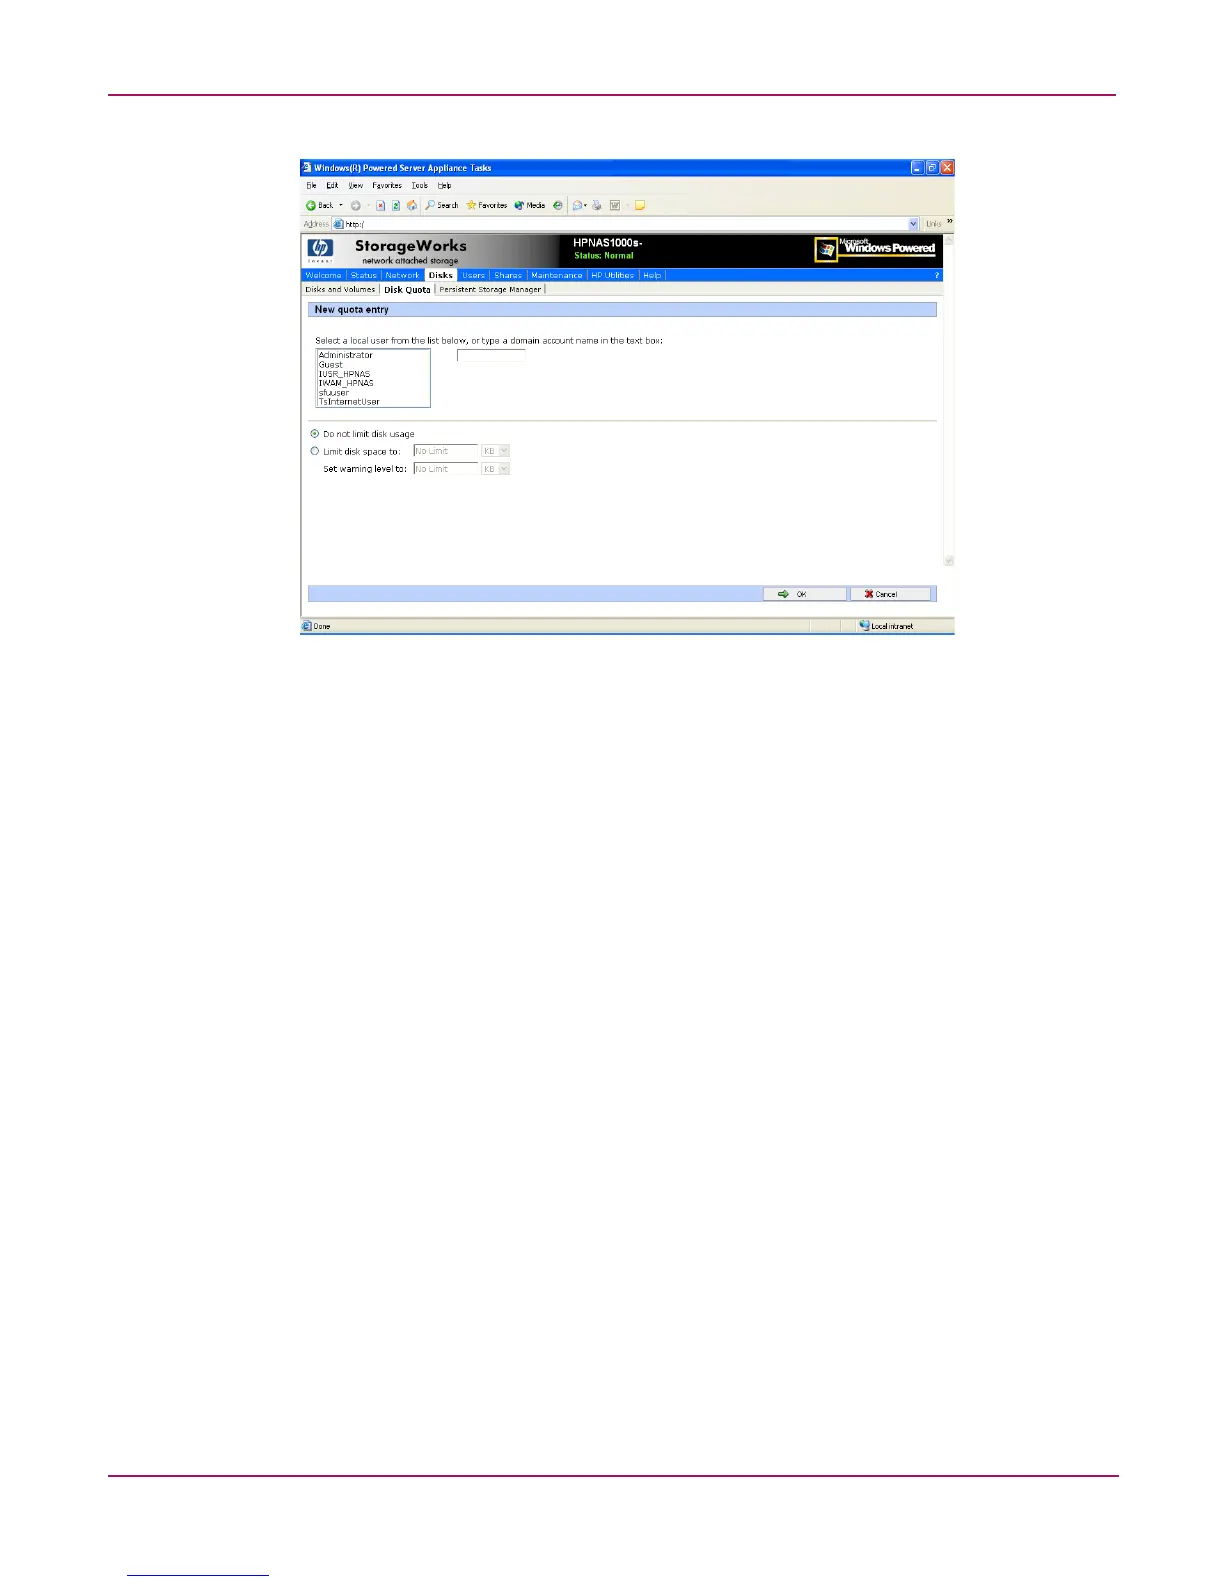
Figure 36: New Quota Entry dialog box
3. Indicate the user that the quota is for. For local users and groups, select the desired user
from the Select a local user box. For users on the domain, enter the user's domain account
name in the indicated box.
4. Enter a disk space limit.
5. Verify the accuracy of the field entries, and then click OK. The Quota Entries dialog box
is displayed again.
Deleting Quota Entries for a User or Group
To delete quotas for a user or group:
1. From the WebUI, select Disks, Disk Quotas. In the Volumes and Quotas dialog box,
select a volume and then click Quota Entries. The Quota Entries dialog box is
displayed.
2. All users and groups with established quotas are displayed. To delete a quota for a user or
group, click Delete. A verification dialog box is displayed.
3. Verify that this is the correct user, and then click OK. The Quota Entries dialog box is
displayed again.
Modifying Quota Entries for a User or Group
Usage limit parameters for a user's quota can be changed. To modify these user quota settings:
1. From the WebUI, select Disks, Disk Quotas. In the Volumes and Quotas dialog box,
select a volume and then click Quota Entries. The Quota Entries dialog box is
displayed.
2. All users and groups with established quotas are displayed. To modify quota for a user or
group, select a user, and then click Properties. The Quota Entry dialog box for that user
is displayed.
 Loading...