Rack Installation
18 1U Rackmount Tape Enclosure Reference Guide
Installing the rack rails
Installation procedures vary depending on the rack type. The rails are shipped
ready for installation in racks with round or square holes. If the rails are to be
installed in racks with 10-32 threaded holes, the mounting pins must first be
removed. Refer to one of the following sections for installation instructions for
your rack.
■ “Installation in racks with round or square holes” on page 18
■ “Installation in racks with 10-32 threaded holes” on page 20
Installation in racks with round or square holes
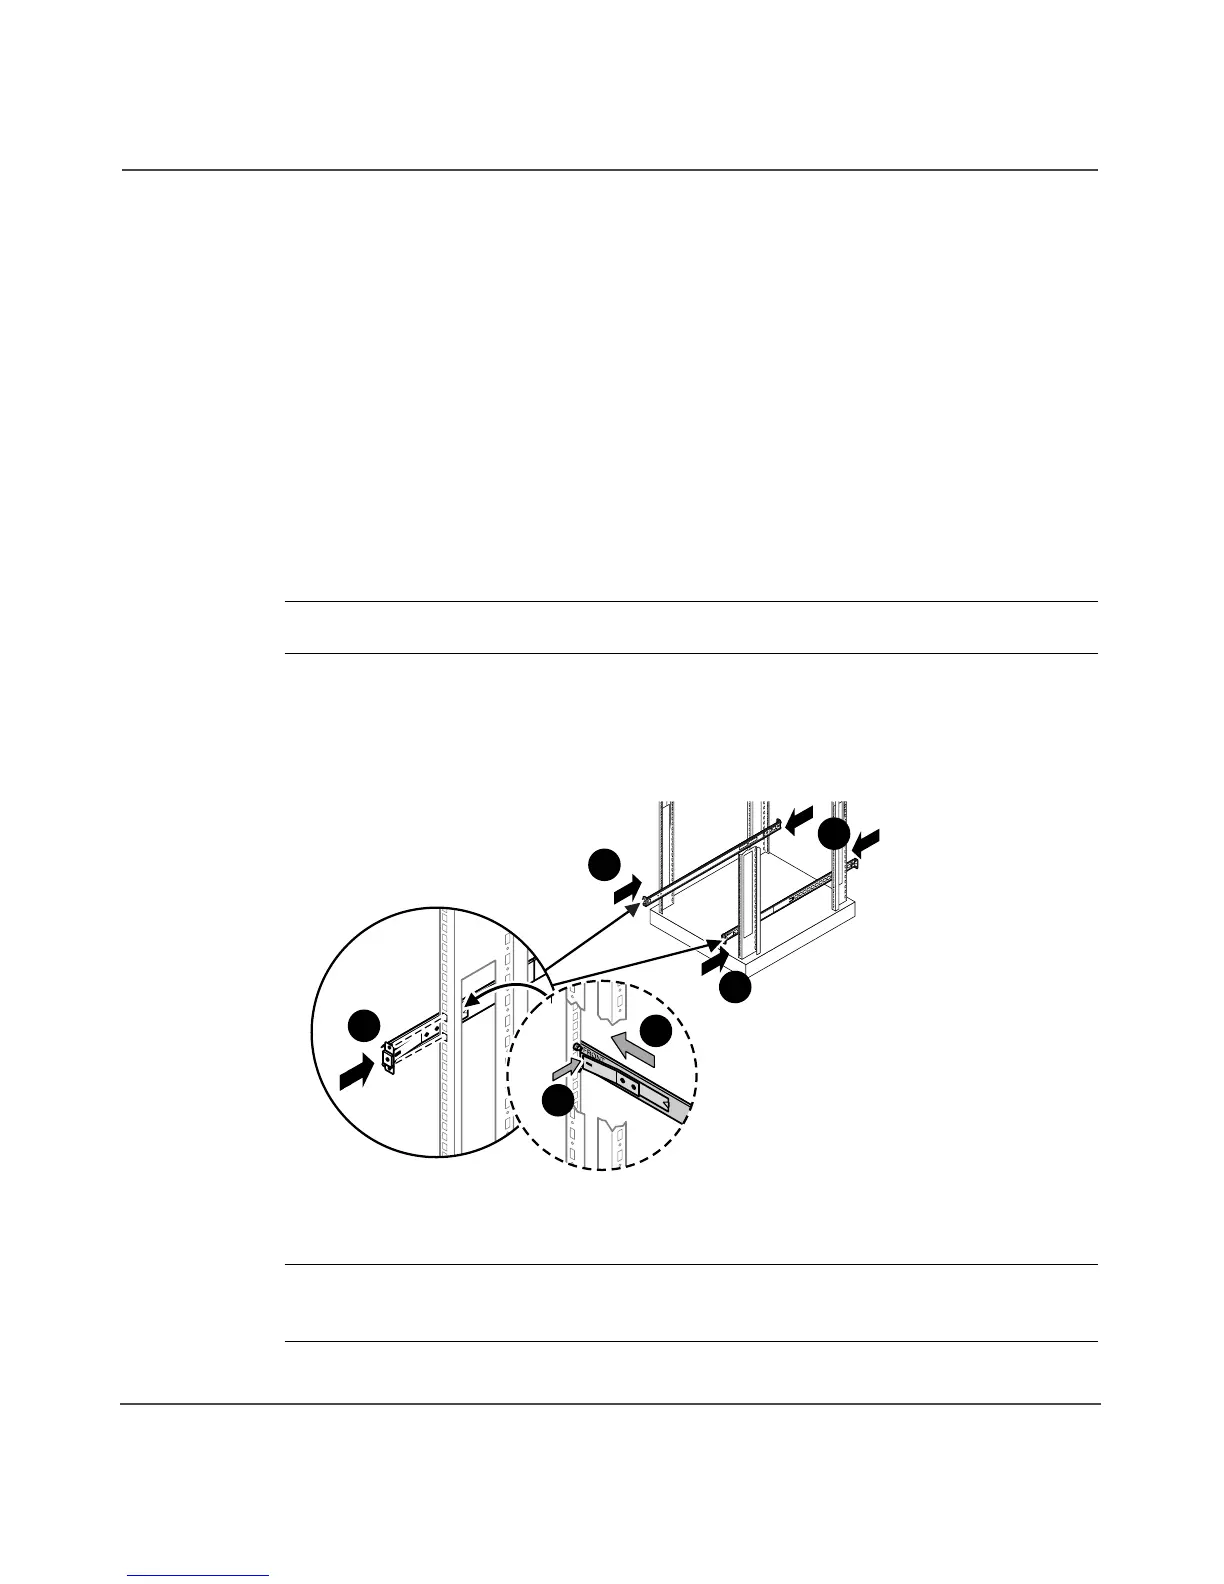
Note: The ends of the rack rails are marked FRONT and REAR for proper orientation.
1. Insert the pins in front mounting plate of the outer rack rails into the
previously marked holes in the front vertical mounting bars of the rack. See
Figure 8. The rack rails will lock securely into place.
Figure 7: Installing the rack rails in front of rack
Note: To remove the rail for repositioning, push the spring-loaded tab 3 on the
outside of the rack rail and slide it forward
4.
15116
FRO
NT
1
2
1
1
4
3