Tape Drive Installation and Replacement
40 1U Rackmount Tape Enclosure Reference Guide
WARNING: To avoid injury from rotating fan blades, do not attempt to
operate the tape enclosure with the top removed.
Caution: When reinstalling the top cover, be sure the latch is fully engaged
and is flush with the cover to avoid interference with devices installed above
the 1U tape enclosure in the rack.
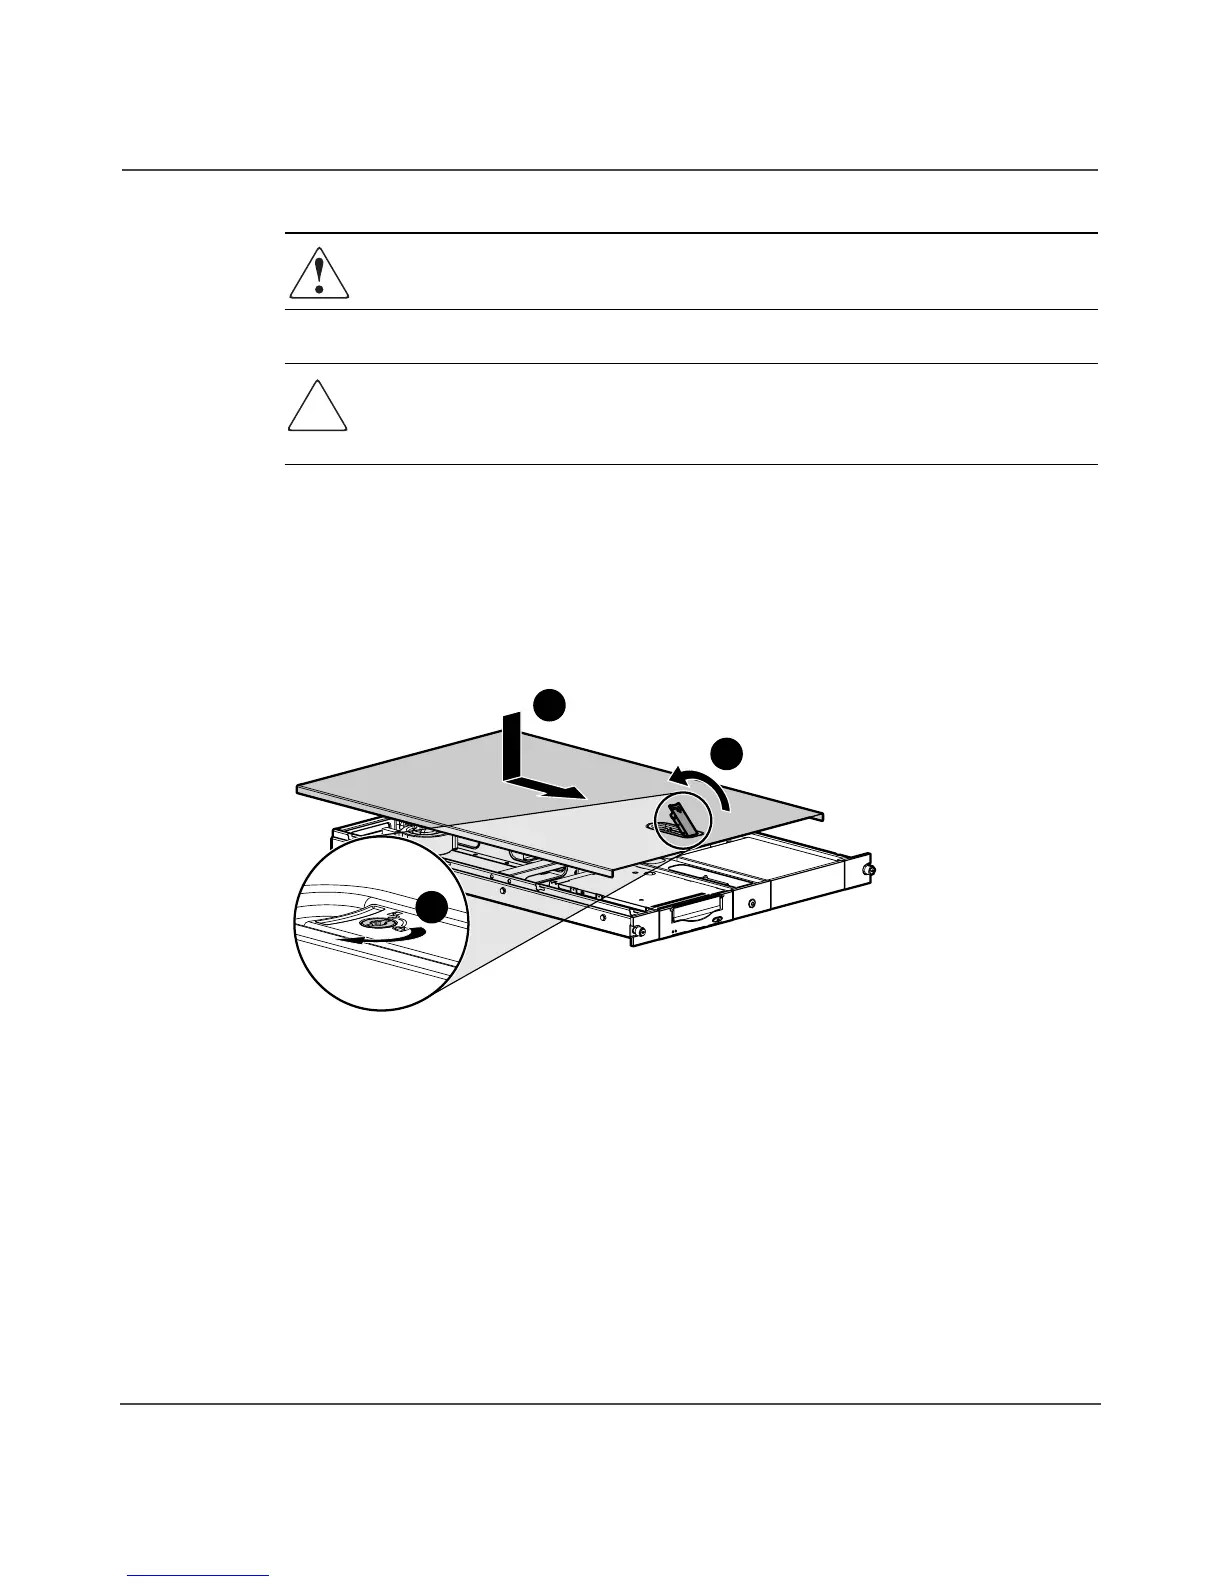
14. Replace the top cover by placing it on top of the enclosure 1, engaging all the
pins into slots in both sides of the enclosure as well as the central pin in the
latch. Push the latch down flush with the top 2 and turn the lock clockwise 3
to prevent accidental opening. See Figure 31
Figure 31: Replacing the top cover
15. Slide the enclosure fully into the rack and tighten the two front panel
thumbscrews.
16. If used reattach the cable bundle to the cable support assembly at the rear of
the rack. See Figure 32.
15128
3
2
1