EasyManuals Logo

HP TouchSmart 9300 Hardware Reference Guide

HP TouchSmart 9300
45 pages
To Next Page IconTo Next Page
To Previous Page IconTo Previous Page
Page #31 background imageLoading...
Page #31 background image
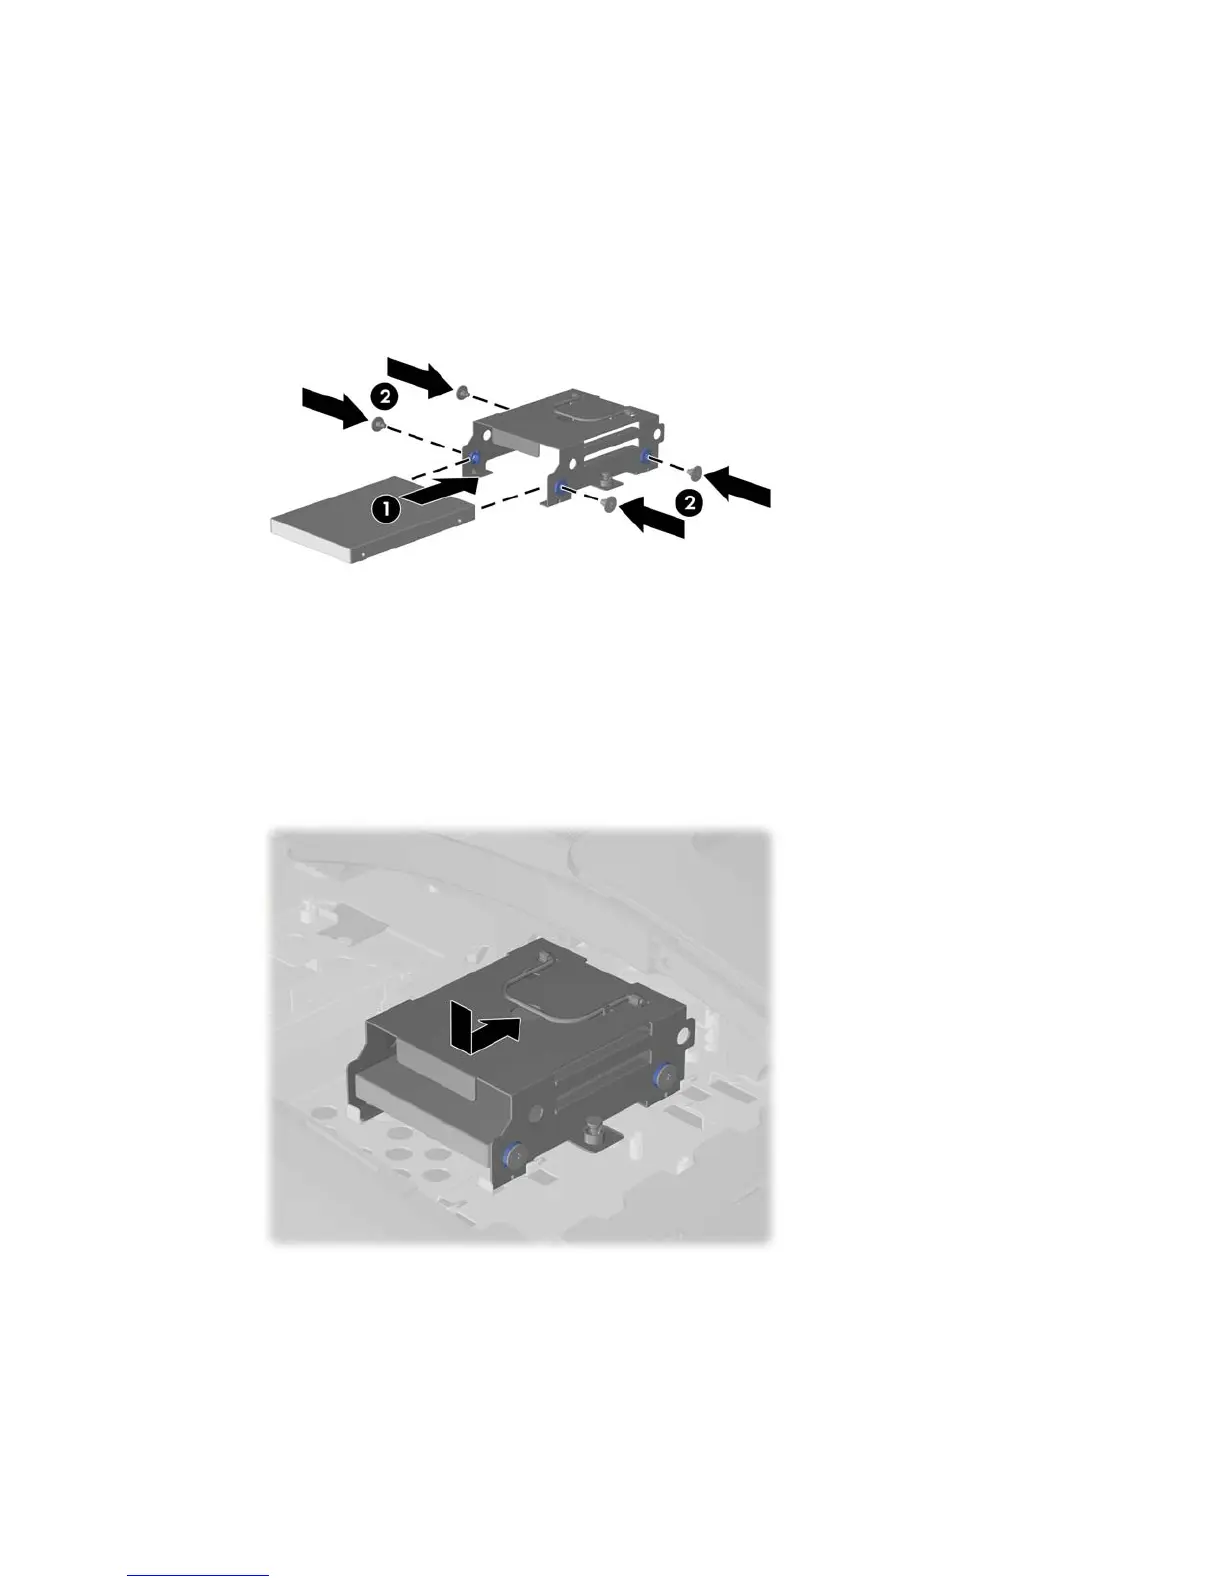
16. Slide the new hard drive into the hard drive cage (1) making sure that the connectors on the
hard drive are on the same end of the cage as the handle, and then install the four screws that
secure the drive to the cage (2).
Figure 2-25 Installing the Hard Drive in the Cage
17. Set the hard drive cage down into the bay, aligning the tabs on the bottom of the cage with the
tabs on the chassis, then slide the drive back toward the center of the computer until it stops,
ensuring that the connector on the end of the drive is properly seated.
Figure 2-26 Installing the Hard Drive Cage
ENWW Replacing the Hard Drive 25

Other manuals for HP TouchSmart 9300

Questions and Answers:

Question and Answer IconNeed help?

Do you have a question about the HP TouchSmart 9300 and is the answer not in the manual?

HP TouchSmart 9300 Specifications

General IconGeneral
Resolution1920 x 1080
AudioIntegrated High Definition Audio
Storage1TB HDD
Display23-inch
Operating SystemWindows 7
Networking10/100/1000 Gigabit Ethernet
Wireless802.11b/g/n
PortsUSB 2.0, Headphone, Microphone, Ethernet

Related product manuals