EasyManuals Logo

HPE OfficeConnect 1420 Series User Manual

HPE OfficeConnect 1420 Series
26 pages
To Next Page IconTo Next Page
To Previous Page IconTo Previous Page
Page #10 background imageLoading...
Page #10 background image
9
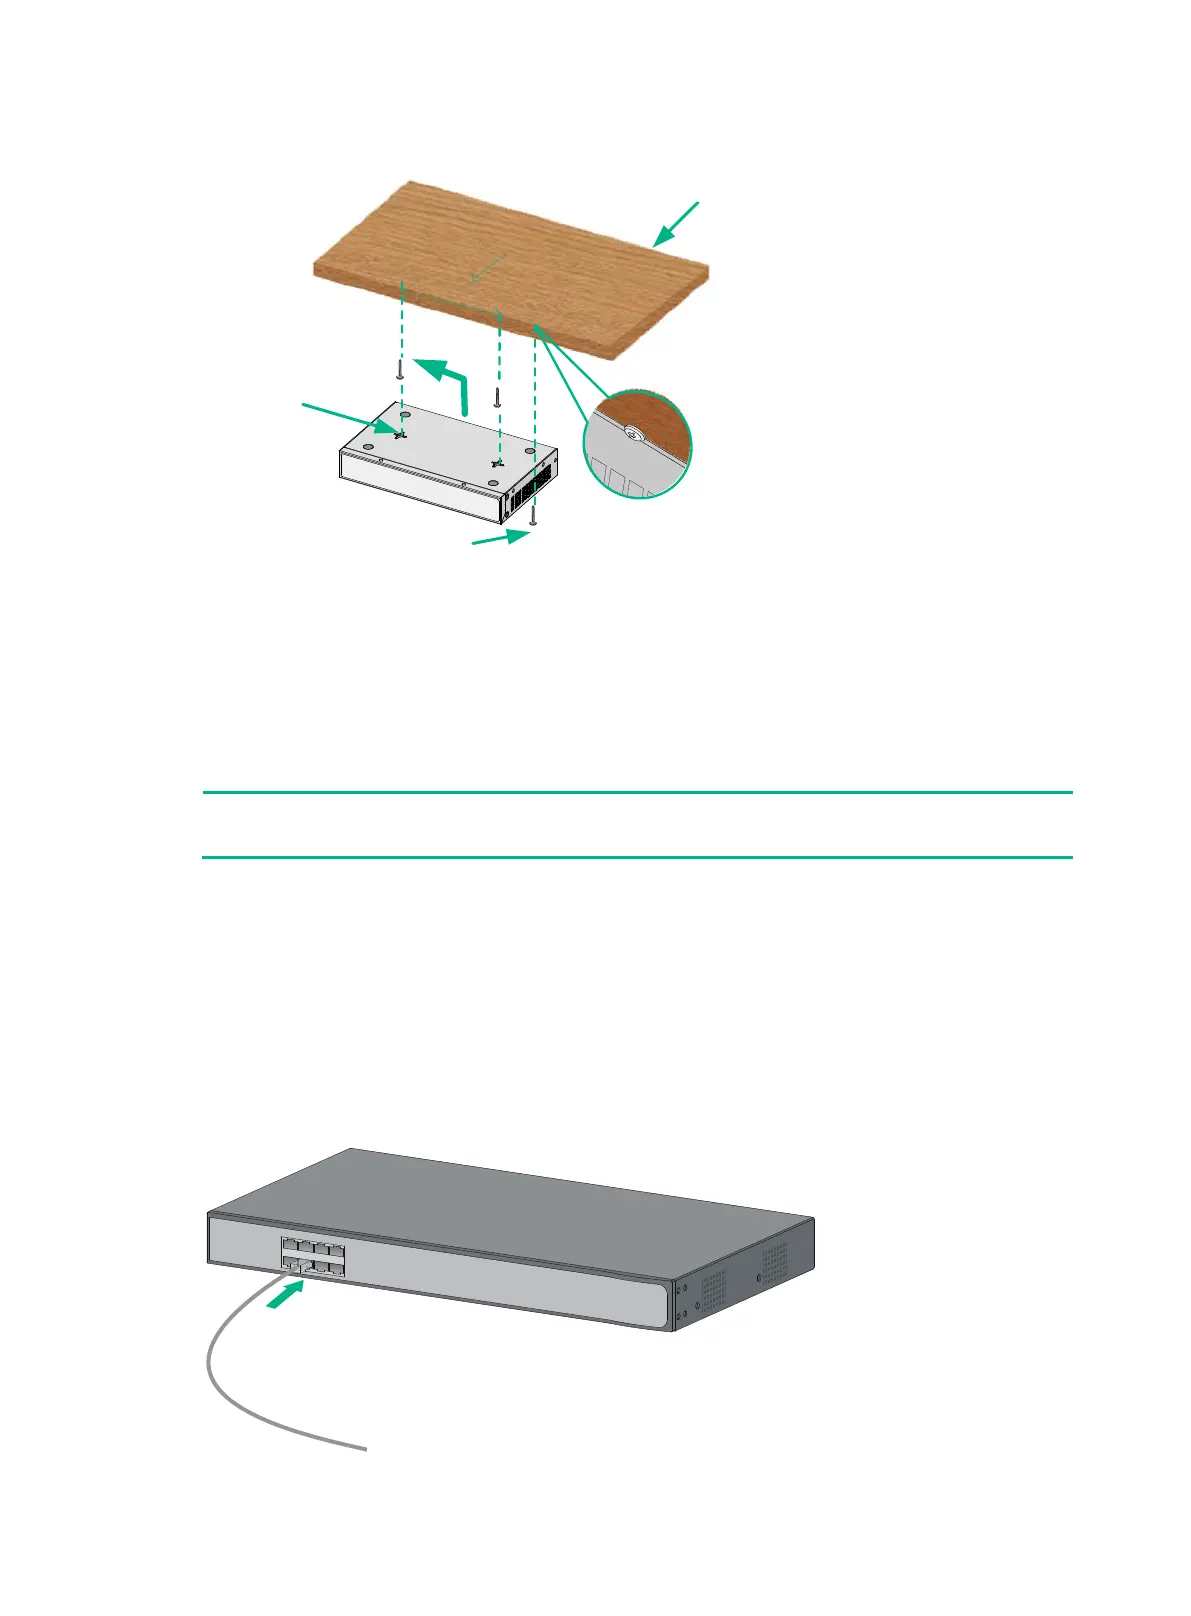
Figure 11 Under-table mounting
To mount the switch under a table:
1. Follow the instructions on wall mounting to determine the location of screw holes to be used
for under-table mounting.
2. Align the two mounting holes in the switch chassis bottom with the two screws on the bottom
of the table and hang the switch.
3. Use a third screw to prevent switch movement.
NOTE:
Installation hole spacing varies by switch model. For more information, see Table 4.
Connecting cables
Connecting network cable
Use crossover cable or straight through cable to connect a PC or other network devices to the
Ethernet port of the switch.
Figure 12 Connecting network cable
Third securing screw
Wood table
Mounting slots
160 mm (6.30 in)

Questions and Answers:

Question and Answer IconNeed help?

Do you have a question about the HPE OfficeConnect 1420 Series and is the answer not in the manual?

HPE OfficeConnect 1420 Series Specifications

General IconGeneral
ModelHPE OfficeConnect 1420 Series
LayerLayer 2
Operating Temperature0°C to 40°C (32°F to 104°F)
Input Voltage100-240 VAC
ManagementUnmanaged
Power over EthernetNo
DimensionsVaries by model
WeightVaries by model
TypeSwitch
Ports8, 16, 24
Port TypeGigabit Ethernet
Form FactorDesktop or Rackmount
Power SupplyExternal power adapter
ThroughputUp to 35.7 Mpps
Operating Relative Humidity15% to 90% non-condensing
Power ConsumptionVaries by model
Jumbo Frames9216 bytes
MAC Address Table Size8K entries

Related product manuals