Procedure
1. Apply the "JBOD3" label to the top-left pull-out tag at the rear of the enclosure.
2. Apply the cable labels to the new SAS cables. On the moving SAS cable, replace the "F=1" label with
the "F=3" label.
SAS cable Label color New label
New 0.5 m cable Red J1:I1:P2 - J3:I1:P1
New 0.5 m cable Green J3:I2:P2 - J1:I2:P1
Moving 2 m cable (N:S3:P2 - JF:I2:P1) White F=3
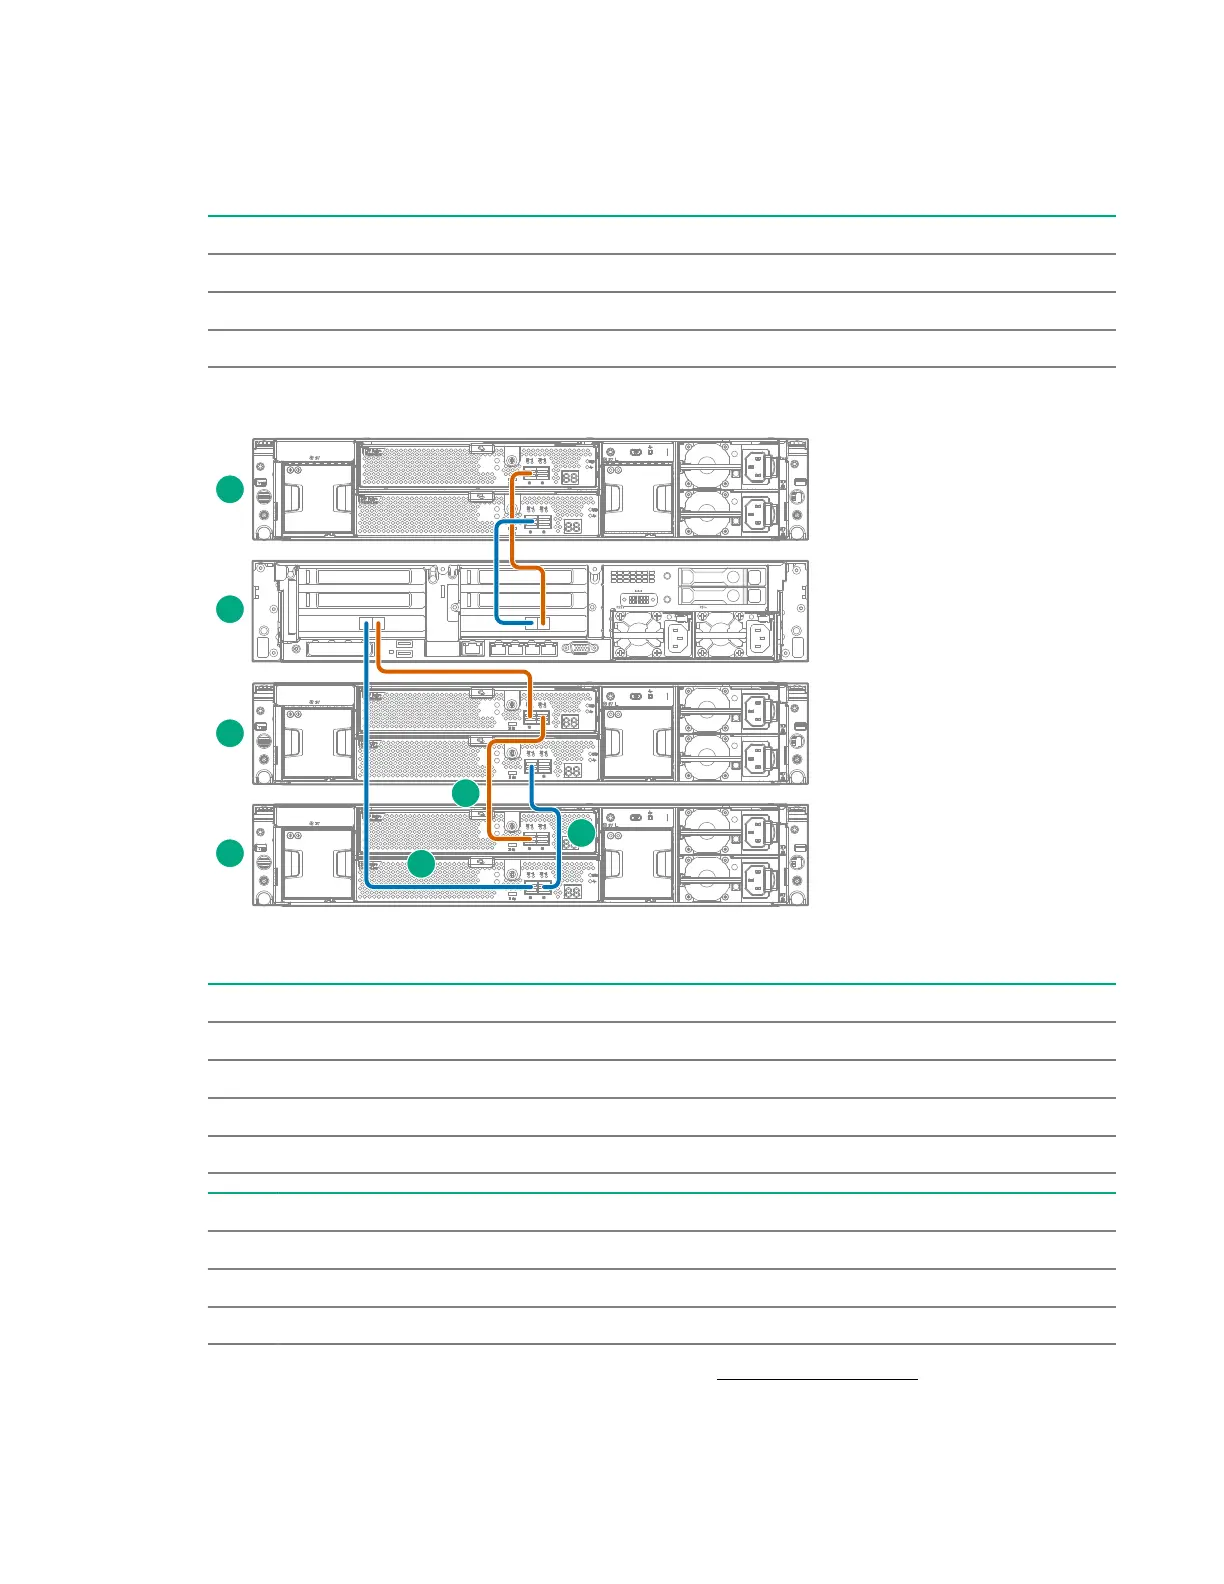
3. Cable the enclosure as shown.
Figure 30: Cabling the second capacity upgrade kit (JBOD 3)
Item Description
1 JBOD 2: First capacity upgrade kit.
2 Server node.
3 JBOD 1: Base enclosure.
4 JBOD 3: Second capacity upgrade kit.
Item SAS cable Label colors Cable from To
5 New 0.5 m cable Red JBOD 1 IOM 1 Port 2 JBOD 3 IOM 1 Port 1
6 New 0.5 m cable Green JBOD 3 IOM 2 Port 2 JBOD 1 IOM 2 Port 1
7 Moving 2 m cable Green and white Node Slot 3 Port 2 JBOD 3 IOM 2 Port 1
4. If you are finished installing capacity upgrade kits, skip to Adding power cables.
92 Installing capacity upgrade kits
 Loading...