LP-605 Rev. 000 Rel. 009 Date 8.16.18
50
To avoid water damage or scalding due to relief valve operation, a
discharge line must be connected to the valve outlet and directed
to a safe place of disposal. This discharge line must be installed
by a qualied service technician or heating/plumbing installer
in accordance with the water heater installation manual. The
discharge line must be terminated so as to eliminate possibility
of severe burns or property damage should the valve discharge.
Service and Cleaning of the Burner
Only specially trained and authorized personnel are permitted to
service the burner.
Sediment Buildup
Over time, sediments from water supply could settle inside the tank
and cause the water heater to lose holding capacity and heating
eciency. It is recommended that the water heater be drained down
completely once every other year to ush out sediments. Buildup of
sediment in faucet aerators, shower heads, and screens could also
impair water ow and cause the water heater to deliver less than its
full output, or to shut down completely. Check any of these screens
or shower heads on your faucets periodically and clean as necessary.
Checking the Water Strainer
The water strainer should be checked at least once annually to
ensure it is not blocked. To do this:
1. Connect garden hose to the drain valve located on the lower
left side of the unit.
2. Open the valve with a at heat screwdriver.
3. Drain a few gallons of water from the water heater. If water
ows freely, the strainer is clean. If water does not ow freely,
follow the steps below to drain the water heater and clean
the strainer.
Draining the Water Heater and Cleaning the Water Strainer
1. Close water supply shut-o valve to the water heater.
2. Connect garden hose to the drain valve located on the lower
left side of the unit.
3. Open the valve with a at head screwdriver.
4. After draining the tank, turn the drain valve body clockwise
by hand to remove the drain valve from the unit and clean
the strainer.
• Lift the relief valve lever. If water ows freely, release the
lever and allow the valve to seat. Watch the end of the relief
valve discharge pipe to ensure that the valve does not weep
after the line has had time to drain. If the valve weeps, lift
the lever again to attempt to clean the valve seat. If the valve
does not properly seat and continues to weep, contact a
qualied service technician to inspect the valve and system.
• If water does not ow from the valve when you completely
lift the lever, the valve or discharge line may be blocked.
Immediately shut the water heater down per instructions on
page 2 and call a qualied service technician to inspect the
valve and system.
• If relief valve seats properly, restore power to the water
heater. Observe operation for ve minutes and ensure it
operates properly.
Check Burner Flame Quality
This water heater has an automatic ignition system. Once you open a
hot water tap, the system electronically ignites the burners. Observe
burner ame via the ame inspection hole. See Figure 48 for ame
inspection hole location.
Turn o the electrical power supply, gas shuto valve, and cold
water shuto valve before proceeding. Failure to comply could
result in substantial property damage, severe personal injury, or
death.
Do not open the drain valve without connecting a hose so that water
can be diverted to an area where water damage is not a problem.
Use a at head screwdriver to open and close the drain valve. Do
not remove the drain valve from the unit without rst draining the
water heater. ONLY remove the drain valve by hand. Failure to follow
these instructions could result in leakage or property damage. Such
damages ARE NOT covered by product warranty.
Figure 49 - Closing the Drain Valve
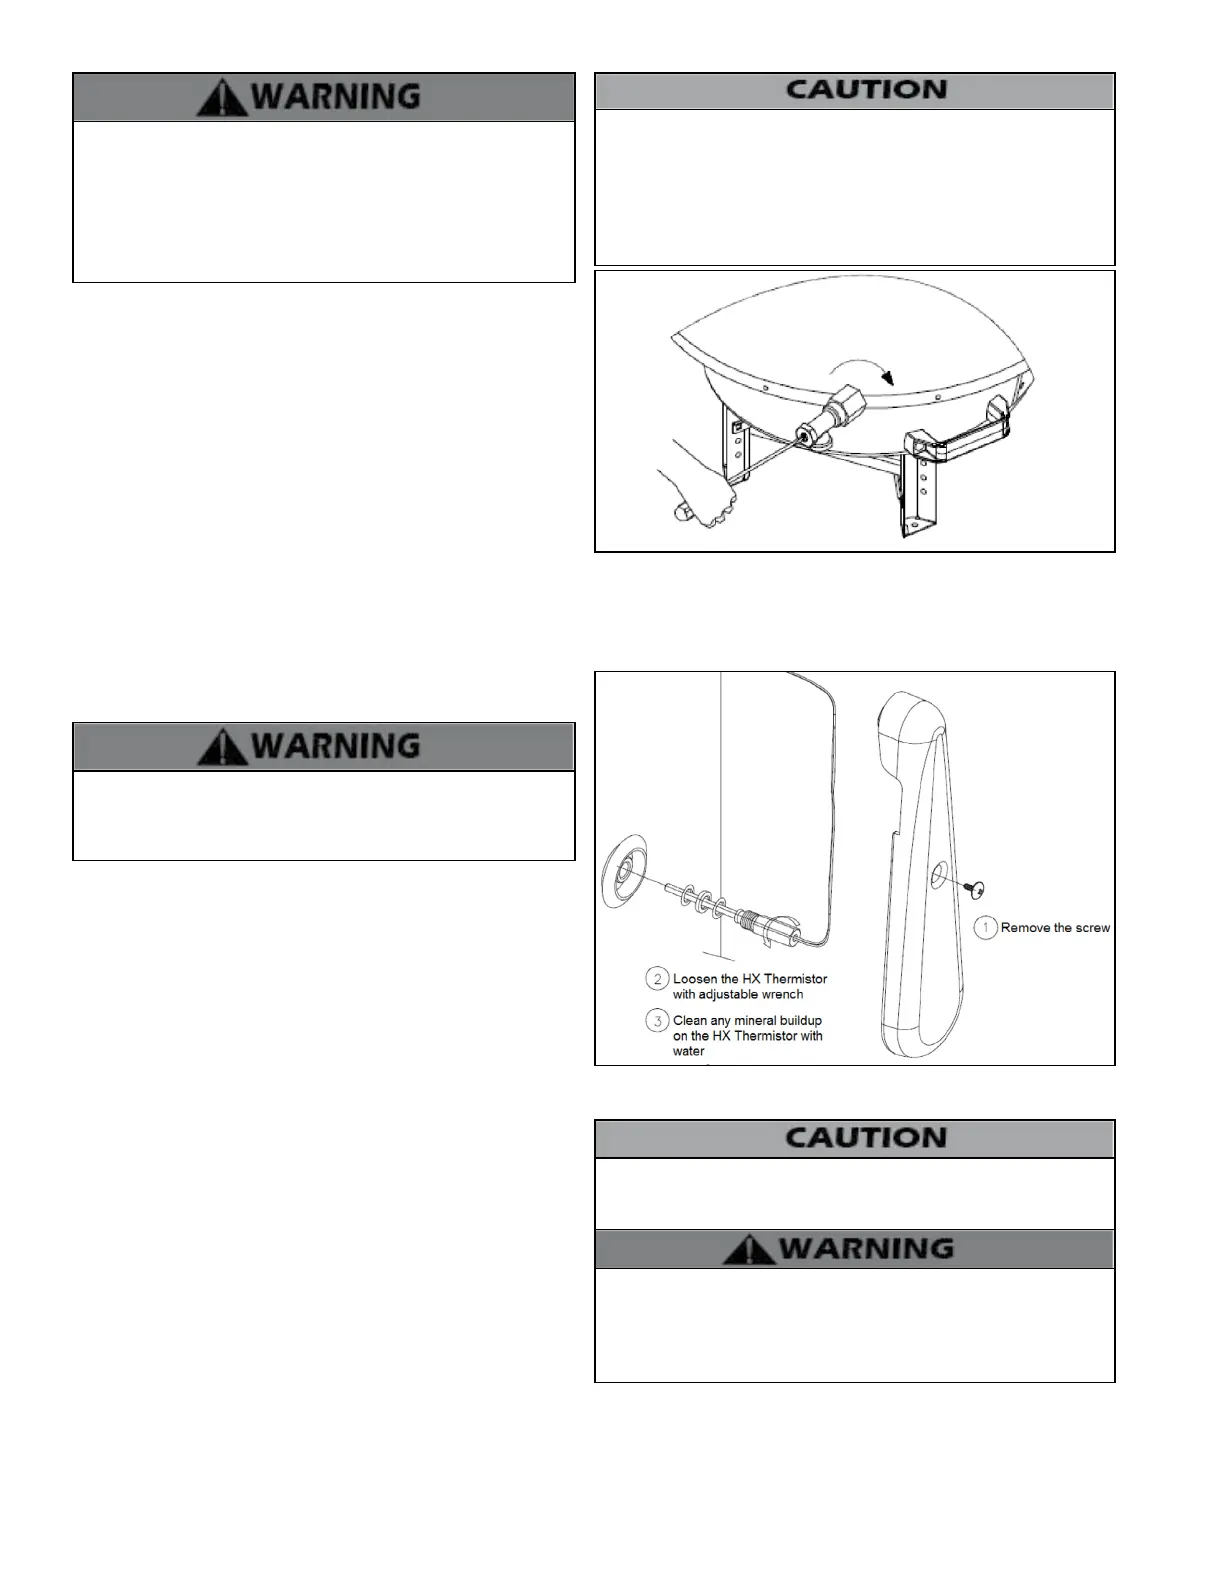
Thermistors
After draining the water heater, remove the HX thermistors from the
unit and check for mineral coating. A mineral coating on the thermistor
requires cleaning. See Figure 51.
Figure 50 - Cleaning the Thermistor
Maintenance Report
In unusually dirty or dusty conditions, care must be taken to keep
water heater cabinet door in place at all times. Failure to do so VOIDS
WARRANTY!
Allowing the water heater to operate with a dirty combustion
chamber will hurt operation. Failure to clean the heat exchanger
as needed by the installation location could result in water heater
failure, property damage, personal injury, or death. Such product
failures ARE NOT covered under warranty.
 Loading...