LP-605 Rev. 000 Rel. 009 Date 8.16.18
16
1. Use a 5/16” socket and two (2) carriage bolts and nuts to connect
a cross beam to two legs. See Figure 6, Step 1.
2. Use a 5/16” socket and two (2) carriage bolts and nuts to connect
a cross beam to the third leg. See Figure 6, Step 2.
3. Use a 5/16” socket and two (2) carriage bolts and nuts to connect
the nal cross beam. See Figure 6, Step 3.
4. After the stand is assembled, it is highly recommended that two
people lift and gently lower the water heater onto the water
heater stand. See Figure 9.
Figure 6 - Assembling the 20 Gallon Model Water Heater Stand
For Installations in the State of California
For installation in California this water heater must be braced or
anchored to avoid falling or moving during an earthquake. See
instructions for correct installation procedures. Instructions may be
obtained from California Oce of the State Architect, 1102 Q Street,
Suite 5100, Sacramento, CA 95811.
2. Floor Mounting the Water Heater
Figure 7 - 40 Gallon Model Water Heater Stand and Components
40 Gallon Models
NOTE: Ensure the Water Heater Stand Assembly has shipped with
all included components. See Figure 7.
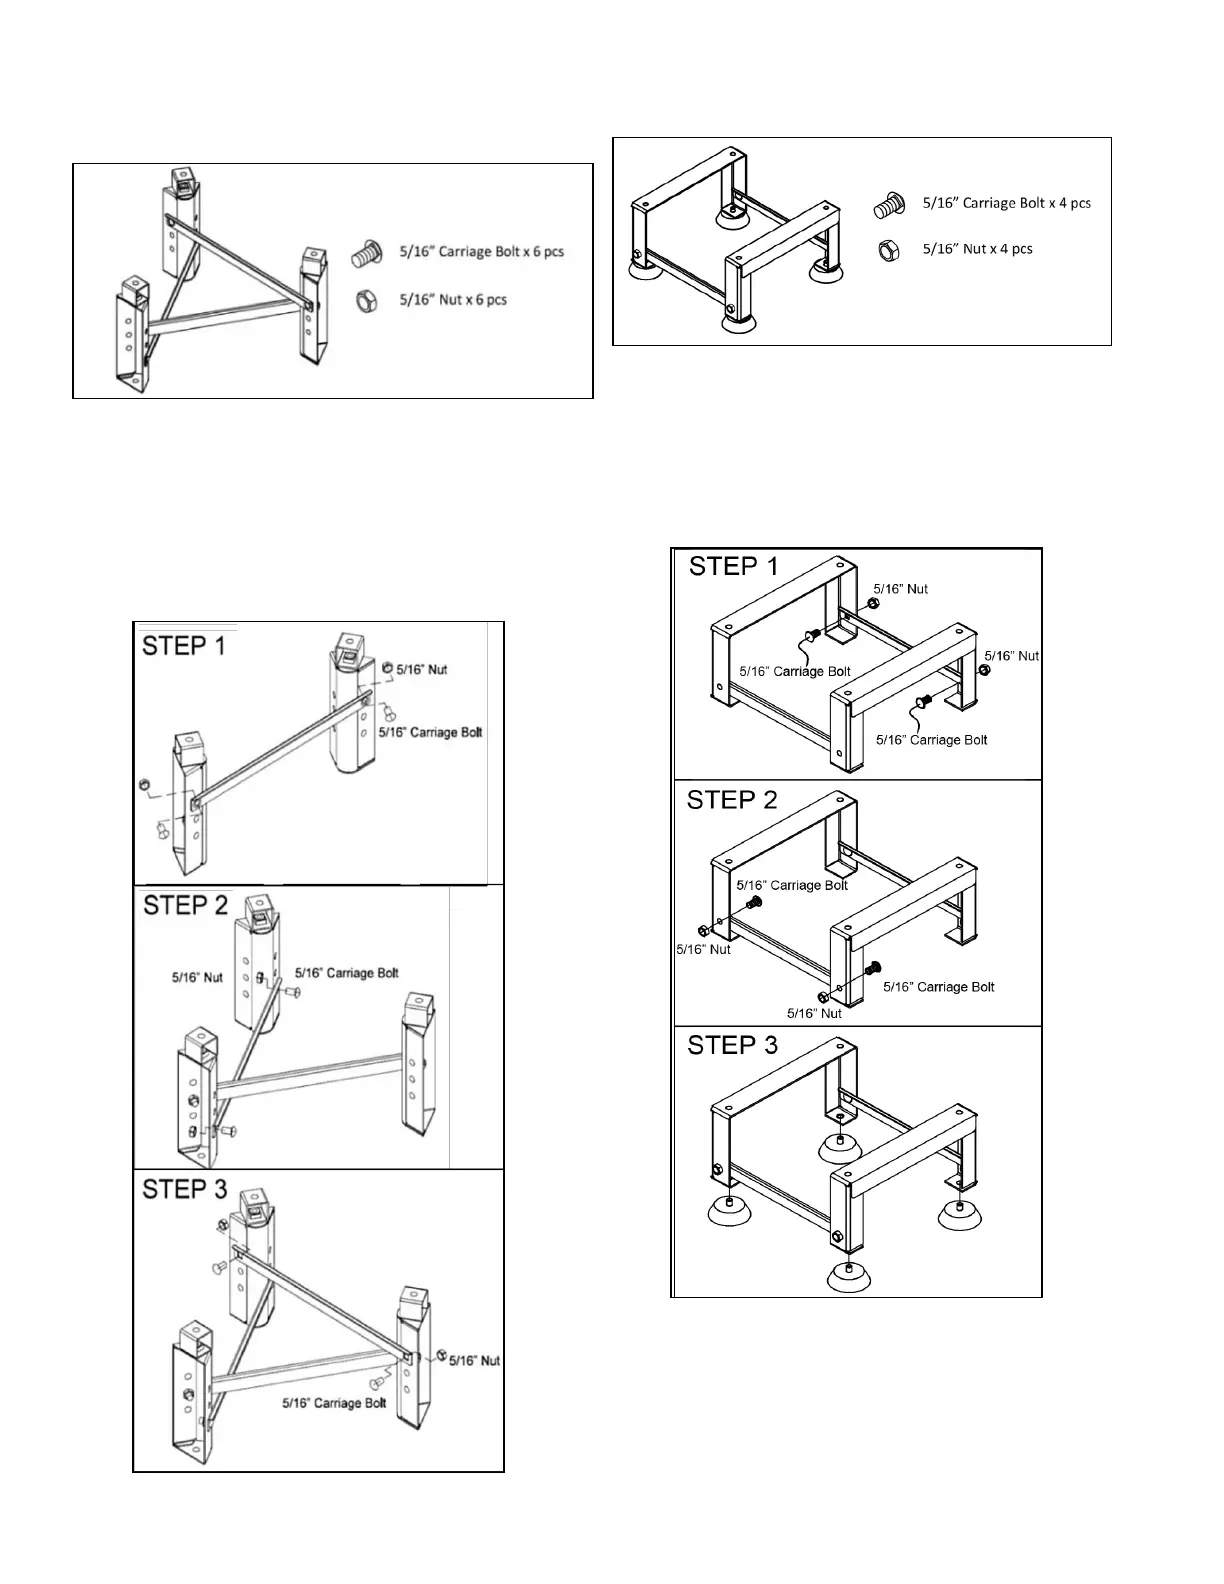
1. Use a 5/16” socket and two (2) carriage bolts and nuts to
connect a cross beam to two legs. See Figure 8, Step 1.
2. Use a 5/16” socket and two (2) carriage bolts and nuts to
connect a cross beam to the other legs. See Figure 8, Step 2.
3. Lower the assembled stand onto the feet. See Figure 8, Step 3.
4. After the stand is assembled, it is highly recommended that
two people lift and gently lower the water heater onto the
water heater stand. See Figure 9.
Figure 8 - Assembling the 40 Gallon Model Water Heater Stand
20 Gallon Models
NOTE: Ensure the Water Heater Stand Assembly has shipped with all
included components. See Figure 5.
1. Assembling the Water Heater Stand
Figure 5 - 20 Gallon Model Water Heater Stand and Components

 Loading...