2. Lower the two ejector levers on the CX320 until the CX320 is completely inserted. See
(3) in Figure 3-4.
3. Use a Phillips screwdriver to tighten the two M3 captive screws on the CX320. See (4)
in Figure 3-4.
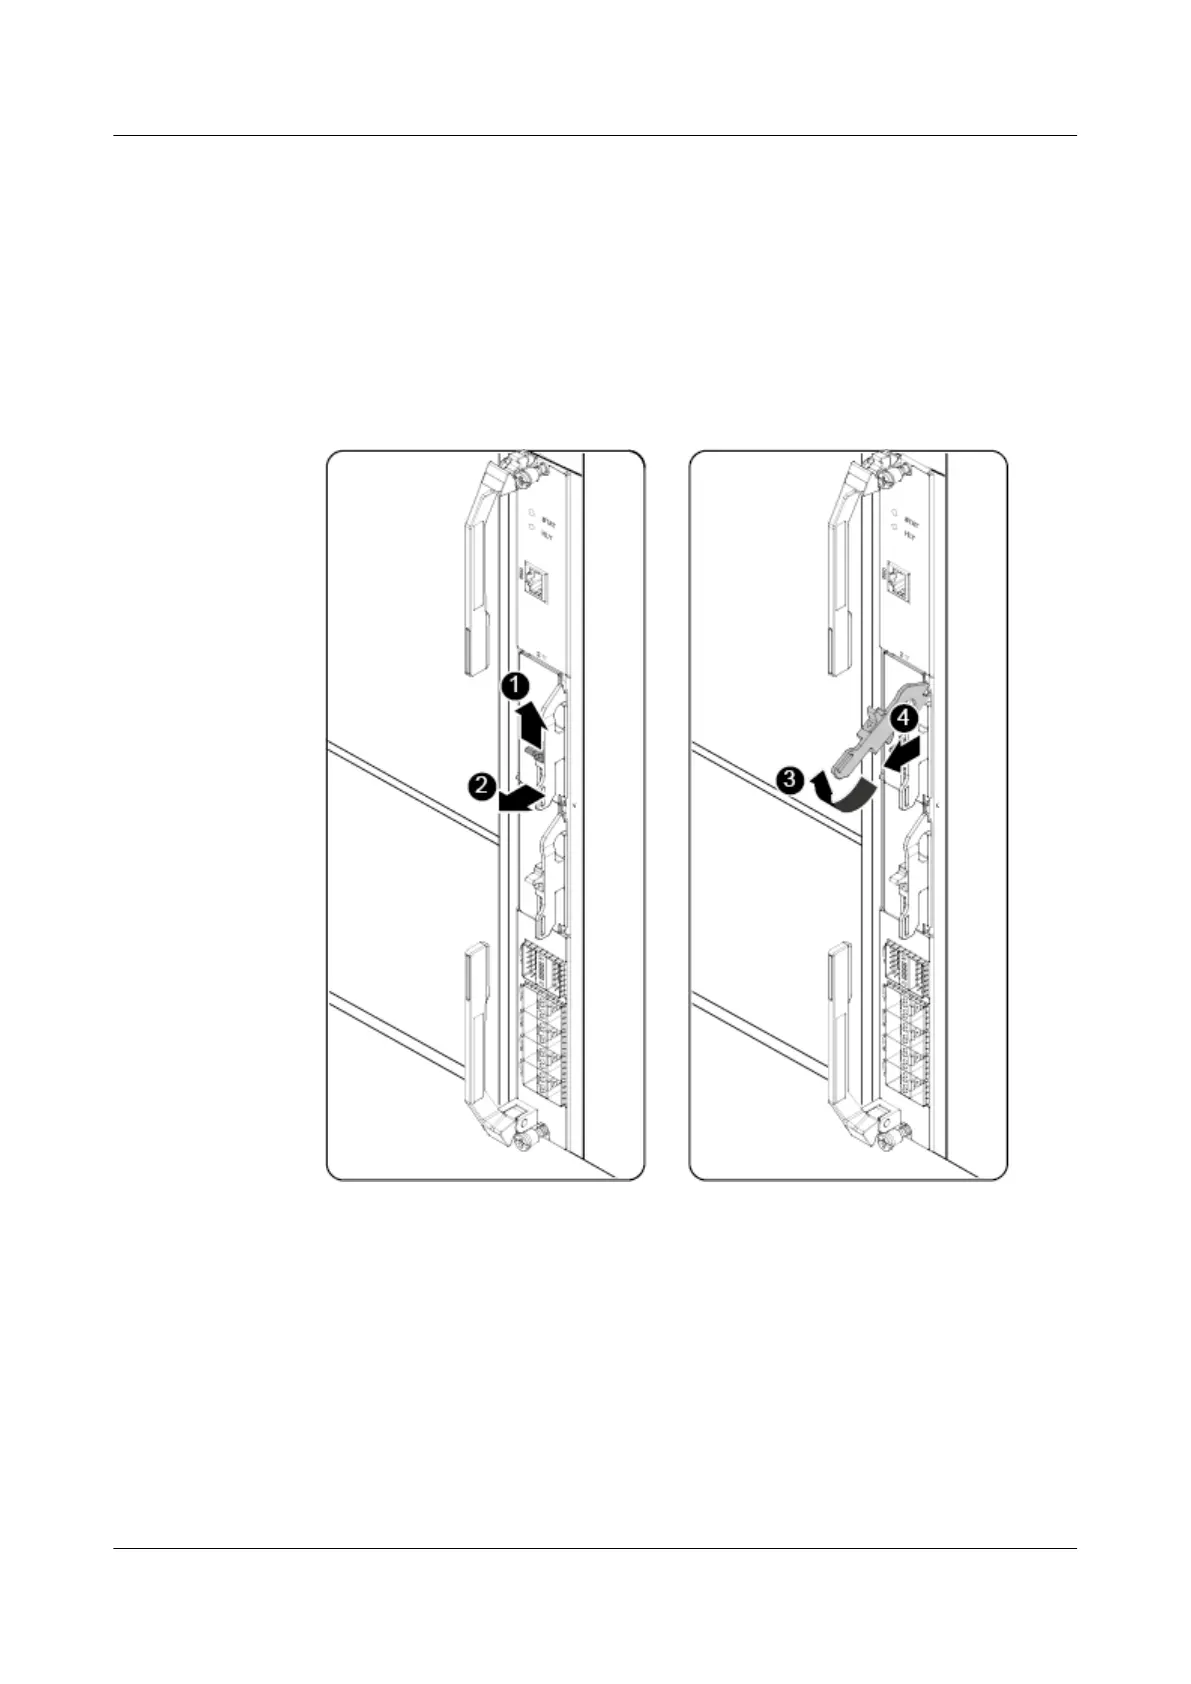
Step 5 (Optional) Remove the PIC card filler panel.
1. Raise the handle on the PIC card filler panel completely and pull the filler panel out of
the PIC slot horizontally. See (1) and (2) in Figure 3-5.
Figure 3-5 Removing a PIC card filler panel
2. Lower the handle on the PIC card filler panel. See (3) and (4) in Figure 3-5.
Step 6 (Optional) Install a PIC card.
1. Raise the handle on the PIC card and push the PIC card into the PIC slot horizontally as
far as it will go. See (1), (2), and (3) in Figure 3-6.
CX320 Switch Module
User Guide
3 Installing and Removing the CX320
Issue 09 (2019-08-02) Copyright © Huawei Technologies Co., Ltd. 39