Do you have a question about the Huawei SmartLi Series and is the answer not in the manual?
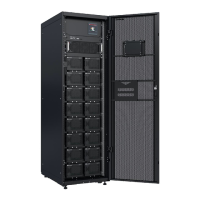
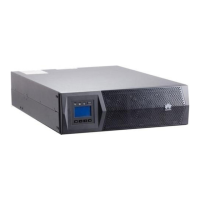
Visual overview of components visible from the front of the battery cabinet.
Visual overview of components visible from the rear of the battery cabinet.
Inspect the fire cylinder and its components for any damage, abrasion, or corrosion.
Detailed steps for filling the fire cylinder with extinguishant and drive gas.
Instructions for physically installing the refilled fire cylinder into the cabinet.
Connects the fire-trace tube to the fire cylinder using a pipe holder.
Steps to open, reinstall, and secure the valve positioning kit after installation.
Links the fire cylinder's dry contact to the UPS expansion card for monitoring.
Check the pressure gauge on the fire cylinder to ensure correct pressure after installation.
Procedure for securely fixing the cabinet to the floor using expansion bolts.
Procedure for leveling the cabinet using its adjustable feet.
Provides general warnings and preparation notes for connecting cables.
Step-by-step guide to properly connect the ground cable to the cabinet.
Comprehensive guide for inserting battery modules and connecting their associated cables.
Steps to remove the front cover and install the battery baffle plate.
Links communication cables between battery modules and the battery control unit.
Connects battery modules using copper bars and inter-module cables.
Guide for correctly reinstalling the front cover after module connections.
Instructions for reattaching the battery control unit after other connections.
Procedures for connecting the main power and communication output cables.
Instructions for integrating multiple SmartLi cabinets into a system.
Follows single cabinet installation methods for each unit.
Steps for joining multiple SmartLi cabinets together.
Connects the protective earth cable to each cabinet in a parallel setup.
Connects battery cables between cabinets and the UPS via a BBB box.
Connects communication cables between cabinets and the UPS for system integration.
Final check for foreign matter and correct cable connections before closing up.
Use sealing putty to seal gaps around cables entering the cabinet.
Keep dustproof covers intact until after the initial power-on.
Set UPS system settings, battery type, and dry contact configuration.
Initiates power-on for the battery control unit and checks indicators.
Uses the Settings Wizard to set language, time, date, and network parameters.
Turns on the battery circuit breaker after the control unit is ready.
Sequence for powering on multiple SmartLi cabinets in a system.
First step in shutting down the system by disabling circuit breakers.
Final step to power down the battery control unit using its power button.
| Architecture | Modular |
|---|---|
| Battery Type | Lithium Iron Phosphate (LiFePO4) |
| Cycle Life | 6000 cycles at 80% DoD |
| Protection Level | IP20 |
| Cooling Method | Forced Air Cooling |
| Dimensions | Varies by model |
| Weight | Varies by model |