INSTALLATION
4
Valance Assembly
Please refer to the section below for your valance type.
Proceed to “Mount the Installation Brackets — Inside Mount” on page 7 or “Mount the
Installation Brackets — Outside Mount” on page 9 based on the mounting option ordered.
Dust Cover Valance Assembly
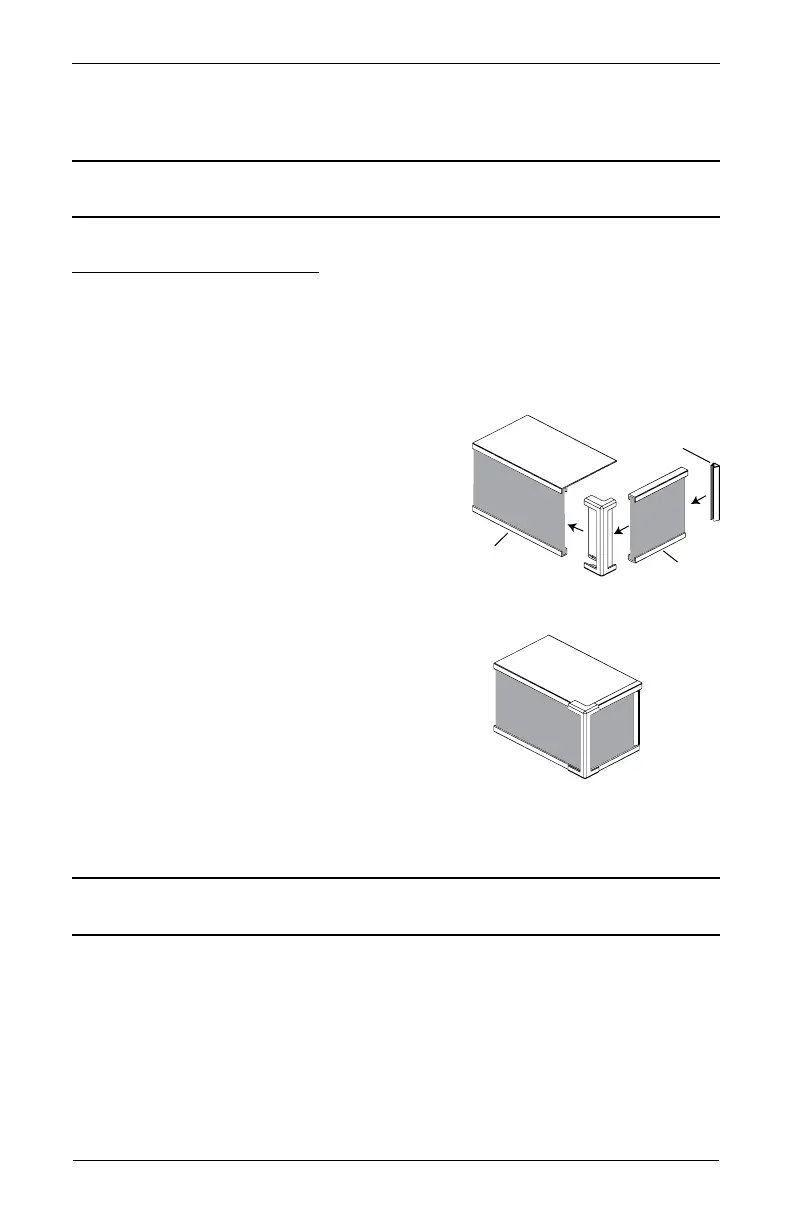
Single-Tiered Closed Corner
■ Cut a fabric insert for the valance and each valance return 1" longer at each end than the
valance and valance return width.
■ Center the fabric insert in the valance and wrap the excess on each side around to the back
of the valance.
■ At one end, hold the fabric insert in place with a
corner clip.
■ At the opposite end, pull the fabric insert tight and
secure it in place with another corner clip.
■ Center each valance return fabric insert and wrap
the excess on each side around to the back of the
valance return.
■ Attach the valance return to the valance using the
already attached corner clip.
■ At the opposite end of the valance return, pull the
fabric insert tight and secure it in place with a
valance return clip.
■ Repeat the previous 4 steps for the other valance return.
IMPORTANT: Vinyl inserts should be cut flush with the ends of the valance and valance
returns. Secure vinyl in place with the corner clip and valance return clips.
Proceed to “Mount the Installation Brackets — Inside Mount” on page 7 or “Mount the
Installation Brackets — Outside Mount” on page 9 based on the mounting option ordered.
Corner
Clip
Valance
Return
alance
Valance Return
Clip
Fabric
Insert