INSTALLATION
12
Install the SofTrak
™
Headrail
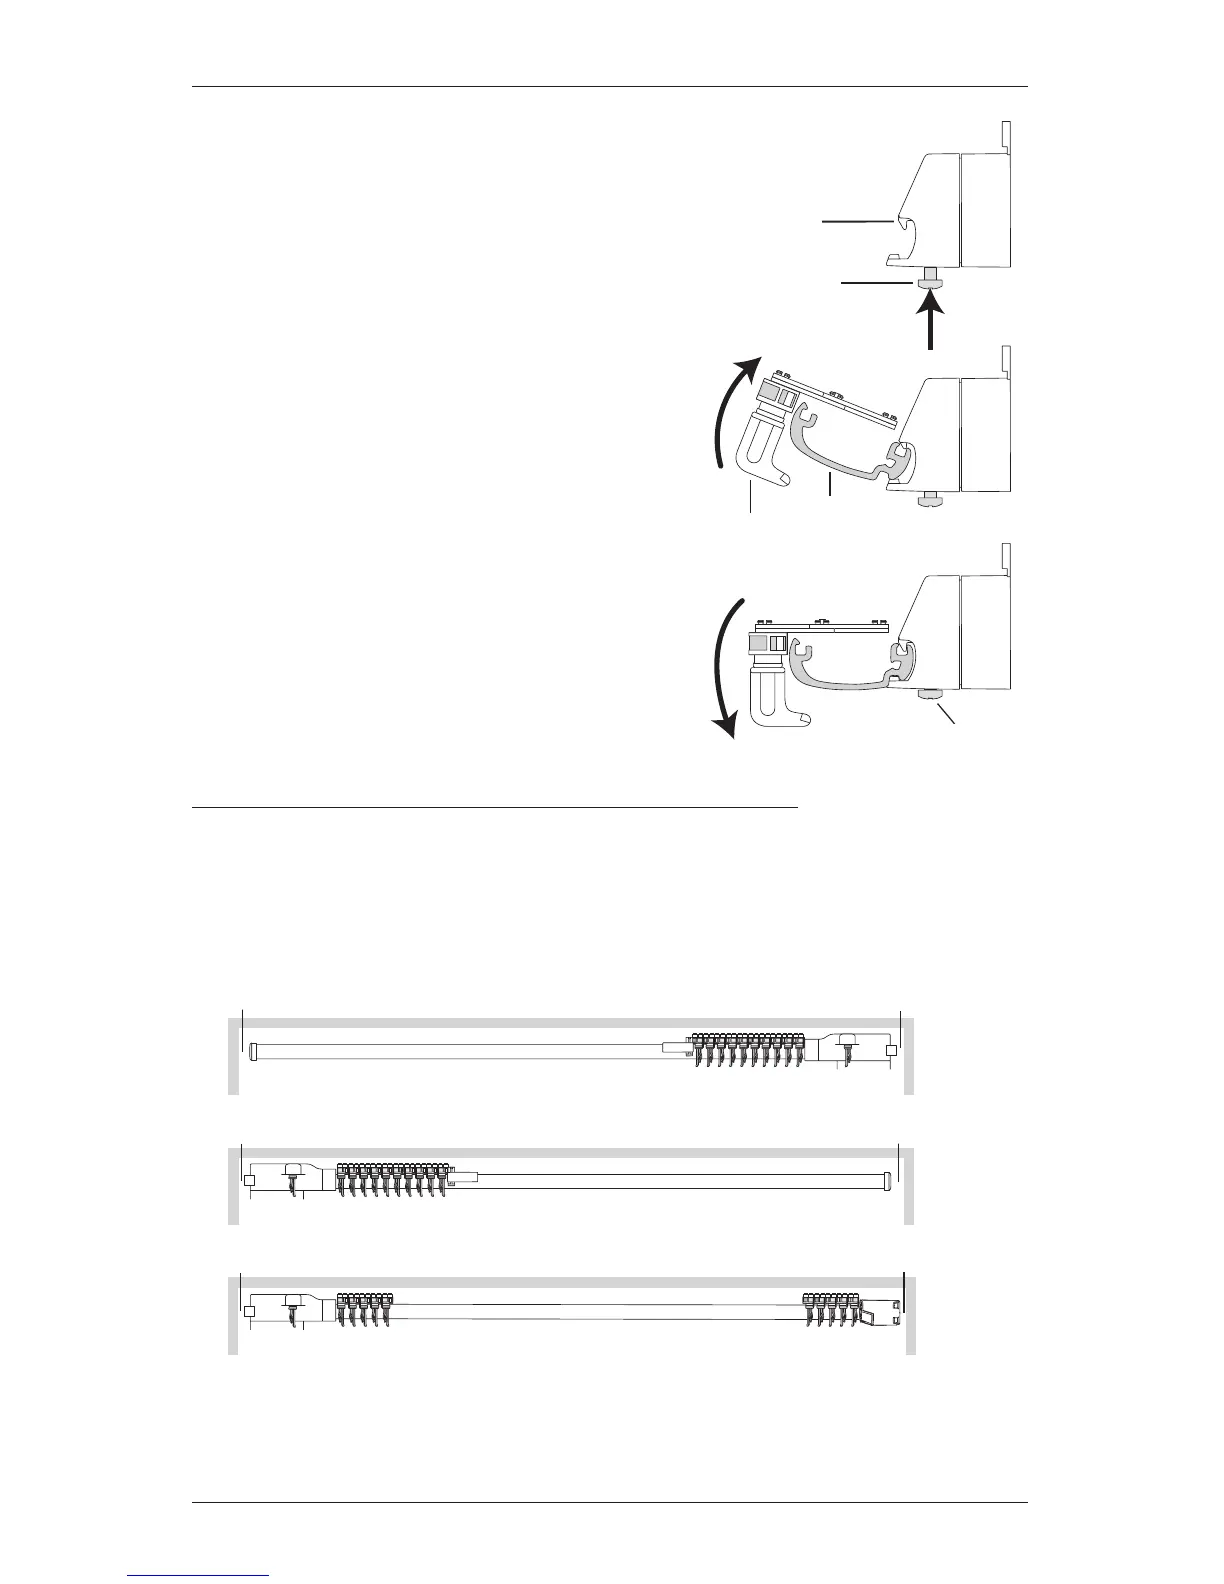
■ Push up on the locking screws. This raises the
locking tab and makes the headrail easier to install.
■ The grooves on the back of the headrail are designed
to snap into the locking tab on the faceplate and
inside/ceiling mount bracket.
➤ Tilt the front of the headrail (the side with the
pinion clips) up so the top groove fits into the
locking tab on each installation bracket.
■ With the top groove in place on all brackets, tilt
the headrail down so the bottom groove fits into
the bottom tabs on the installation brackets.
■ Position/center the headrail and tighten the locking
screws until snug. Do not overtighten.
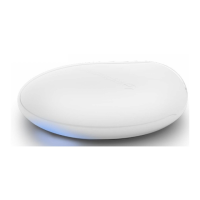
Inside Mount and Wall-To-Wall Outside Mount Installations
■ After the SofTrak headrail is installed into the installation brackets, check the clearance at
eachend and make any necessary adjustments.
IMPORTANT: The recommended amount of clearance varies according to the control end
and stack design, as shown below.
Tilt Down
Pinion
Clip
Tighten
Tilt Up
Locking
Tab
SofTrak
™
Headrail
Locking
Screw
Split Stack — Minimum Clearances*
5
/
8
"
Non-Motor End*
5
/
8