INSTALLATION
4
Mount the Installation Brackets — Inside/Ceiling Mount
If you are mounting on corner or bay windows, refer to “Bracket Locations — Corner and Bay
Windows” on page 11 for specific bracket locations. Return to this page after identifying
the bracket locations.
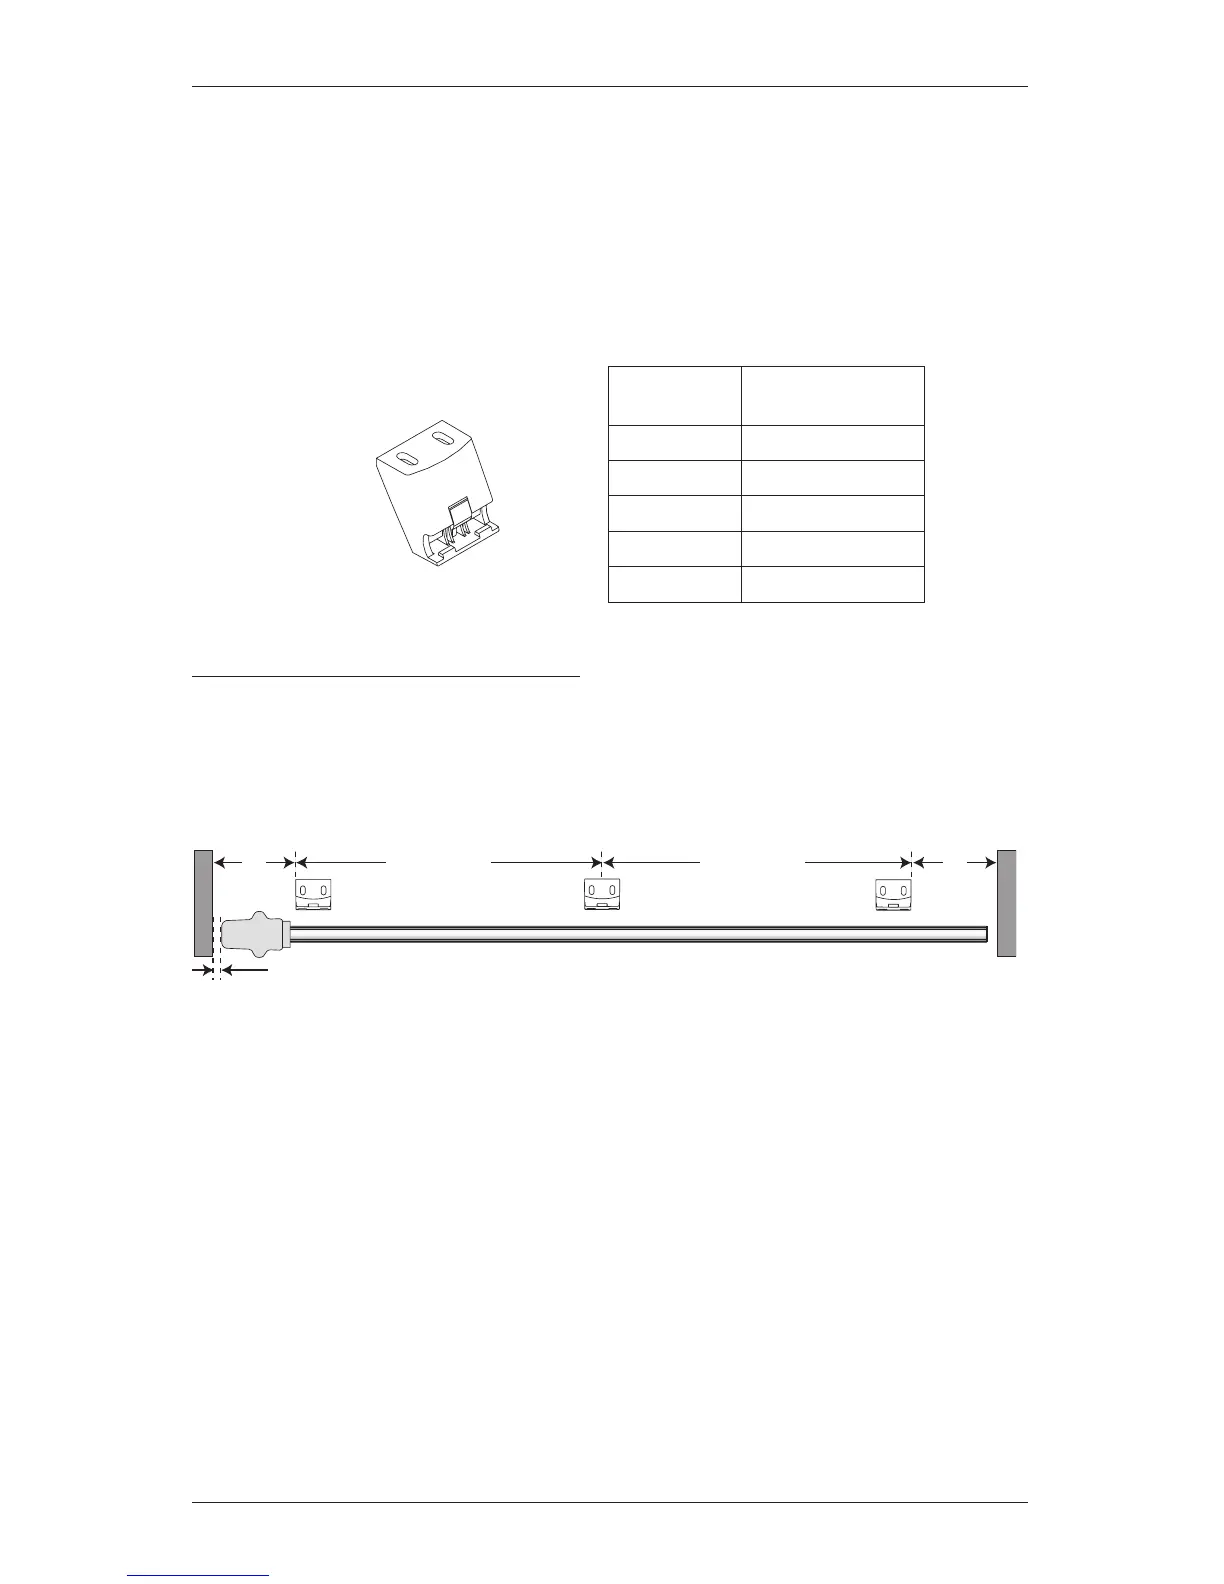
■ Your order will include the appropriate number of inside/ceiling mount installation brackets.
The number of installation brackets required varies with headrail width, as shown below.
Measure and Mark Bracket Locations
■ Mark 5" from each jamb on the mounting surface.
➤ If more than two installation brackets are required (see table above), mark the locations
of additional bracket(s) spaced evenly between the two end brackets.
CAUTION: Installation brackets should be fastened into wood whenever possible. Use drywall
anchors when mounting into drywall. When attaching brackets into drywall, additional brackets
may be required to keep the headrail level after the fabric is attached.
Inside/Ceiling Mount
Installation Bracket