INSTALLATION
7
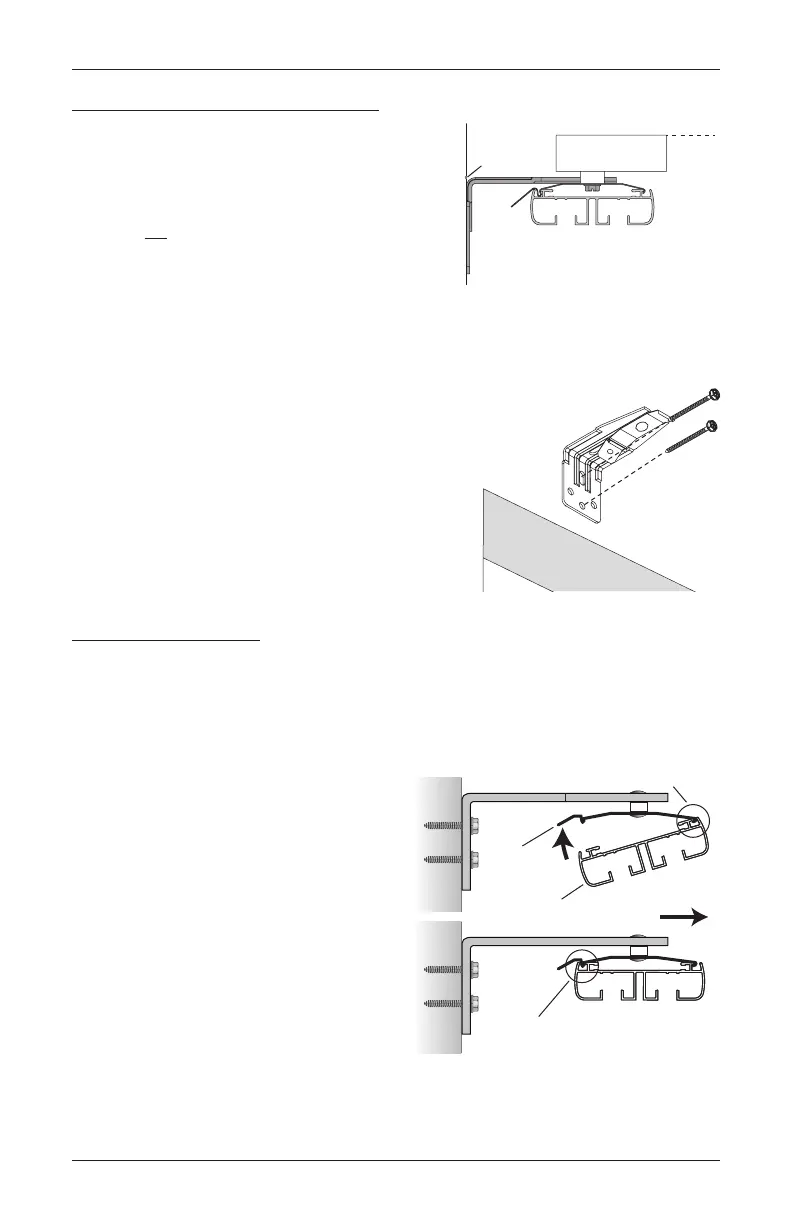
Attach the Installation Brackets
■ Center the installation brackets on your marks
and mark the location of the screw holes.
➤ The installation brackets must be mounted
level for the unit to operatecorrectly.
Do not mount installation brackets on
curvedmolding.
➤ The top of the installation brackets need to
be mounted at the ordered height minus
7
⁄
8
". If the ordered height does not allow for floor clearance, subtract only
3
⁄
8
" for
1
⁄
2
" of
floor clearance.
■ Use a
3
⁄
32
" drill bit to drill the screwholes.
Mount into wood whenever possible.
IMPORTANT: Use drywall anchors when mounting
into drywall.
■ Attach the installation brackets using the screws
provided.
➤ The brackets must be level and aligned.
Mount the Headrail
IMPORTANT: The headrail must be mounted level for the drapery to operatecorrectly.
Useyour level to check that the installation bracket mounting clips are aligned and level.
■ Orient the headrail so that the control side is located on the correct side.
■ Center the headrail underneath the
mounting clips.
➤ Ensure that all the mounting clips on
the valance board are oriented with
the hook toward the front and the
release tab toward the window.
■ Starting with the center, tilt the headrail
and hook the mountingclips into the
front groove of the headrail.
■ Rotate the headrail upward and snap it
intoplace.
■ Make sure the headrail is secure.
NOTE: With outside mounts, the
valance is attached after the drapery is
installed.
Ordered
Height
Mark Ordered
Height -
7
⁄8
Outside MountInside Mount
Headboard
Front
Mounting
Clip
Headrail
Headrail
Hook into
the front
groove of
the headrail.
Hook into the front
groove of the headrail.
Snap Into Place