Note: The product is available for pairing for 3
minutes. If pairing has not been successful within
this time period, turn off the product (Main switch,
position 0). Wait until the LED indicator lamp goes
out, and then set the Main switch to position 1 again.
4. Enter the PIN code for the product.
5. Select
My mowers
in the Automower
®
Connect app,
and then select the plus sign (+).
6. Select model. The Automower
®
Connect app is now
searching for available products within short-range.
7. For Automower
®
310 and Automower
®
315 without
Automower
®
Connect:
a. Enable Bluetooth
®
mode on your mobile device.
The Automower
®
Connect app is now searching
for available products within short-range.
b. Select the product.
8. For Automower
®
315X, Automower
®
310 and
Automower
®
315 equipped with accessory
Automower
®
Connect:
• Follow the pairing instructions in the app.
9. Name your product, and select
Done
.
3.11 Automower
®
Connect menu
The main menu in Automower
®
Connect offers 4
options:
•
Dashboard
•
Map
(only available with Automower
®
Connect)
•
Settings
•
Messages (only available for Bluetooth short-range
connectivity)
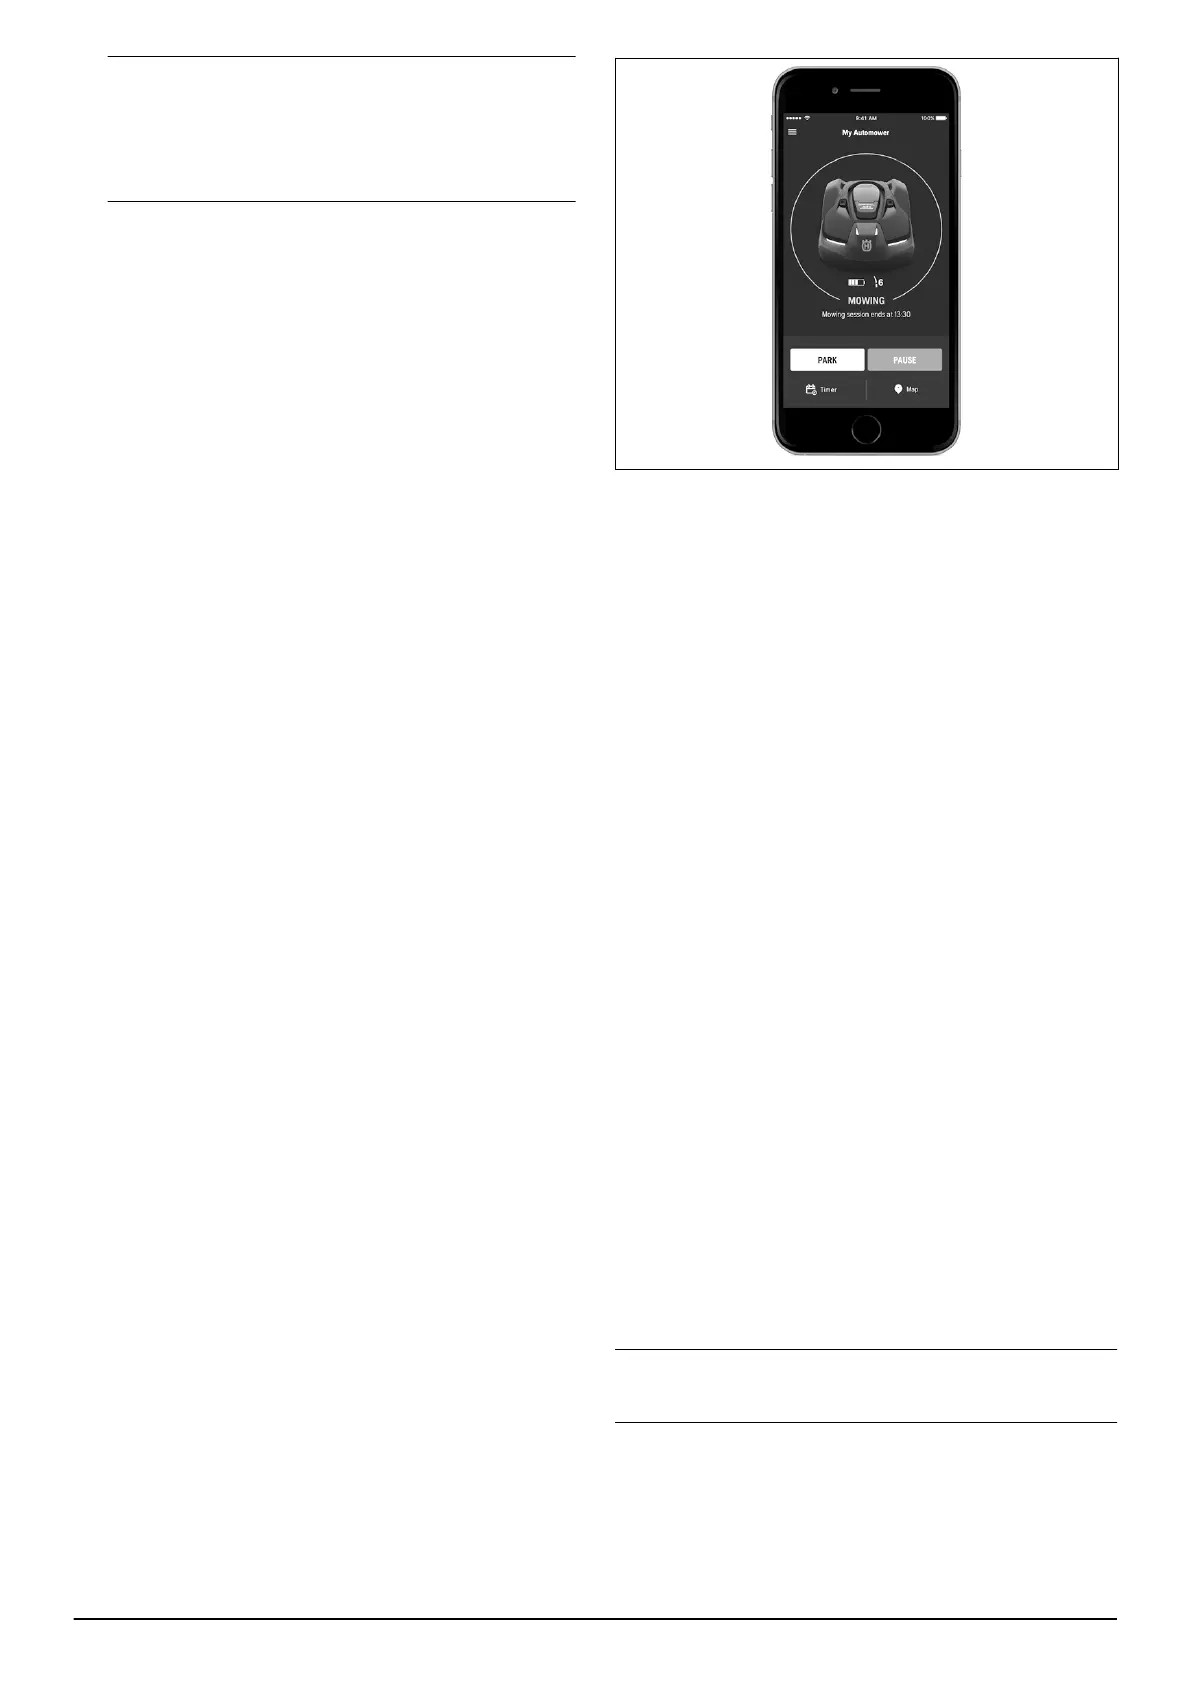
3.11.1 Dashboard
The dashboard shows the current status of the robotic
lawnmower both visually and in text. It is very easy to
control the robotic lawnmower by tapping the controls,
for example
Park
.
In the lower part of the dashboard there are shortcuts to
the
Timer settings
and the
Map
. The dashboard also
shows symbols according to below:
1. The battery status shows the remaining battery
charge. A flash is shown over the battery symbol
when the robotic lawnmower charges its battery. A
plug is shown over the battery symbol when the
robotic lawnmower is standing in the charging
station without charging.
For more information about the operating modes
Start,
Park
and
Pause
, see
Operation on page 43
.
3.11.2 Map
The map shows the current position of the robotic
lawnmower and the set centerpoint (origin) for
GeoFence.
3.11.2.1 Map settings
1. Open
Map
in the main menu.
2. Tap the settings symbol down to the right.
3. Enable/disable
Movement path
.
4. Choose
Map view
or
Satellite view
.
3.11.3 Settings - overview
For many working areas there is no need to change the
default settings. However sometimes, depending on the
lawn complexity, the mowing result can be improved by
making manual settings.The following settings can be
done in the Automower
®
Connect app:
•
Timer
•
Operation
•
Installation
•
Accessories
The timer function is an ideal tool to control which
periods the robotic lawnmower should not mow, for
example when children are playing in the garden. See
Timer and Standby on page 44
For an overview of possible settings, refer to
Menu
structure overview on page 37
.
3.11.4 Messages
In this menu the previous fault and information
messages can be found. For some of the messages,
there are tips and advice to help to rectify the fault.
Note: The
Messages
menu is only available for
Bluetooth short-range connectivity.
If the robotic lawnmower is disrupted in any way, for
example it is trapped or the battery is low, a message is
saved relating to the disruption and the time it
happened.
20 - Installation 840 - 001 -