5 Other Settings
5.1 Network Settings
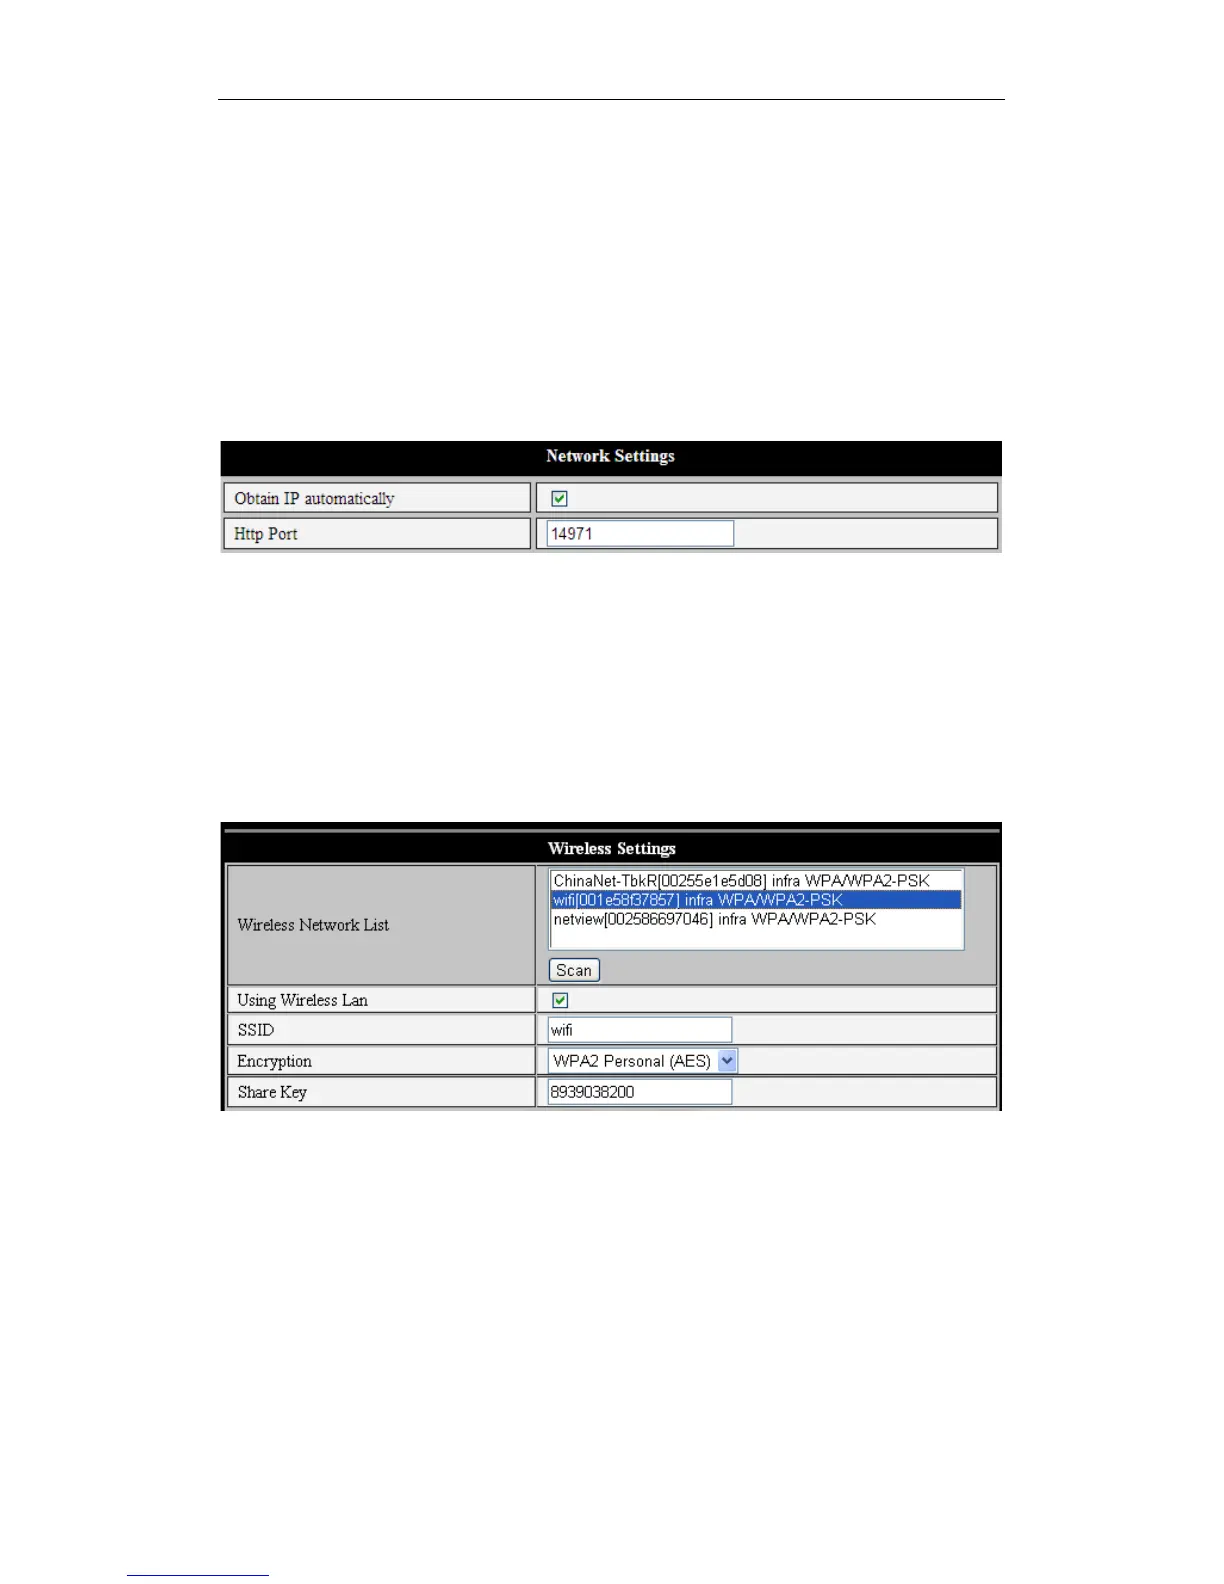
5.1.1 Basic Network Settings
Figure 13 shows how to set up the Basic Network Settings to have an IP address
assigned to your iBaby monitor automatically.
Figure 13
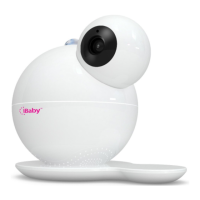
5.1.2 Wi-Fi Setting
If your iBaby monitor is going to be set up over Wi-Fi, use the configuration menu shown
in Figure 14. First, click the “Scan” button to see the available networks. Highlight the
one you wish to use, then check “Using Wireless Lan." Then fill in the SSID, encryption
method and share key or password; you can get this information from your router. Click
“Set” when finished.
Figure 14
Note 1: When the device is connected to both a Wi-Fi and wired network, it will first try to
connect to the wired network. If that connection fails, it will switch to Wi-Fi. The IP
address and port is the same in either case.
Note 2: The iBaby monitor needs to be connected by cable to your router before the
wireless settings described above can be put in place. Once the Wi-Fi settings
have been saved, you can remove the cable, and the wireless connection will
begin operating.