5. Note where each cable is connected, and then disconnect all cables from the
I/O board and remove the assembly from the server.
To install an I/O board, complete the following steps:
1. Connect all cables to the internal connectors on the I/O board.
2. Align the board with the card guides and insert the board in the connector.
3. Close the release latches to seat the board in the connector.
4. Replace the top cover.
5. Reconnect the external cables and power cords.
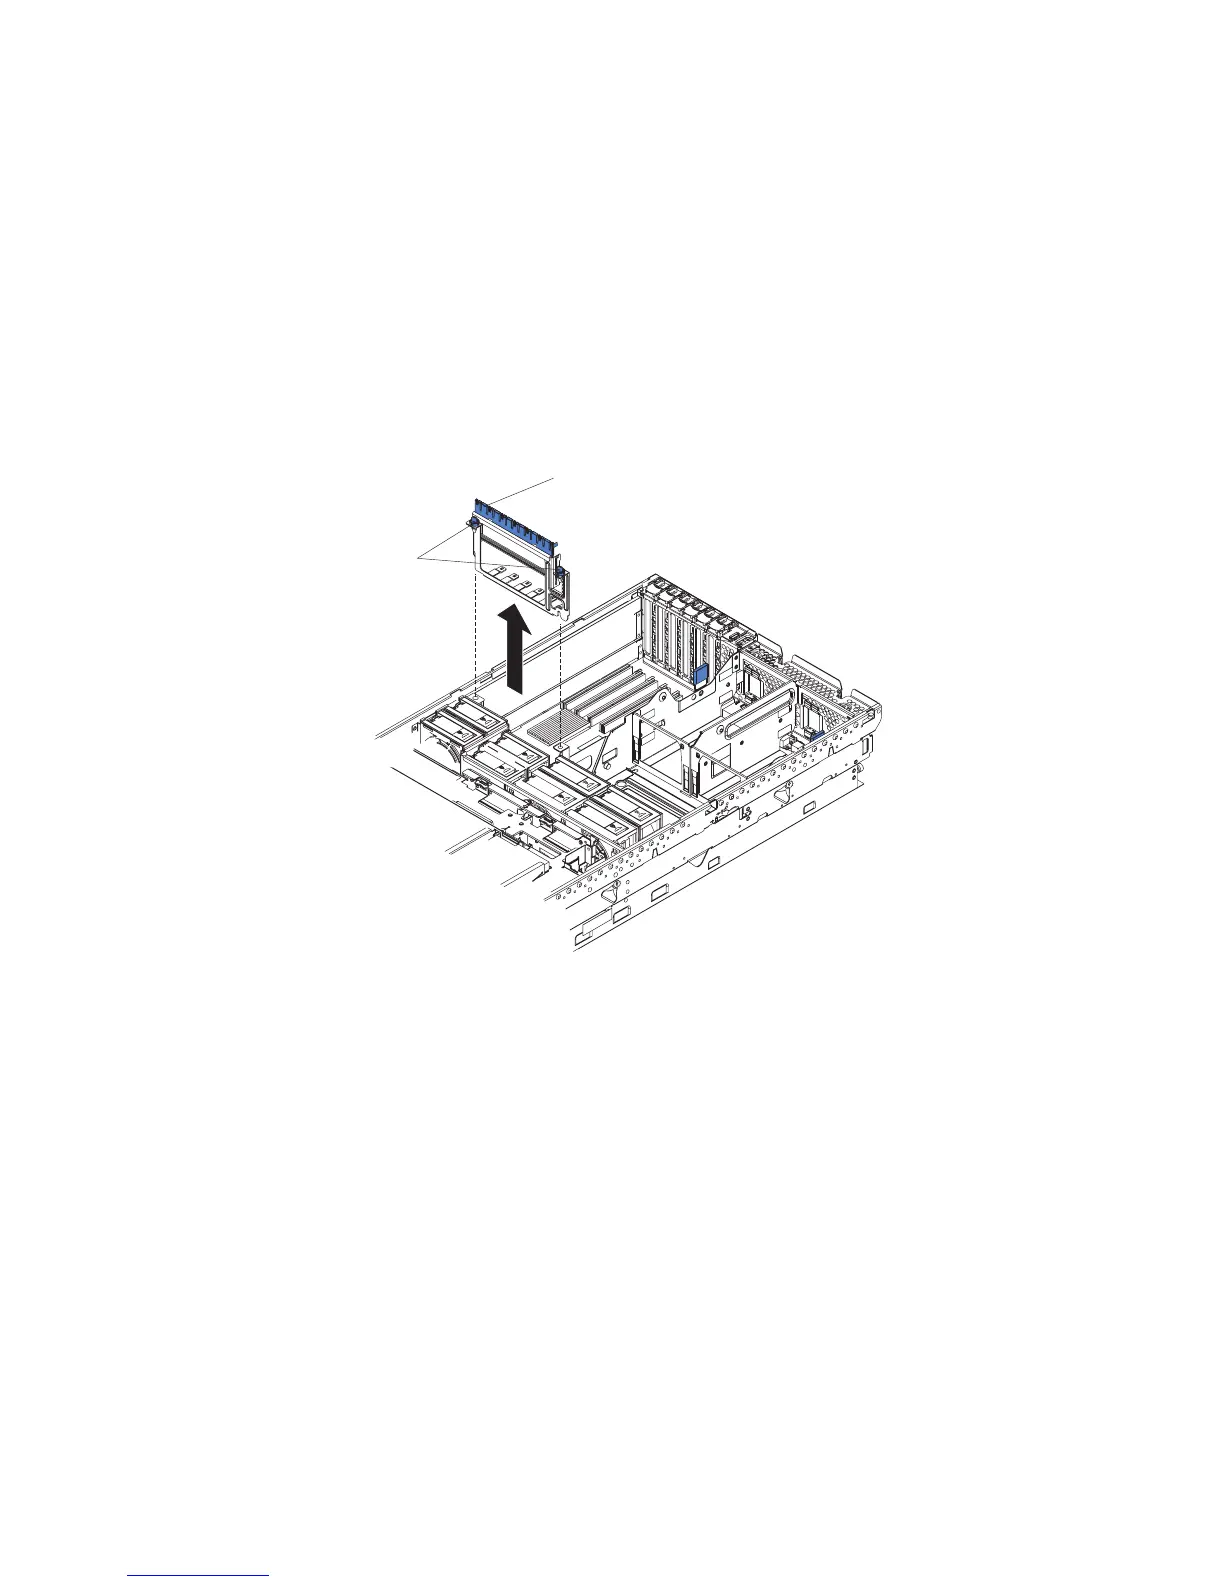
PCI-X adapter guide
To remove the PCI-X adapter guide, complete the following steps.
Latch mechanism
Quarter-turn
fasteners
1. Read the safety information that begins on page vii, and “Handling
static-sensitive devices” on page 100.
2. Turn off the server and peripheral devices, and disconnect the power cords and
all external cables necessary to replace the device.
3. Remove the top cover.
4. Lift the latch mechanism.
5. Remove all adapters and adapter dividers, and place the adapters on a
static-protective surface (see the User’s Guide on the IBM xSeries
Documentation CD).
Note: You might find it helpful to note where each adapter is installed before
removing the adapters.
6. Disconnect one end of all cables that pass through the PCI-X adapter guide;
then, remove the cables from the routing feature of the guide and fold the
cables out of the way.
Note: You might find it helpful to note where each cable is connected before
disconnecting the cables.
7. Turn the blue quarter-turn fasteners to release the PCI-X adapter guide.
120 IBM xSeries 366 Type 8863: Problem Determination and Service Guide
 Loading...